If you are a regular user of Microsoft Word or any word processing program I’m sure that you know that you can change the typestyle or font to suit your needs. If it wasn’t for fonts we would all have the same boring looking letters, flyers and other documents. Most computers will have many fonts to choose from but keep in mind that your font choices will be based on what fonts you have installed on your computer.
Fonts help set the tone of a document and can influence how the information is perceived by the reader. A playful font might feel appropriate for a flyer or invitation, while a clean, simple font is often better suited for professional documents or reports. Choosing the right font can make content easier to read and more visually appealing, which is why understanding how fonts work and where they come from is useful for anyone who regularly creates documents.
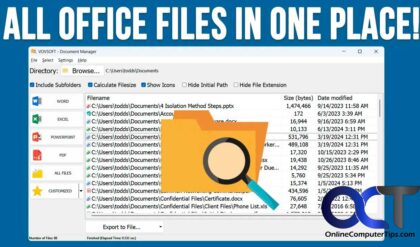
Windows comes with preinstalled fonts and when you install other programs sometimes they install additional fonts as well. You can also download fonts online or buy fonts online that come with hundreds or thousands of fonts. Or if you see a font on another computer you like then you can copy it to a disk and install it on your own computer. To see all the fonts installed on your computer as well as preview how they look you can open your Fonts applet in Control Panel. You can also install new fonts here as well as copy them to disk to use on another computer.
With so many fonts available, it’s easy to build a large collection over time, but not every font will work well in every situation. Some fonts are designed for headings, others for long paragraphs, and some are meant purely for decorative use. Knowing how to preview and manage your fonts helps you make better design choices and ensures that your documents remain readable and consistent, regardless of how many fonts you have installed.
There may come a time when you find a font you really like and want to use it in your Word document but the spacing between the letters doesn’t look right and they seem too close together making the words look “squished”. Fortunately there is a way to adjust this spacing and it’s pretty easy to do.
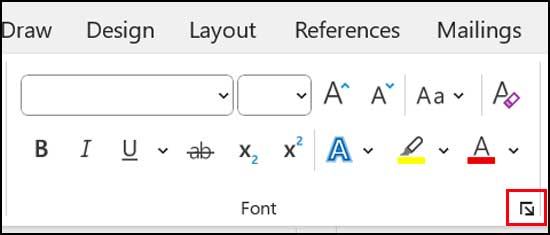
To make the change in the font spacing you will need to first highlight the text you want to change and click on the Font Dialog Box Launcher arrow. The Font Dialog Box Launcher arrow is located on the bottom right corner of the font area on the Word ribbon.
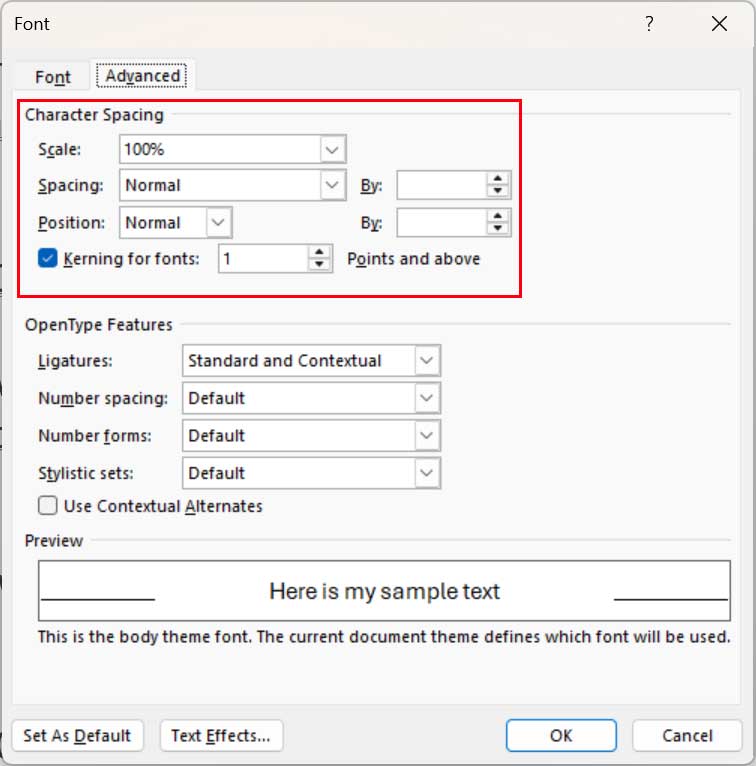
After you open the Font dialog box you will then go to the Character Spacing section and go to the Spacing section. From here you will choose a spacing option for your font. You can choose either expanded to stretch out the font or condensed to shrink it up. After that you will have to choose by how much by entering a number in the By box or by using the up and down arrows to incrementally change the value.
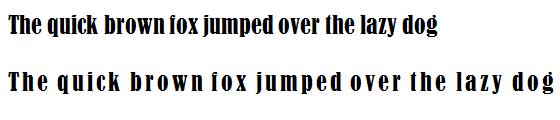
Here is an example of some text before and after the adjustment so you can see how much of a difference the letter spacing can make when you want to stretch out the font.
There is also an option to Stretch or scale the text horizontally by using the Scale option. In the Scale box, choose a percentage that you want to scale the text. Numbers above 100% stretch the text and numbers below 100% compress the text.