If you are the type who likes to build your own computer or upgrade components such as hard drives when needed, then you might have run into issues here and there that require some troubleshooting on your part to resolve. When adding a hard drive to your computer to install Windows on, you have the option to not use the entire drive and leave space unallocated if desired. But when you do this, you might find that Windows adds its own partitions such as recovery partitions to your drive.
As you probably know, Windows uses partitions on your hard drive to segregate space allowing you to divide up your storage space to do things such as have multiple hard drives on one physical hard drive. For example, your computer might have a C and a D drive yet only have one hard drive installed inside of your computer itself.
As you create partitions on your hard drive, they will use free space in a contiguous fashion and most people don’t pay attention to how this space is used or really even care. But there might come a time when this causes a problem like in the example we will be going over in this article.
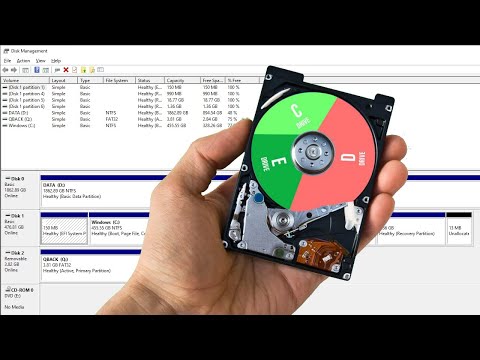
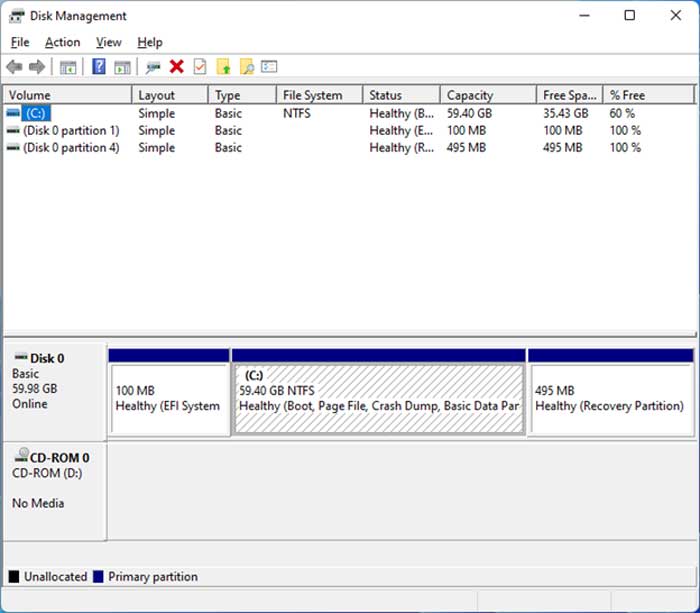
The computer in question has a 60 GB system partition (C drive) and we want to add more space to it since we will be running out of room eventually. As you can see in the figure below, there is a 100 MB EFI System Partition used for UEFI boot purposes. Then we have the 60 GB system partition that contains Windows and finally a 495 MB recover partition. This information can be seen using the Windows Disk Management tool.
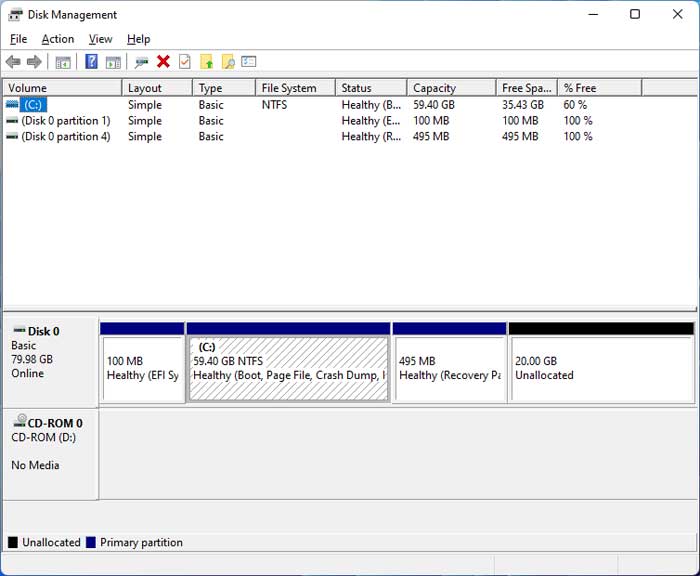
Fortunately, this hard drive (Disk 0) had some free space left so we expanded it by 20 GB and the results are shown below as unallocated space. In order to use this extra 20 GB we will need to either make a new partitionvolume or use it to extend a current volume.
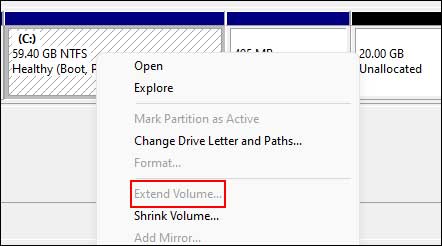
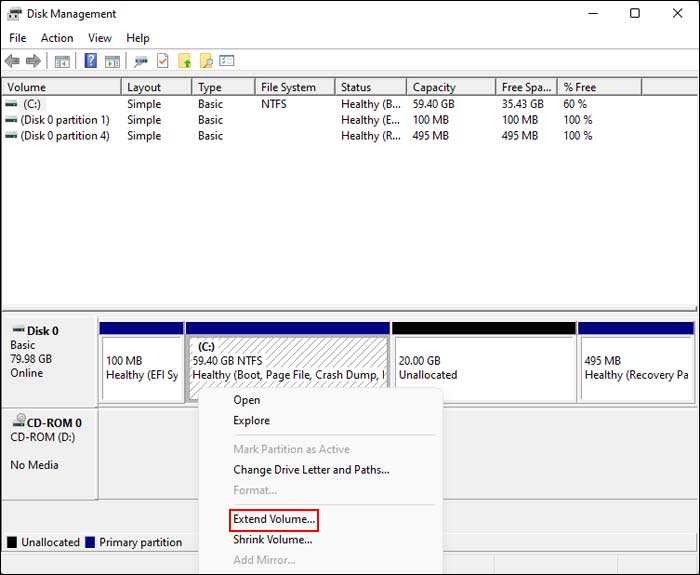
Since we want to extend the C drive on this computer, we will right click on the 60 GB partition and choose Extend Volume but as you can see, the option is greyed out. This is because the 495 MB recovery partition is in between the C drive and the 20 GB of unallocated space that we need to use.
To get around this problem we are going to use a third party application called NIUBI Partition Manager to move the recovery partition out of the way since it is what is causing the problem. The Windows Disk Management tool doesn’t have a way to move partitions around.
You can download the free home edition of the software to perform this task but they do have a professional version that has many more features but will cost you some money at the same time.
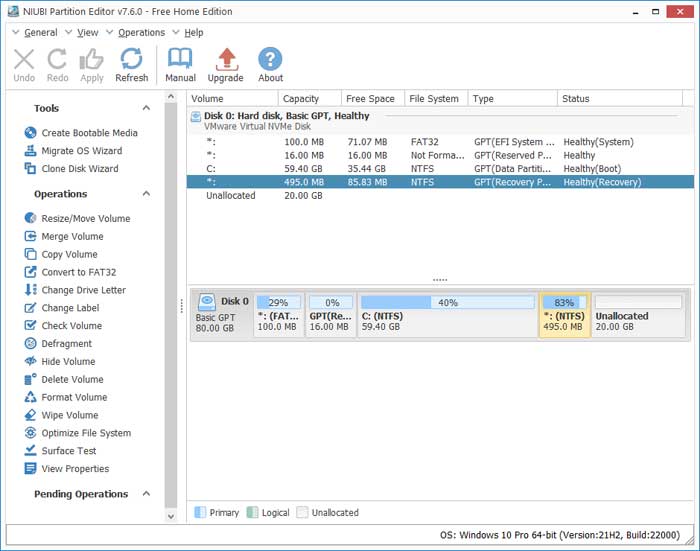
Once you download and install the software you can run it to have it show you a similar looking interface to Device Manager. As you can see in the image below, the 495 MB partition is shown highlighted in yellow since it has been selected by clicking on it.
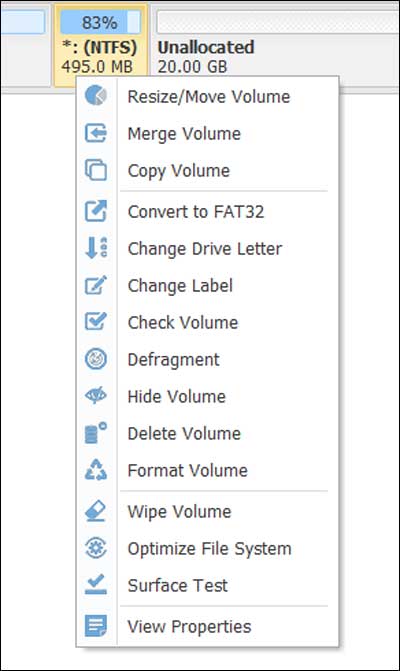
To move the partition, we will right click on it and choose Resize/Move Volume.
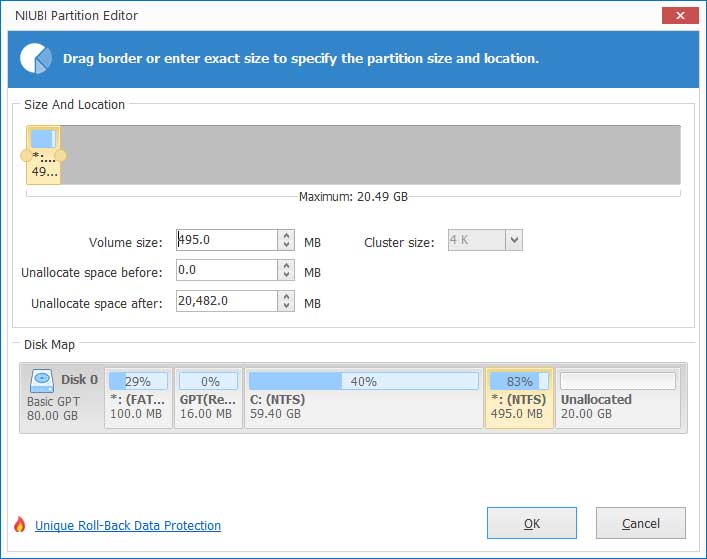
Next, we will drag the partition volume from the left side of the window over to the right side with the mouse and click the OK button.
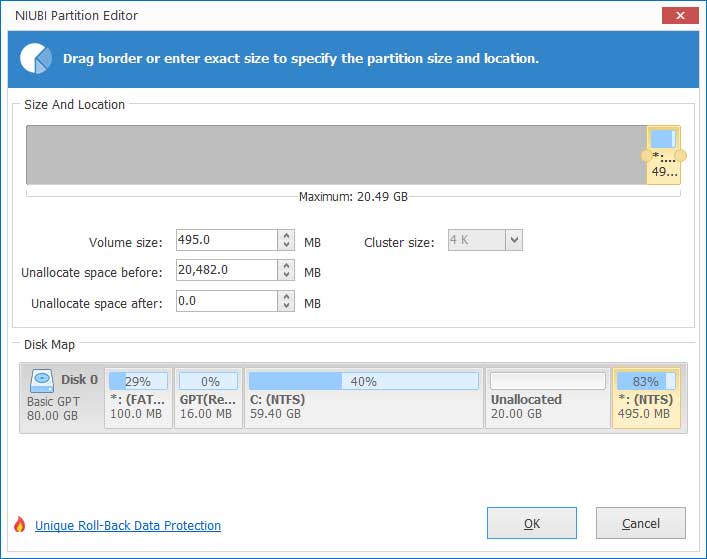
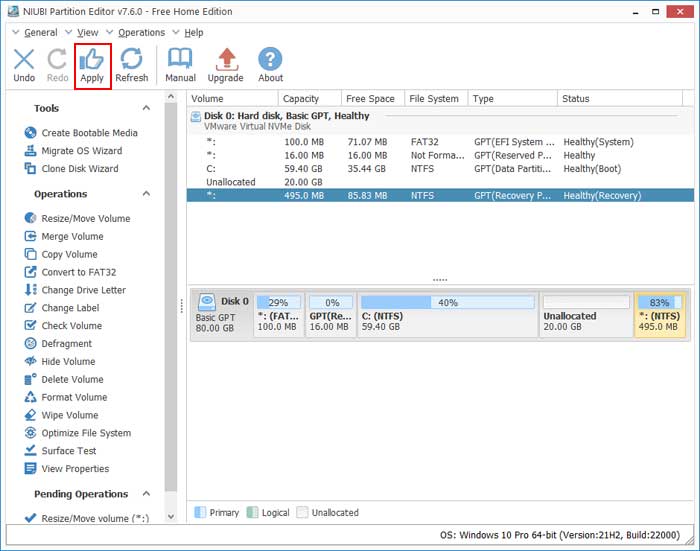
As you can see, the 495 MB recover partition is now to the right of the 20 GB unallocated space. Before we can do anything with this new configuration, we will need to click on Apply to have the changes applied to the drive.
When we go back to Disk Management, we will see that the partitions have been rearranged. If the change are not shown then you might have to click on the Action menu and then on Rescan Disks.
Now when we right click on the system drive, we have the option to extend the volume which will allow us to add the 20 GB of unallocated space to the existing 60 GB C drive.
To get more information about NIUBI Partition Editor and to download the free home edition, check out their website.
For additional training resources, check out our online IT training courses.
Check out our extensive IT book series.