Last Updated on August 4, 2026
With today’s computer hard drives being faster and larger than ever, you might find yourself wanting to upgrade but not wanting to reinstall Windows and all your software from scratch just to have a larger or faster drive. And of course you will need to backup all your personal files and then restore them after you get your computer reconfigured with its new drive.
You may also have a situation where your current hard drive is failing, and you want to migrate everything to a new drive before it’s too late or are maybe building yourself a new computer. This is where making a copy or clone of your hard drive can benefit you by getting your operating system and data on a larger or faster drive within minutes. In this article, we will be showing you how to clone your system drive with the AOMEI Partition Assistant software.

AOMEI has a variety of programs you can use to do things such as a backup app and recovery software that can restore files from your computer or smartphone. They also have some free tools you can use to help manage your PC. The AOMEI Partition Assistant software will cost you some money to use. If you want to make the cloning process easy or plan on doing this on other computers, it will be worth the price. They have a free version that will allow you to clone a hard drive. It will not migrate the operating system unless you use the professional version.
1. Download and Install AOMEI Partition Assistant
To begin, you will need to download the AOMEI Partition Assistant software from their website. Grab the professional version to ensure the operating system migration feature is fully unlocked. Then you can install it onto your computer just like any other standard software application.
2. Select the Migrate OS Feature
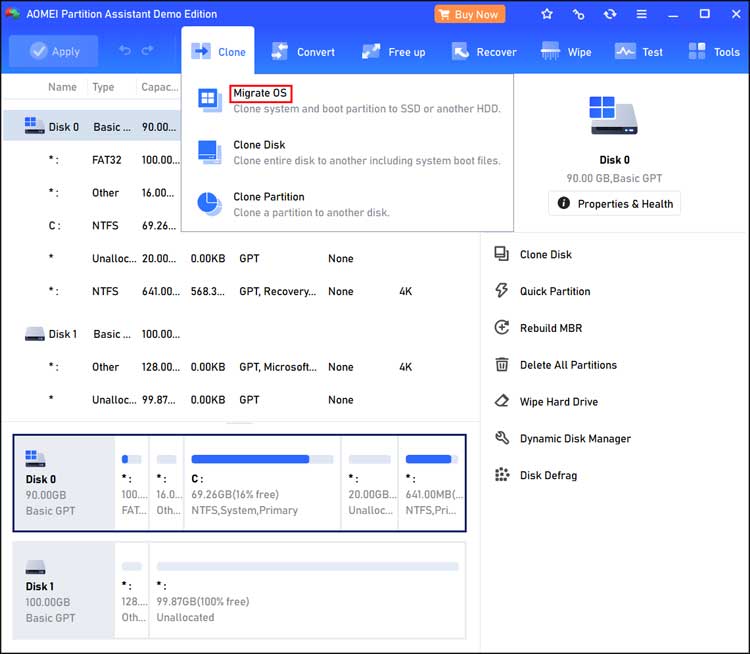
When you open the software, you will need to go to the Clone section to begin the process. From here you will want to choose the Migrate OS option. You will also be able to see the configuration of the drives attached to your computer so you will need to make sure you see your current system drive as well as the drive you want to create the clone with.
3. Choose Your Destination Drive
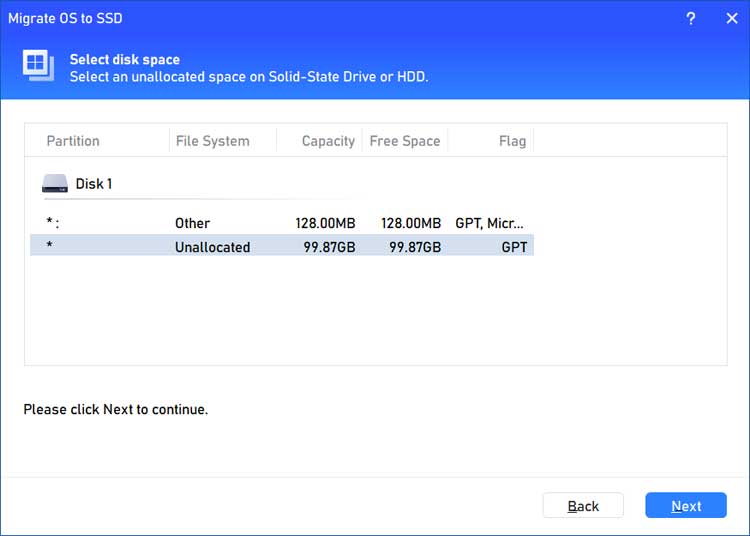
The next step involves choosing the specific drive you want to create the clone on. This hardware is also known as the destination disk. AOMEI Partition Assistant will most likely choose the correct drive for you automatically. This happens unless you have more than one extra drive installed inside your computer case.
4. Resize the Drive Partitions
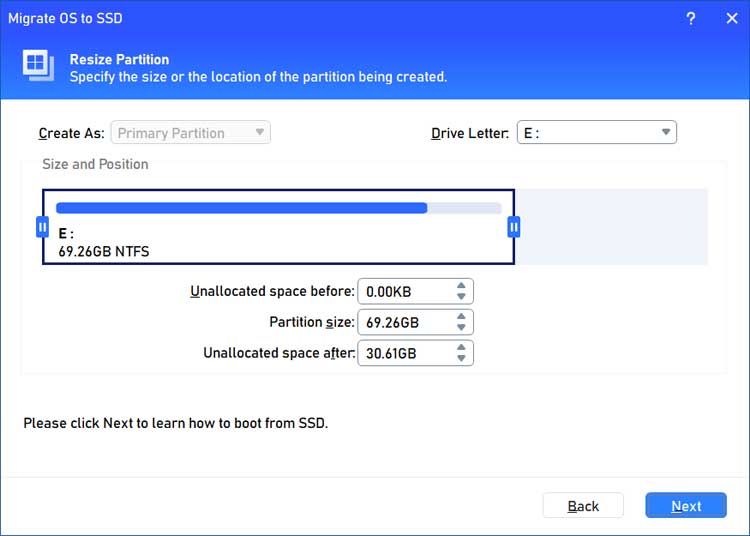
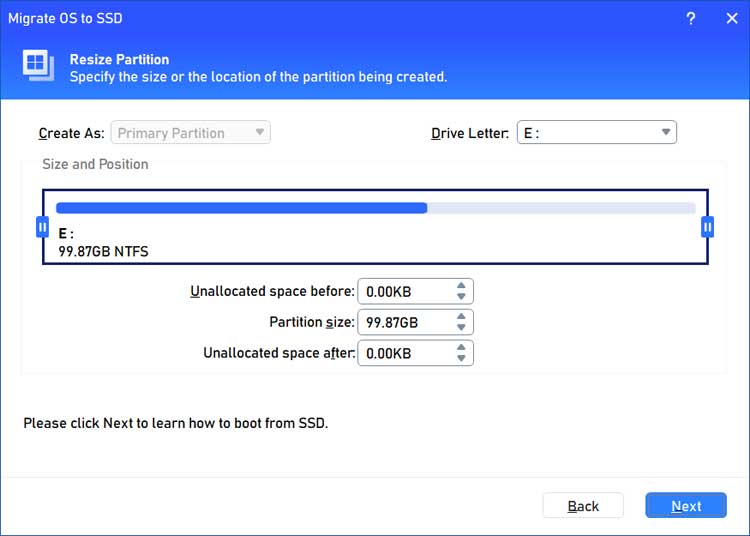
You may then have an option to extend the partition on the new drive. This allows you to use up all of its available space rather than just create a partition that matches the exact size of the current OS drive. If the new drive is not physically larger than the existing source drive then you will not see this option.
5. Maximize the Unallocated Space
The image below shows exactly how the new drive will look after moving the configuration slider. You drag it all the way over to use all the empty space on the new drive. This prevents you from wasting any valuable storage capacity on your brand new hardware.
6. Finish the Initial Configuration
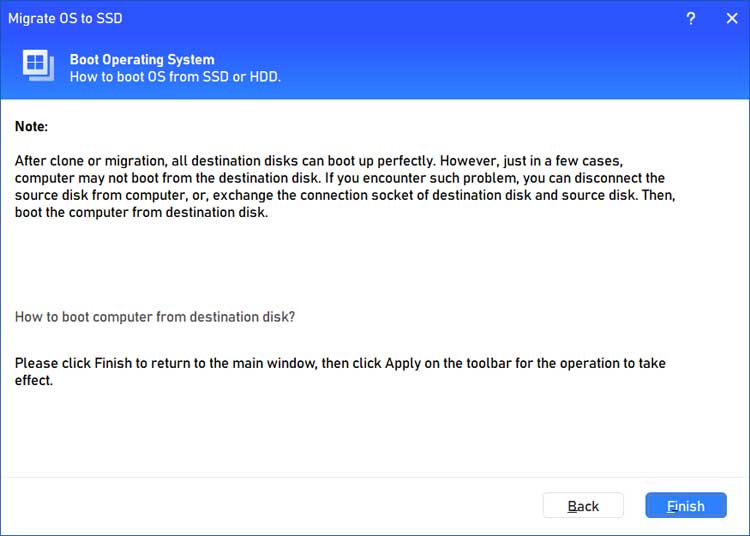
Once everything is completely ready to go, you can click on the Finish button at the bottom of the screen. This action does not actually start the cloning process just yet. It simply locks in your partition settings and takes you back to the main software dashboard.
7. Apply Your Pending Changes
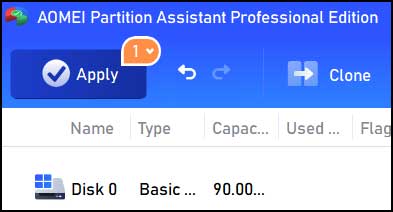
Before the actual cloning process will begin, you must finalize the task. You will need to click on the Apply button located near the top left of the main AOMEI program window. This commits your pending changes and triggers the software to start copying your data.
8. Wait for the Clone to Finish
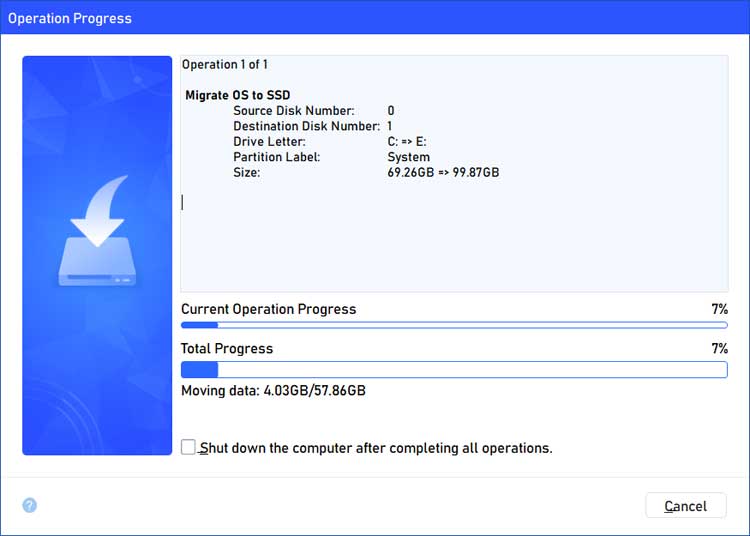
The cloning process will take several minutes to run its course. The exact time will depend heavily on the total size of your hard drive and the speed of your hardware. Solid state drives will finish this data transfer much faster than older mechanical hard drives.
9. Swap Your Hard Drives
Once the process is complete, you will get a popup message telling you it was successful. Then you can shut down the computer completely. Remove the original drive and boot up the machine with the new drive connected. You may have to go into your BIOS\UEFI to change its boot settings if the computer does not boot up using the new hard drive automatically.
For additional training resources, check out our online IT training courses.
Check out our extensive IT book series.