
Last Updated on May 12, 2026
If you are still running Windows 10 and have not upgraded to Windows 11 yet, you may not be aware of how it is much more difficult tweaking or customizing things like the taskbar and start menu in Windows 11.
You may also be interested to know that Microsoft is extending support for Windows 10 until October 2026 and gives you three ways to enroll to do so.
One of the features of Windows that many of us miss from the Windows Vista and XP days is the Quick Launch toolbar. This toolbar allows you to have smaller shortcut icons next to the Windows search box rather than having to pin apps to the taskbar itself and have them kind of be in the way.
Fortunately, it’s very easy to enable the Quick Launch tool bar for Windows 10 and unfortunately, it’s not very easy for Windows 11 unless you use a third party app such as Explorer Patcher. In this article, we will be showing you how to add the Quick Launch toolbar to the Windows 10 taskbar.

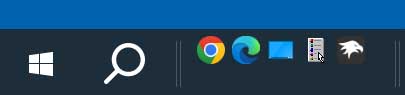
The image below shows a typical Windows 10 taskbar with a few apps pinned to the right of the search box.

How to Enable the Quick Launch Toolbar
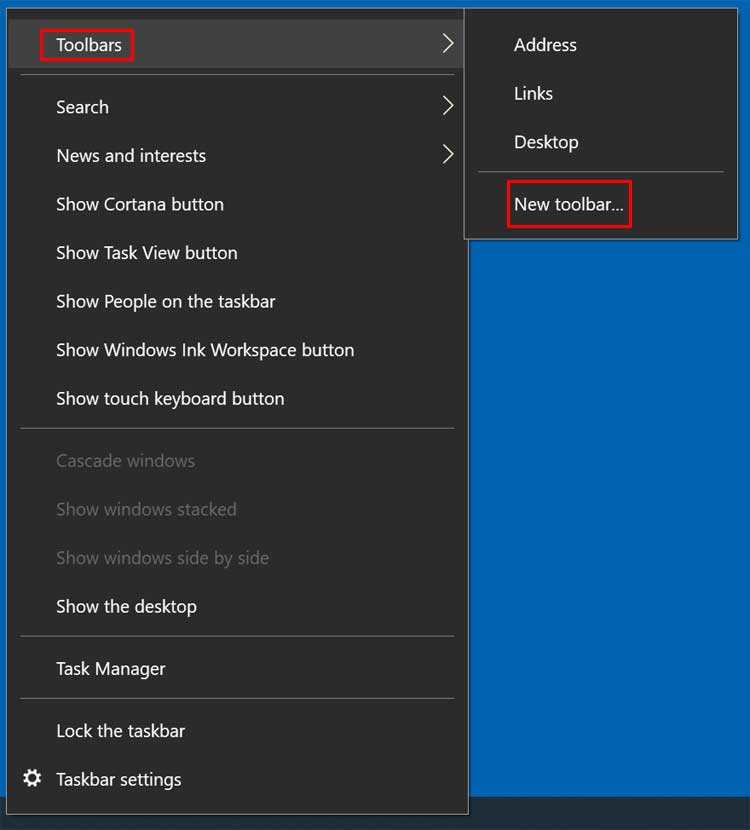
To add the Quick Launch toolbar to the Windows taskbar, you can right-click on any blank area of the taskbar itself.
Navigate up the context menu and go to Toolbars and then click on New toolbar.
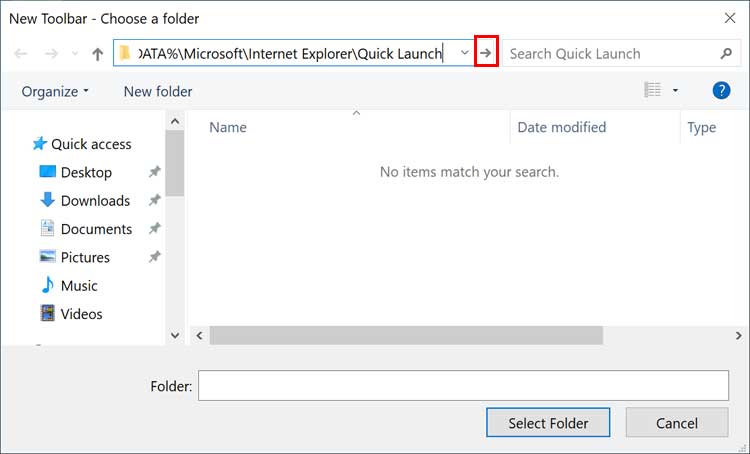
Next, you can paste the text string below into the address bar of the File Explorer window that appears.
%APPDATA%\Microsoft\Internet Explorer\Quick Launch
After pasting the path, click on the right arrow button next to the address bar.
Finally, click on the Select Folder button at the bottom of the window to confirm your choice.
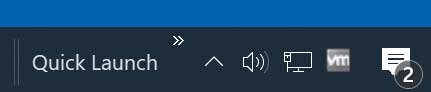
You will then see the Quick Launch toolbar appear over on the far right side of the taskbar right next to the system tray.
Customizing the Quick Launch Icons
Most people only want to see the application icons in the Quick Launch toolbar and not the text labels.
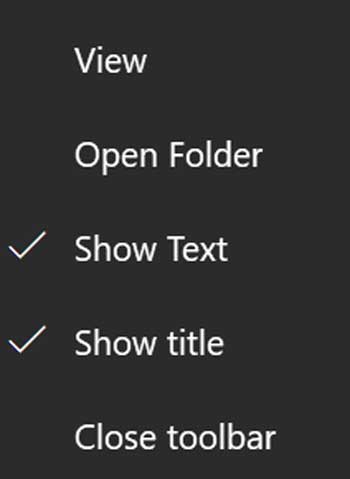
To fix this, you can right-click right next to or below the words Quick Launch on your taskbar.
You can then uncheck both the Show Text and Show title options from the popup menu.
To move the Quick Launch toolbar over to the left side of the taskbar, you will need to hover your mouse over the double vertical lines.
This will change your cursor to make a double-sided arrow.
Click and drag it all the way over to the left side of the taskbar.
Keep in mind that you will not be able to drag it all the way over next to the search box just yet.
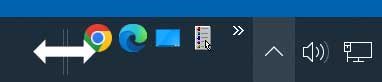
Next, you will do the exact same thing with the other set of double vertical lines.
But this time, drag them over to the right and past the Quick Launch toolbar icons to compress the space.

Now your previously pinned app shortcuts will be to the left of the Quick Launch toolbar.
You can right-click on each icon and unpin them if you do not want them to be on the main part of the taskbar anymore.
Then you can just make sure your favorite apps are securely placed in the Quick Launch toolbar.
If they are not there, you can easily drag and drop whatever software shortcuts you want directly into this section.

How to Minimize the Taskbar Search Box
If you want to clean things up even more, you can change the large search box on the taskbar to a simple search icon.
This takes up significantly less space on the taskbar and gives you much more room for your open programs.
The core search feature will work exactly the same if you do this.
To configure this, simply right-click on a blank area of the taskbar again.
Navigate up the menu and choose Search and then click on Show search icon.
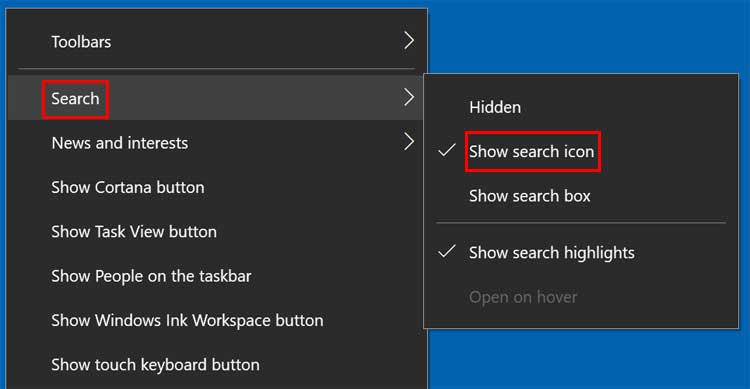
Now you will have a smaller magnifying glass search icon rather than the large, bulky search box.
You can even choose the Hidden option to have no search box on the taskbar at all.
Removing the Quick Launch Toolbar
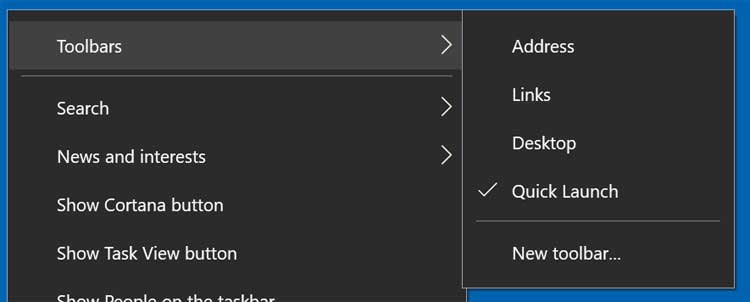
If you ever want to completely remove the Quick Launch toolbar from the Windows taskbar, you can right-click the taskbar and go back to Toolbars.
From there, simply uncheck the Quick Launch option.
Just keep in mind that if you want to add it back later, you will need to repeat this entire process over again since Windows will not keep the custom path saved in the Toolbars section.
For additional training resources, check out our online IT training courses.
Check out our extensive IT book series.






