
Last Updated on May 2, 2026
As Windows progresses with newer versions, Microsoft tends to add and remove features in an effort to keep the operating system feeling fresh and modern. However, for many long-time Windows power users, these changes often leave us wondering why a perfectly functional feature was removed in the first place.
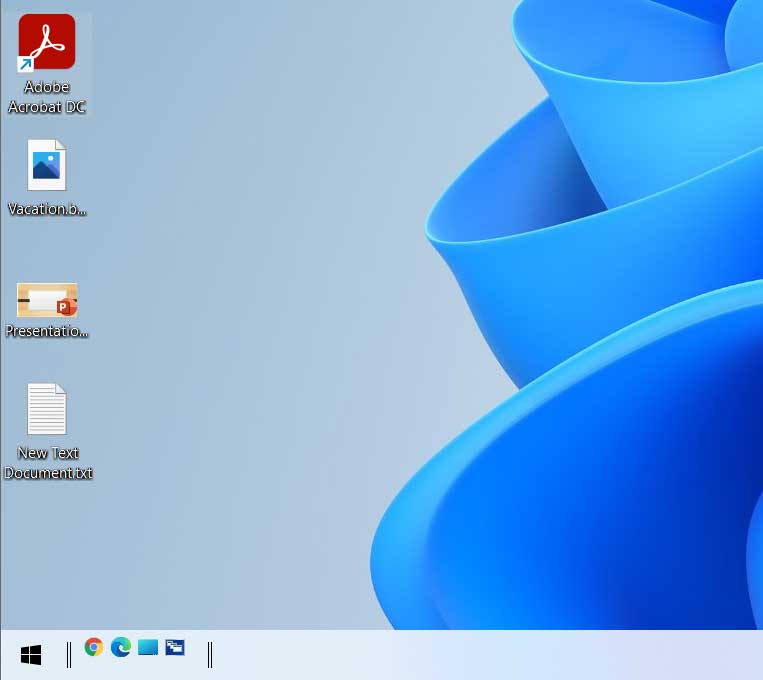
In Windows 7, the Quick Launch Toolbar was a staple for productivity, and we were luckily able to add it to Windows 10 with a few clicks. But when Windows 11 was released, users found that Microsoft had completely redesigned the taskbar, making the old-school toolbar method much harder to implement.

In this article, we will be showing you exactly how to reclaim your desktop real estate and add the Quick Launch Toolbar back to Windows 11. To achieve this look on the modern interface, we will need to utilize a small piece of third-party software to “unlock” the taskbar capabilities that Microsoft currently hides.
Installing the ExplorerPatcher Software
In order to get the Quick Launch Toolbar back in Windows 11, you are going to need to install a lightweight utility called ExplorerPatcher. Fortunately, this software is completely free, open-source, and very easy to install on most systems.
While it is unfortunate that we need extra software for a basic feature, this is currently the most stable way to restore the classic Windows 10/7 taskbar behavior.
1. Download the Latest Version from GitHub
The first step in the process is to visit the official GitHub repository for ExplorerPatcher and download the setup file. Look specifically for a line that says “Download the latest version of the setup program” under the “How to” section of the page. You will then download a file named ep_setup.exe to your downloads folder.
2. Run the Silent Installation
Once the download is complete, locate the executable file and double-click it to begin the installation. Unlike most software, you won’t be prompted with complicated questions about installation paths or user agreements. The software will simply install itself silently in the background while it refreshes your Windows Explorer shell.
3. Verify the Visual Changes
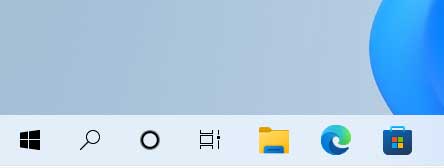
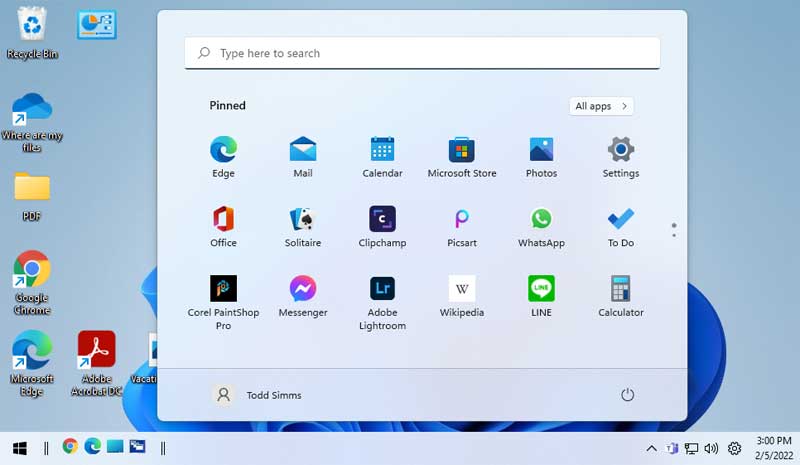
You will know the installation is complete when you see your Start button and other taskbar icons shift to the left side of the screen. You may also notice that your Start button has taken on a slightly different, more classic appearance. This change confirms that ExplorerPatcher is active and you can now proceed with adding the toolbar.
Adding the Quick Launch Toolbar to the Taskbar
Now that the system is patched, we can use the classic method of adding custom folders to the taskbar. This involves navigating to a hidden system directory that has existed in Windows for decades.
4. Unlock Your Windows Taskbar
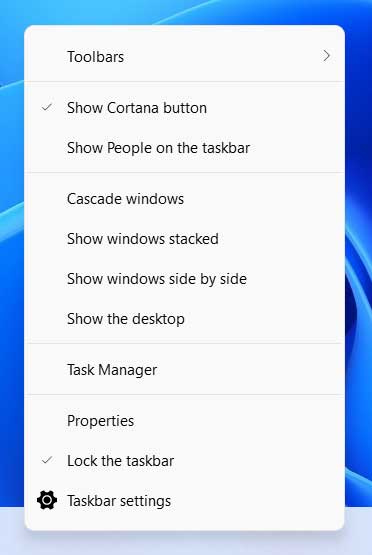
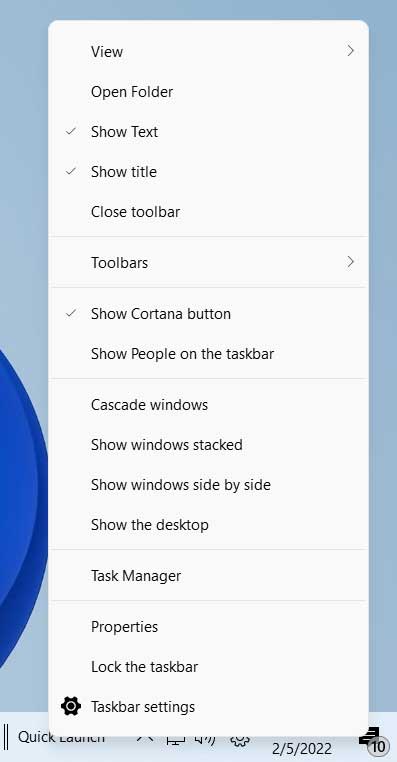
Before taking the next step, you will need to make sure your taskbar is not locked, or you won’t be able to move the new toolbar around. Right-click on an empty space on the taskbar and look for the “Lock the taskbar” option. If there is a checkmark next to it, click it once to uncheck it and enable editing mode.
5. Create a New Custom Toolbar
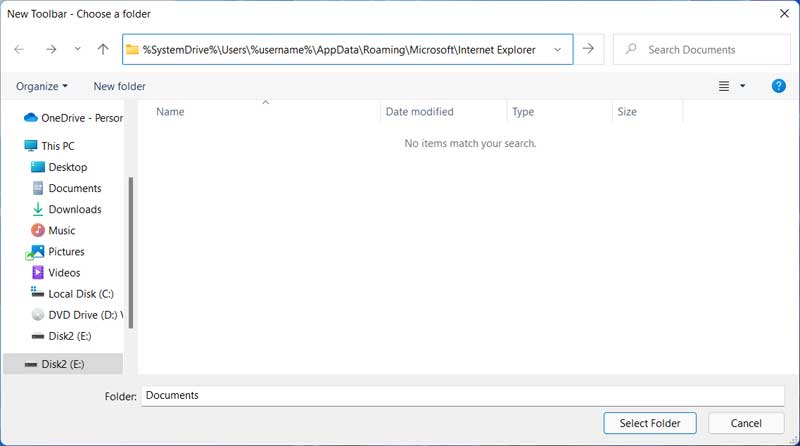
Next, right-click the taskbar again and navigate to the Toolbars menu, then select New toolbar. A file explorer window will pop up asking you to select a folder for your new taskbar addition.
6. Navigate to the Quick Launch Path
Instead of browsing manually, you should copy and paste the following environment path into the address bar at the top of the window and press Enter. This shortcut will take you directly to the hidden folder where Windows stores the Quick Launch shortcuts.
%SystemDrive%\Users\%username%\AppData\Roaming\Microsoft\Internet Explorer
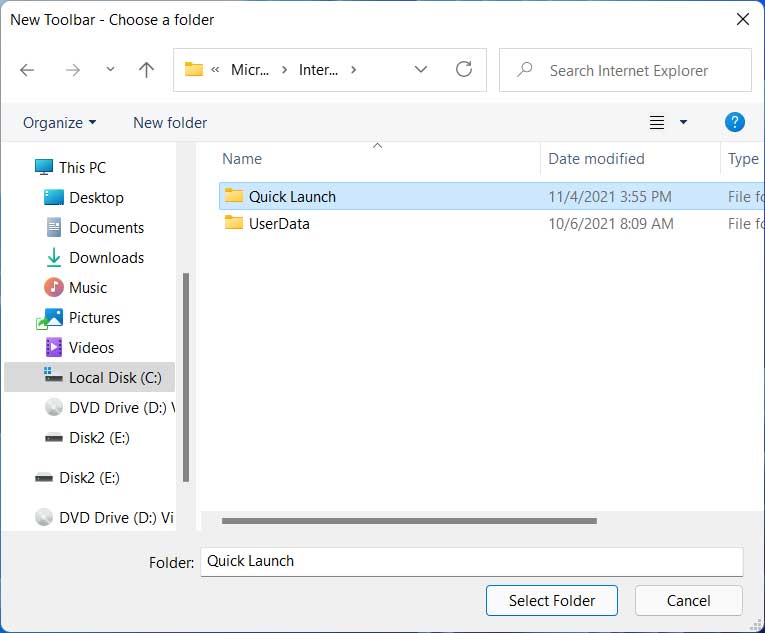
7. Select the Quick Launch Folder
Once you hit enter, you will see a folder specifically named Quick Launch appear in the list. Click on this folder once to highlight it, and then click on the Select Folder button at the bottom of the window to confirm your choice.
8. Locate the New Toolbar on Your Taskbar
You will now see a new “Quick Launch” section appear on the right side of your taskbar, usually near the clock and system tray. It will likely look a bit cluttered at first because it will be displaying the text label and the folder title.
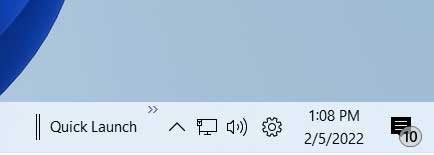
9. Clean Up the Toolbar Appearance
To make the toolbar look like the classic version, right-click on the word “Quick Launch” on your taskbar. Uncheck the options for Show Text and Show Title to hide the unnecessary words. This will leave you with just the small, clean application icons that power users prefer.
10. Reposition the Toolbar to the Left
The next step involves clicking on the double vertical bars located next to the icons and dragging them all the way to the left side of the taskbar. You might need to play with this for a few seconds to get the icons to “snap” into the right place next to your Start button. After you finish dragging, you will have your small Quick Launch icons perfectly positioned next to your larger pinned apps.
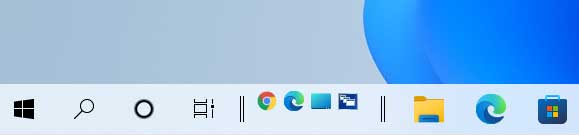
11. Remove Unnecessary Standard Icons
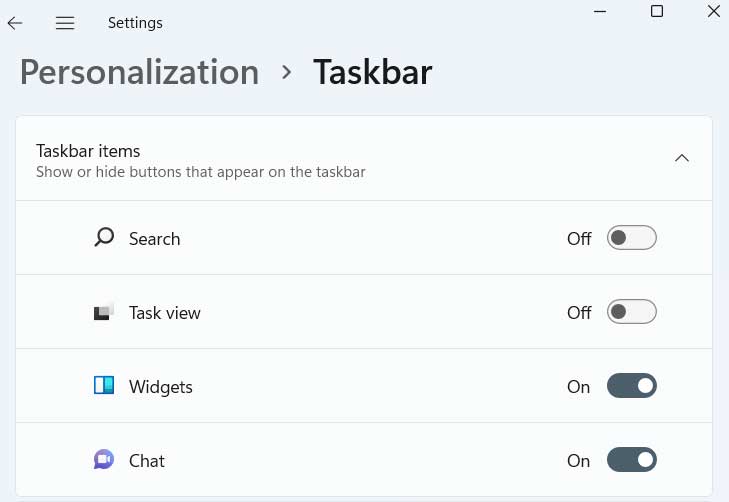
For the larger standard icons that you no longer need, you can simply right-click them and choose Unpin from taskbar to remove them. For system icons like Task View and Search, you can go to your Windows Settings, select Personalization, and then click on Taskbar to toggle them off manually.
12. Remove the Legacy Cortana Icon
If you are on an older version of Windows 11 that still shows the Cortana search icon, you can easily hide it to save more space. Just right-click the taskbar one more time and uncheck the “Show Cortana button” from the context menu. Your taskbar should now look clean and optimized for a single-click workflow.
Final Adjustments and Start Menu Alignment
Once you have made all of these changes, you might notice that when you click on the Start button, your Start menu still appears in the middle of the screen. This can feel jarring if your icons are all aligned to the left.
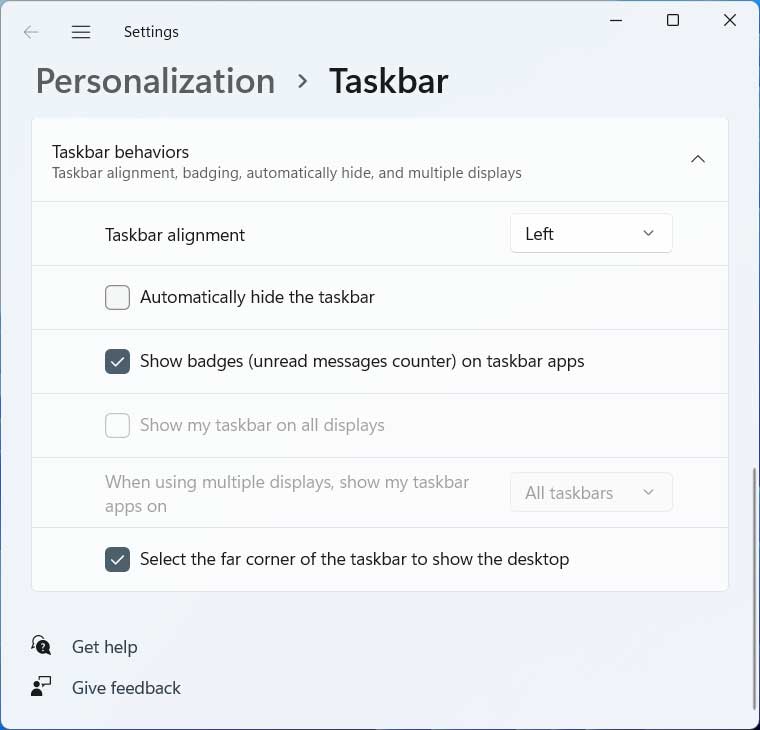
13. Set Taskbar Alignment to the Left
You can fix this by right-clicking the taskbar and selecting Taskbar settings. Under the Taskbar behaviors section, find the alignment dropdown and change it from “Center” to “Left.” This ensures that your Start menu opens directly above the Start button, just like in previous versions of Windows.
Reverting Back to the Default Windows 11 Look
If you ever decide that you want to revert back to the default Windows 11 taskbar, the process is very simple to undo. You don’t have to manually delete the toolbars or reset your registry keys.
Simply go to Programs and Features in your Control Panel (or Apps and Features in the modern settings app) and uninstall the ExplorerPatcher software. After you reboot or the explorer shell restarts, everything will be back to the factory default state as if you never started the process.
Another thing you can do is install Classic Shell to get a Windows 7 style Start menu for your Windows 11 (or Windows 10) computer. So as you can see, it only takes a few steps to add the Quick Launch Toolbar to the taskbar in Windows 11.
Here is an alternative way to add the Quick Launch toolbar and keep the Windows 11 look for the taskbar.
For additional training resources, check out our online IT training courses.
Check out our extensive IT book series.


