
Last Updated on May 27, 2026
YouTube is the most popular streaming and hosting website in use today. YouTube offers multiple ways to organize and manage your viewing experience, but the differences between Playlists, Watch Now, and Queued Videos often leave users wondering which option to choose. These tools shape how content flows, how easily you can revisit videos, and how personalized your sessions feel. In this article, we’ll break down what sets them apart and help you decide which approach best fits your viewing habits.
Beyond simple saving, YouTube’s organizational tools quietly influence how intentional your viewing becomes. The moment you decide where a video belongs, whether it’s tucked into a themed playlist or left to surface later, you’re shaping the way YouTube remembers your interests and serves content back to you.
This subtle layer of control can turn casual watching into a curated experience, helping you separate one‑off entertainment from videos you actually want to return to, learn from, or share. Understanding these distinctions makes it easier to keep your feed feeling useful instead of cluttered, especially as your watch history grows over time.

Saving Videos to Custom Playlists
1. Understand the Save Feature
YouTube has a nice feature that allows you to save videos so you can watch them again whenever you like without needing to search for them. This comes in handy if you enjoy videos from a variety of channels but do not want to subscribe to these channels. You maintain total control over your personalized content library.
2. Click the Save Button
To save a video, simply click the Save button located directly below the video player itself. And by the way, if you were wondering what the Thanks button is for, it’s a way to send a cash tip to the creator of the video. You will need to link some type of payment method to your Google account in order to do this.

3. Add to an Existing Playlist
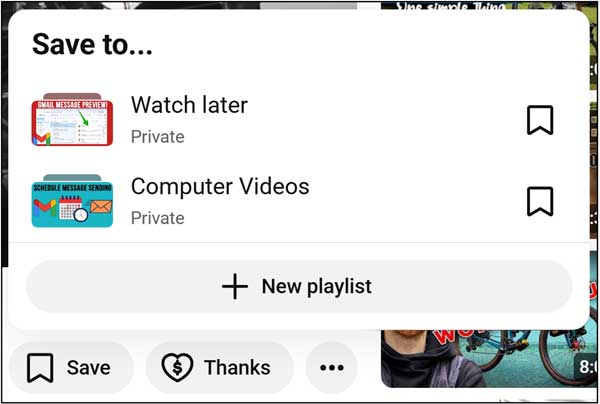
When you click the Save button, a small menu pops up on your screen. You will have the option to add the videos to an existing playlist if you already have one built. You can also create a brand new playlist on the spot to categorize your media instantly.
4. Name Your New Playlist
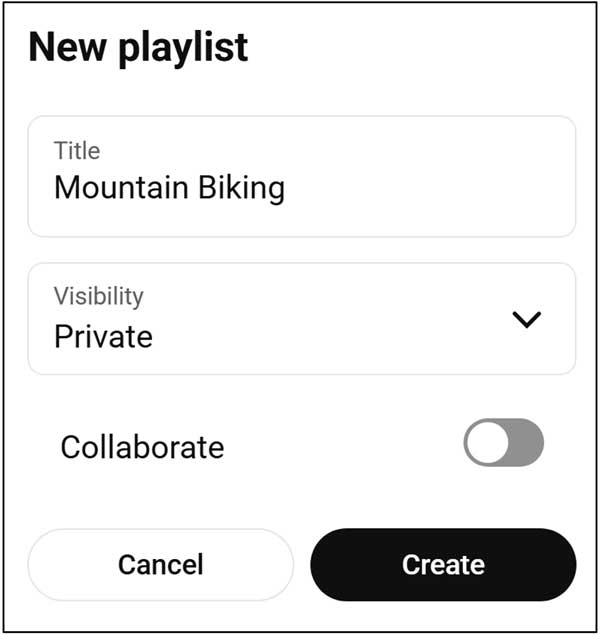
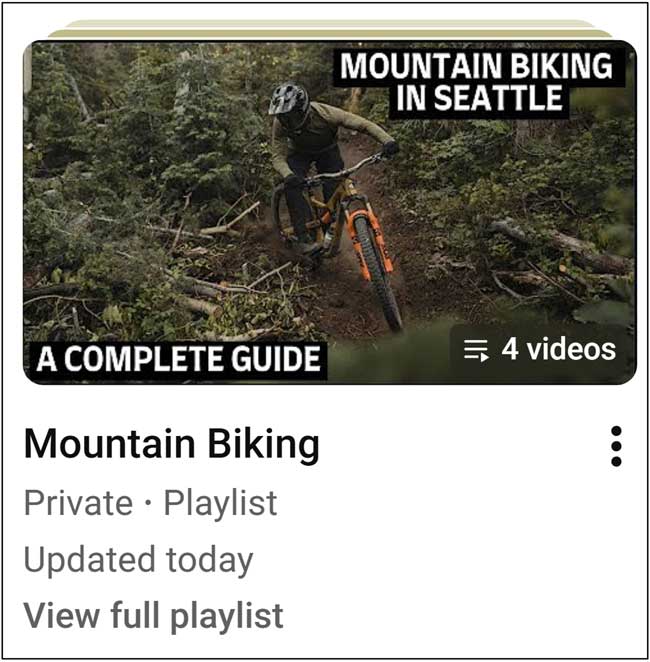
For our example, we will be creating a new playlist called Mountain Biking. Type your desired title into the text box provided. Make the name highly descriptive so you can find these specific videos easily later on.
5. Choose the Visibility Settings
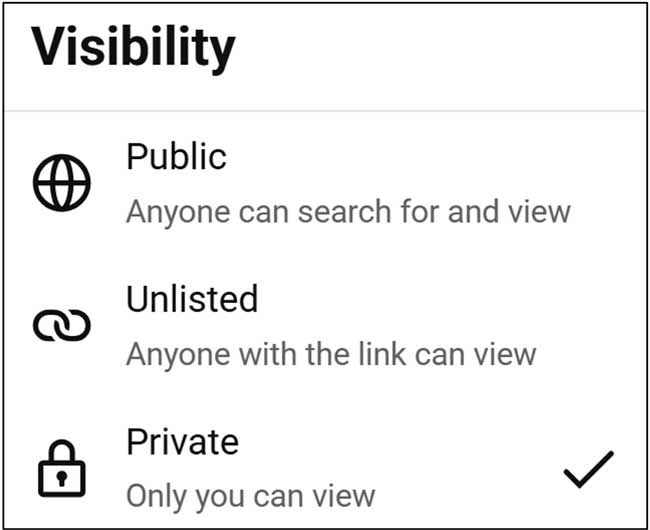
For the visibility options, you will have three distinct choices. You can set the list to public, unlisted or private with private being the default state. The Collaborate option is a feature that turns a private or solo playlist into a shared one, allowing other people to add videos to it. It is essentially a group playlist for friends or coworkers.
6. Access Your Video Playlists
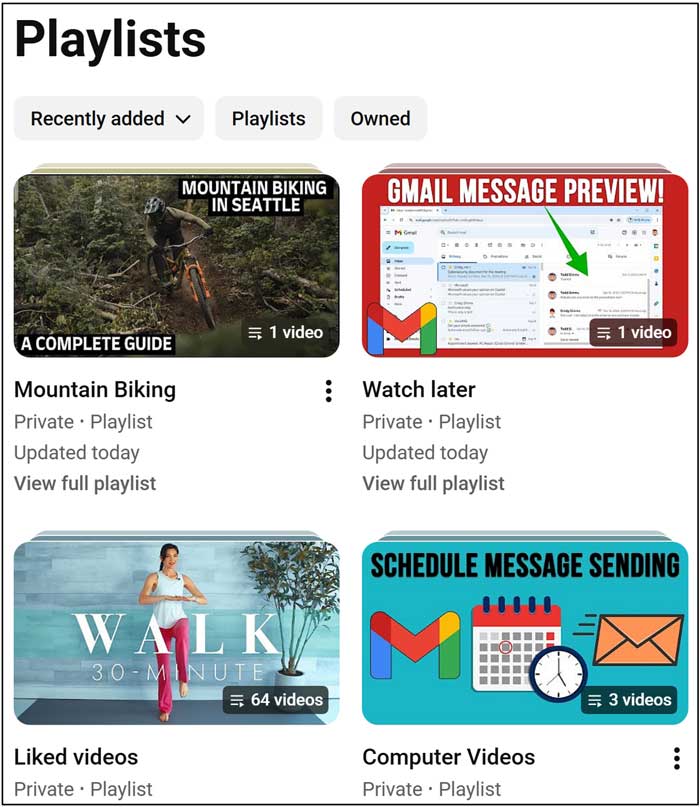
Now that we have saved the video into a new playlist, we can easily find it later. We can go back to the main Playlist section located on the left sidebar. You will see it there along with your liked videos, other playlists, and the default watch later list.
7. Manage Your Saved Videos
We will now add some additional videos to our playlist by saving them from the videos themselves. As you can see in the image below, our playlist now shows exactly 4 videos. If we were to click on the three vertical dots off to the right, we would have the option to delete the playlist entirely. We can also edit it if we need to rename it or change the privacy settings.
8. Play Videos from Your Playlist
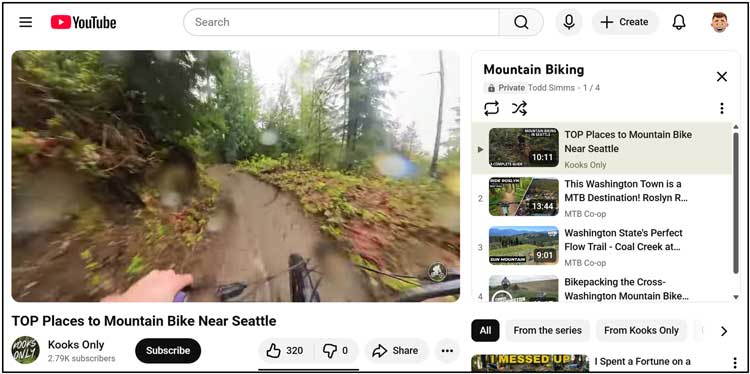
When we click on our playlist, it will open the first video in the list automatically. It then shows the other videos in the playlist docked off to the right side of the screen. We can then click on any one of them to play that specific video immediately.
9. Edit or Remove Playlist Videos
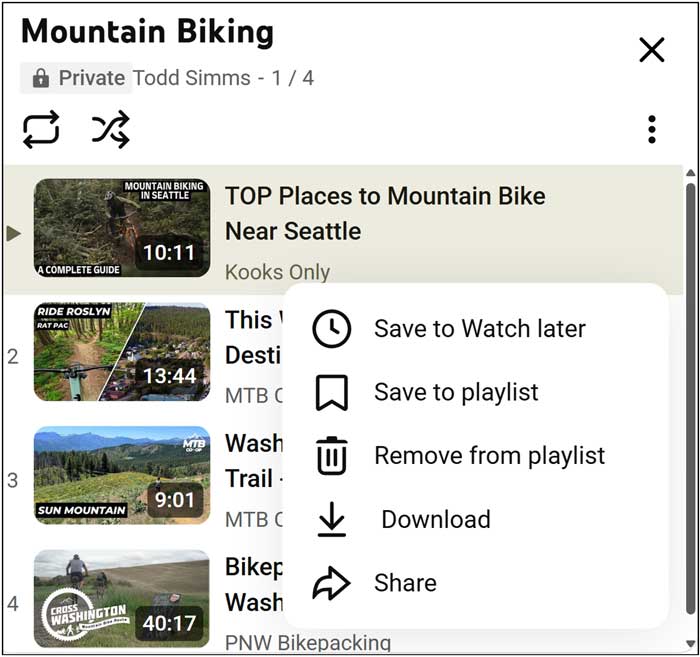
If we were to click the three vertical dots next to one of these videos, we get a new context menu. We would have several options such as saving it to a completely different playlist or removing it as shown in the image below. The download option will only work for those who pay for the YouTube Premium subscription service.
Using the Watch Later List
1. Understand the Watch Later Purpose
The Watch Later feature is similar to adding a video to a standard playlist. However, it is meant to be more of a temporary way of saving videos for immediate future viewing. Let’s say you are looking up a specific topic and find a video that looks interesting, but you do not have the time to watch it right now.
2. Save Videos to Watch Later
You can click the three vertical dots next to the video directly in the search results. Choose Save to Watch Later from the dropdown menu. To see our Watch later list, we can either go back to the Playlists section or click Watch later on the sidebar to view our list.

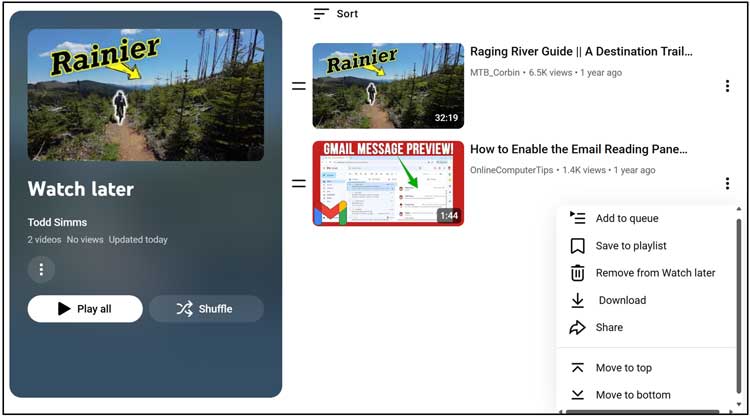
3. Organize Your Watch Later Videos
If we go to Watch later, we will get a much better view of our videos from this specific category. We can then watch them as needed on our own schedule. You can click on the three vertical dots next to one of them and do things such as remove them or permanently save them to a custom playlist.
Creating a Temporary Video Queue
1. Understand the Temporary Queue
A YouTube queue is a temporary list of videos you add to play next in a specific order during your current session. It is not saved and disappears entirely when you refresh the page or close YouTube. If you have your web browser set to restore the current browsing session after you close and reopen it, then your queue may be saved locally.
2. Add Videos to the Queue
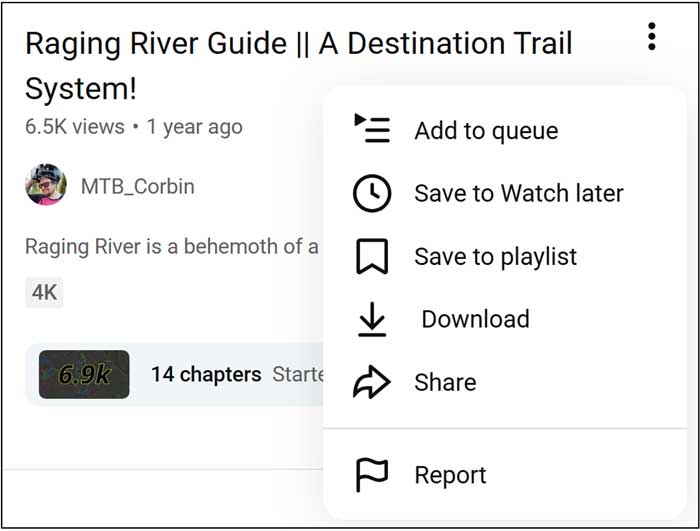
To add a video to your queue, you can click the three vertical dots next to the video in the main search results. Choose Add to queue from the popup list. This action stages the video to play next without interrupting your current playback.

3. View the Mini Player
YouTube will then open that video in the mini player on your screen. It will immediately start playing the video in the corner. You will also see exactly how many videos are in your queue at the lower left corner of the video player. If you were to close the video, it would no longer be in your active queue.

4. Track the Queue Count
After adding a couple more videos to the queue using the exact same method, the list expands. You can see the total number of videos in our queue is now 3. The player automatically cycles to the next item when the current video finishes.

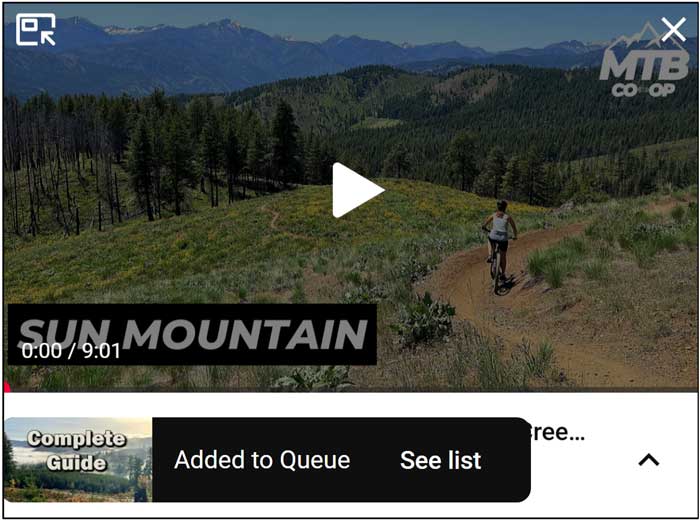
5. Access the Full Queue List
As you add videos to your queue, you should see a small popup message saying Added to Queue. It provides an option to see your full queue list. This interface helps you manage a long string of upcoming media.
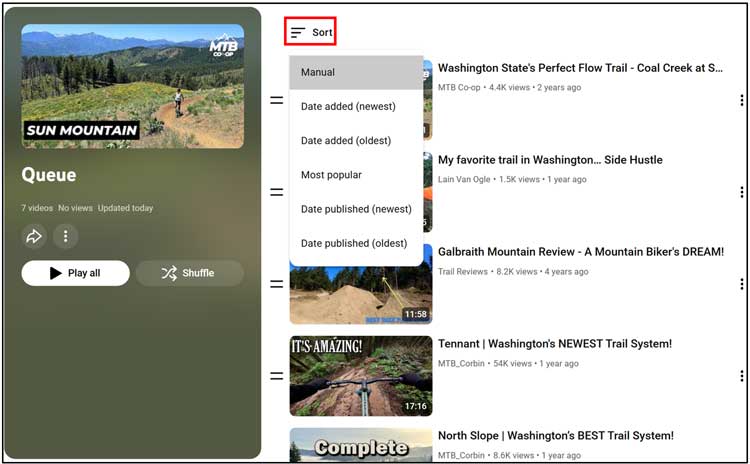
6. Sort Your Queued Videos
When you click on See list, you will be taken to the dedicated panel that contains all the videos in your queue. You can then use the Sort option located at the top. This changes the strict order that they are shown during playback.
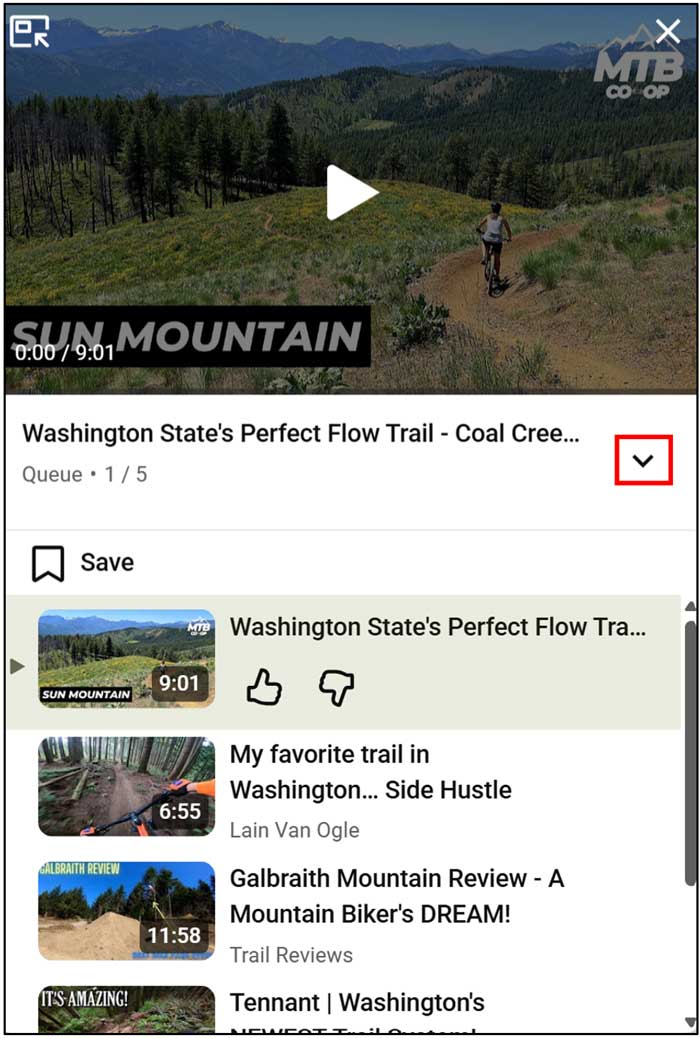
7. Navigate the Queue Menu
If you were to click the arrow while in the mini player, the interface expands upward. You would then be able to see all the videos in your queue stacked vertically. You can then click on a different one to skip ahead and watch it if desired.
As you can see, YouTube Playlists, Watch Later lists and Queued Videos are similar yet are all unique enough that they all have their specific purposes on the YouTube website.
For additional training resources, check out our online IT training courses.
Check out our extensive IT book series.


