Overcome the VirtualBox 2TB Virtual Disk Limit!
VirtualBox is Oracle’s free virtualization software that you can use on your home computer to create your own virtual machines (VMs) and run multiple computers virtually on one physical computer. The best part about this is the ability to alter your virtual machine’s hardware on the fly such as adding more RAM or additional processors etc.
One common thing many people like to do is add additional virtual hard disks (VDI files) to their VMs to get more storage space. Another option is to increase the size of a current disk rather than having to add another one. You can do this while leaving your files on the disk which comes in handy even though you should make sure you have a backup before doing anything like this.

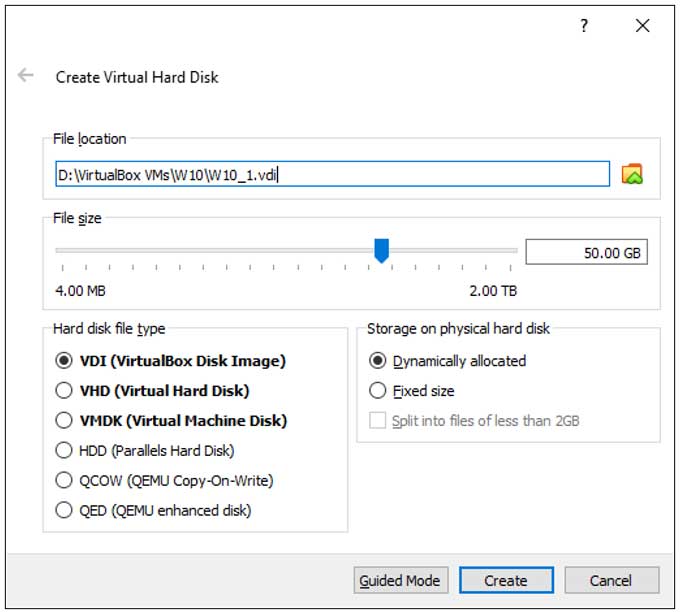
If you want to increase your disk size, it’s very easy to do via the VirtualBox Manager but there is one catch, you can only increase the disk up to 2 TB (terabytes) in size. As you can see in the image below, I have created a 50 GB virtual hard disk and only have an option to go up to 2 TB.
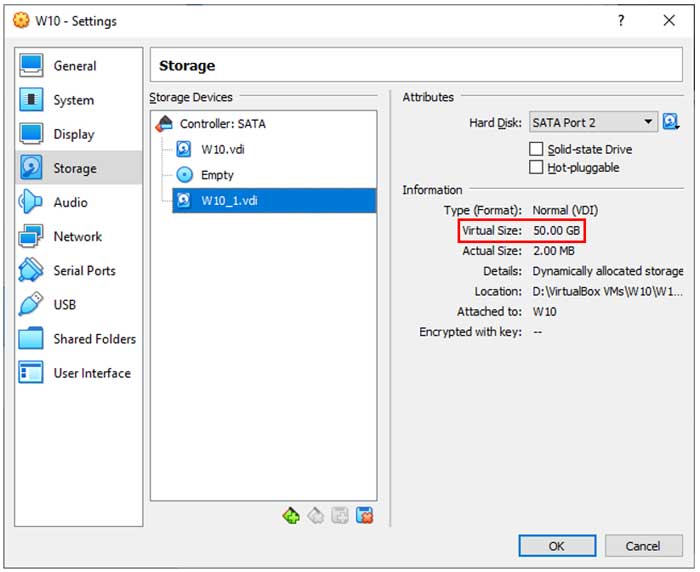
After creating my 50 GB disk, it shows up under the Storage section within the options of my VM
Now if I go to increase the size of the virtual disk in the Virtual Media Manager under the File menu I can see that I still only have the option to resize it up to 2 TB.

To get around this limitation I will need to resize the disk using the command line. To open a Command Prompt, type in CMD in your Windows search box after clicking on the Start button. You can also type in in the Cortana search box if that is what you are used to using.
From there I will need to type in a specific command from a specific directory and what you type here will vary based on your VirtualBox configuration.
To start with, you will need to know the installation directory of your VirtualBox software. The default location is C:Program FilesOracleVirtualBox so if you didn’t change this during the installation, yours should be the same. Once you figure out the proper location, navigate to that location within the command prompt.
Then you will need to figure out the location of the virtual disk that you wish to enlarge. If you don’t know then you can find it in the Location box in the Virtual Media Manager as seen in the image above.
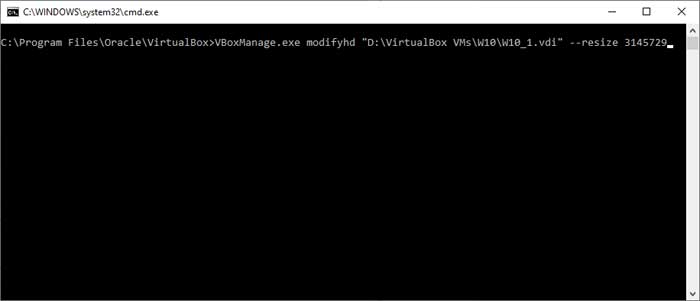
Next you will use the VBoxManage.exe modifyhd command to resize your virtual disk. After you type in VBoxManage.exe modifyhd you will need to enter the path to your VID file and make sure that it is in quotes. Then add a space, and type –resize, another space and enter the size you wish the drive to become in MB (megabytes). For my example I want my drive to become 3TB which is 3145729 in MB. You can find out the TB to MB conversion by looking it up online. Just make sure you don’t put any commas in for your new size such as 3,145,729.
VBoxManage.exe modifyhd “D:VirtualBox VMsW10W10_1.vdi” –resize 3145729
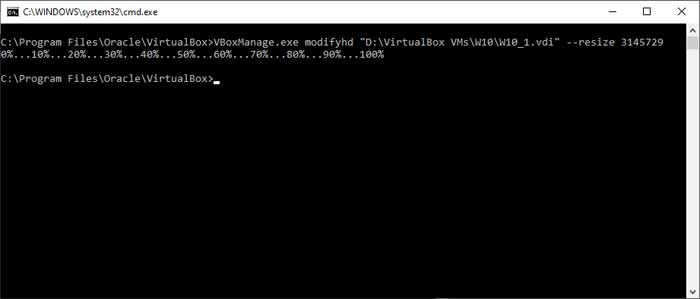
If you typed in everything correctly then you should see a 0% to 100% status go across the screen and the process should be very quick.
Now when you go back to the storage settings of your VM, you should see the newly increased size of the virtual disk.

Now you know how to resize a VirtualBox VM hard disk over 2TB via the command line.