
Last Updated on May 6, 2026
If your Windows computer is suddenly freezing, randomly crashing with Blue Screens of Death (BSOD), or built-in apps like the Edge browser refuse to open, you likely have corrupted system files.
A sudden power outage, a failed Windows update, or a lingering malware infection can easily scramble the core files Windows needs to function.
Before you panic and completely reinstall your operating system, there is a built-in diagnostic repair tool you need to run. It is called the System File Checker (SFC).
SFC acts as an automated mechanic for your hard drive. It scans every single protected operating system file, verifies its digital integrity, and automatically replaces any missing or damaged files with a healthy copy.
A clean SFC result can instantly rule out core operating system damage, saving you hours of troubleshooting time. Here is exactly how to run it properly on modern Windows machines.
The Crucial First Step: Run the DISM Command
In the old days of Windows XP and Windows 7, you could just run the SFC command by itself.
However, on Windows 10 and Windows 11, the System File Checker relies on a hidden backup folder called the Windows Component Store to grab healthy copies of broken files.
If that backup folder is also corrupted, the SFC scan will inevitably fail.
Therefore, modern IT professionals always run the Deployment Image Servicing and Management (DISM) tool first to ensure the backup cache is perfectly healthy.
To start, click your Windows Start button and type cmd into the search bar.
Right-click on the Command Prompt app and select Run as administrator. This process will absolutely not work if you skip this step.
Click Yes on the User Account Control prompt to allow the app to make changes.
In the black window, type the following command exactly as written and press Enter: DISM.exe /Online /Cleanup-image /Restorehealth
The tool will connect to the internet, download replacement files directly from Microsoft’s servers, and fix your local backup cache.
This usually takes about five to ten minutes. Once the progress bar hits 100 percent, you are officially ready to run the actual SFC scan.
How to Run the SFC /Scannow Command
Now that your system image is repaired, you can confidently run the System File Checker.
In that same elevated, Administrator Command Prompt window, type the following command and press Enter: sfc /scannow
The utility will immediately begin the verification phase of the system scan.
Do not close the black Command Prompt window until the verification reaches 100 percent.
Depending on the speed of your processor and hard drive, this can take anywhere from a few minutes to half an hour.
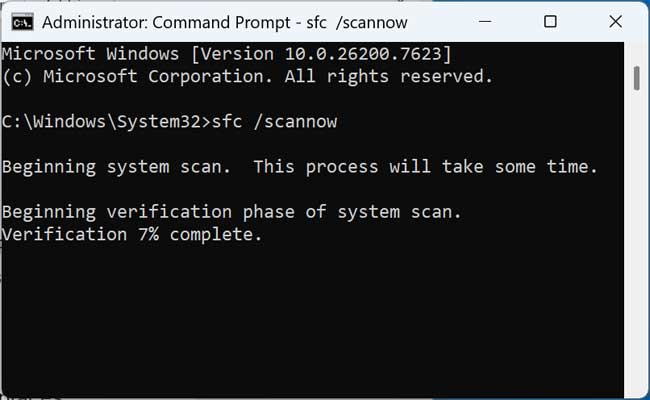
sfc /scannow command
t may ask you for your Windows installation media if it needs to pull any specific files off of it, so keep it handy just in case.
How to Read Your SFC Scan Results
Once the scan finishes, Windows will print one of four messages on your screen. Here is exactly what they mean and what you should do next:
“Windows Resource Protection did not find any integrity violations.”
This is the best-case scenario. It means all of your core Windows files are perfectly healthy. If your computer is still crashing, you now know the issue is hardware-related or caused by a third-party app, not Windows itself.
“Windows Resource Protection found corrupt files and successfully repaired them.”
The tool did its job! It found broken files and replaced them using the cache we repaired earlier with DISM. Restart your computer and see if your glitches are finally gone.
“Windows Resource Protection found corrupt files but was unable to fix some of them.”
This means the tool found a broken file but it was actively being used by Windows and couldn’t be overwritten. To fix this, you will need to reboot your computer into Safe Mode and run the sfc /scannow command again while the system is locked down.
“Windows Resource Protection could not perform the requested operation.”
An antivirus program or a severe hard drive error is actively blocking the scan. Try running the scan again in Safe Mode. If it still fails, your hard drive may be physically failing.
Viewing the SFC CBS.log File
If you want to dig deeper into exactly which files were repaired or failed to repair, Windows logs everything in a specific text file.
You can manually find this log by navigating to C:\Windows\Logs\CBS\CBS.log on your hard drive.
Because this file is filled with complex system data, you can use a quick command to extract just the SFC results right to your desktop.
Simply open Command Prompt as an administrator and run this command: findstr /c:”[SR]” %windir%\Logs\CBS\CBS.log > “%userprofile%\Desktop\sfcdetails.txt”
This will instantly generate a clean text file on your desktop showing exactly what the System File Checker accomplished behind the scenes.
Advanced SFC Command Switches
While /scannow is the only command 99 percent of users will ever need, the System File Checker does have a few advanced modifiers for specific troubleshooting scenarios.
sfc /verifyonly
This command scans all your protected system files but strictly refuses to make any changes. It is incredibly useful if you are a system administrator who just wants to check for corruption without accidentally overwriting customized core files.
sfc /scanfile=c:\path\to\file
Instead of scanning the entire operating system, this command allows you to target one specific file. This is incredibly fast if you already know exactly which .dll file is causing your system to crash.
sfc /offbootdir and /offwindir
These commands are used for offline repairs. If your computer is so broken that it cannot boot into Windows at all, you can boot from a USB recovery drive. You then use these switches to tell the Command Prompt exactly where your broken Windows hard drive is located so it can scan it from the outside.
Legacy Commands (Windows 7 and older)
If you are working on very old legacy machines, you might encounter outdated switches like /scanonce, /scanboot, /purgecache, or /cachesize=x.
These commands were used to manage the old Windows File Protection cache limits and schedule boot scans.
Microsoft fully deprecated these features in modern operating systems. This means typing them into Windows 10 or 11 will simply result in an error.


