Last Updated on May 24, 2026
Most of use have a printer or two attached to our computer at the home or at the office and there are many ways to connect to our computer. Many printers these days have wireless capabilities and of course you can use the go to USB connection for your printer. Then there are those who like to connect the printer using a network connection so it can be used by multiple computers at the same time.
HP (Hewlett Packard) is one of the largest printer manufacturers out there today and they offer a wide range or printers that utilize various types of connections. If you prefer to know the IP address of your printer so you can connect to it using that IP address whether its via Wi-Fi or Ethernet, we will show you how to configure your HP printer to use a static IP address in this article.

Before you get started with the configuration, you need to verify that your specific HP printer actually has the ability to connect over a network using an IP address. Oftentimes, you can simply print a network configuration page directly from the physical printer’s control panel to find out this information. You will also need to ensure that the printer is already configured on your local network as an Ethernet or Wi-Fi device, otherwise you might not see the correct menu options for the upcoming steps. (Note: As a quick update, you can also download and install the HP Smart app from the Microsoft Store to achieve this without manually hunting down the IP address, but the manual method below gives you much more control. Here is a video showing the process).
1. Access Printer Properties in Windows 11
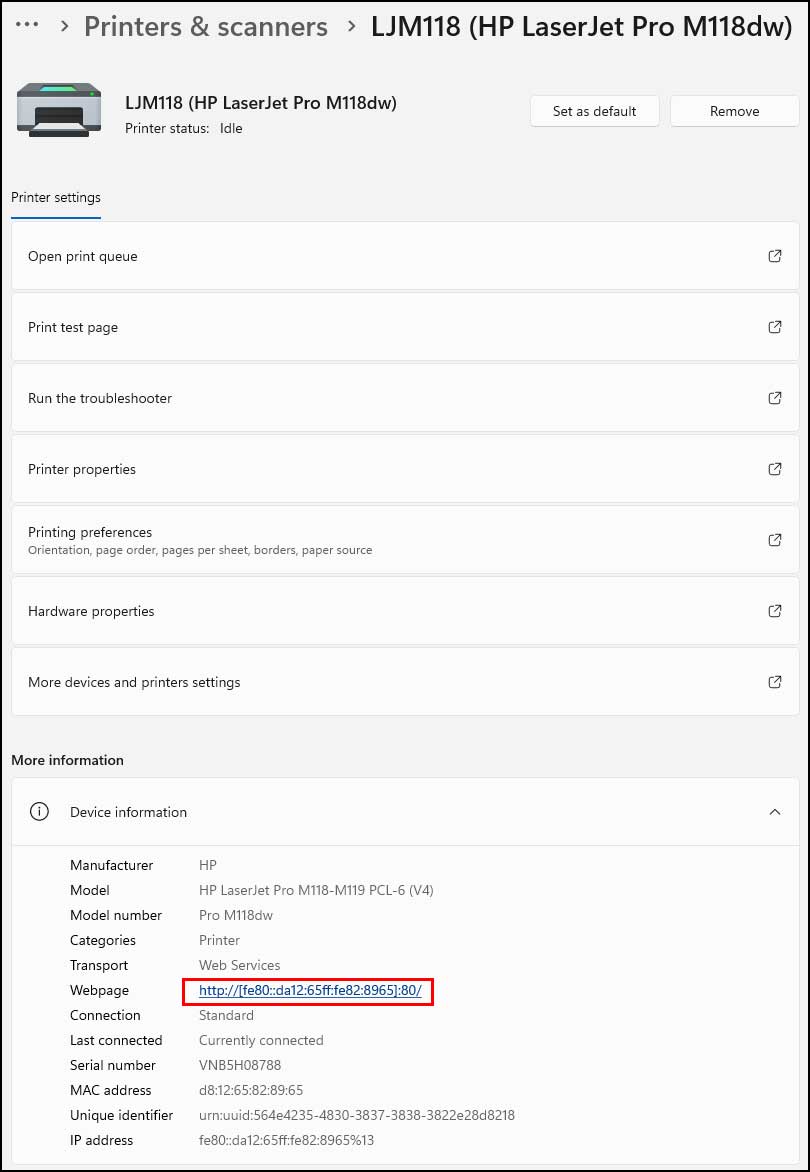
To start the static IP assignment process, you will first need to navigate over to the printer properties menu for your specific HP device. Depending on exactly what version of Windows you are currently running, the steps to reach this menu may vary slightly. If you are on Windows 11, you will likely need to open the Windows settings app, navigate under Bluetooth & Devices, select Printers & Scanners, and then click on the section named More Information to reveal the embedded web page address for your printer.
2. Locate Your Printer in Windows 10
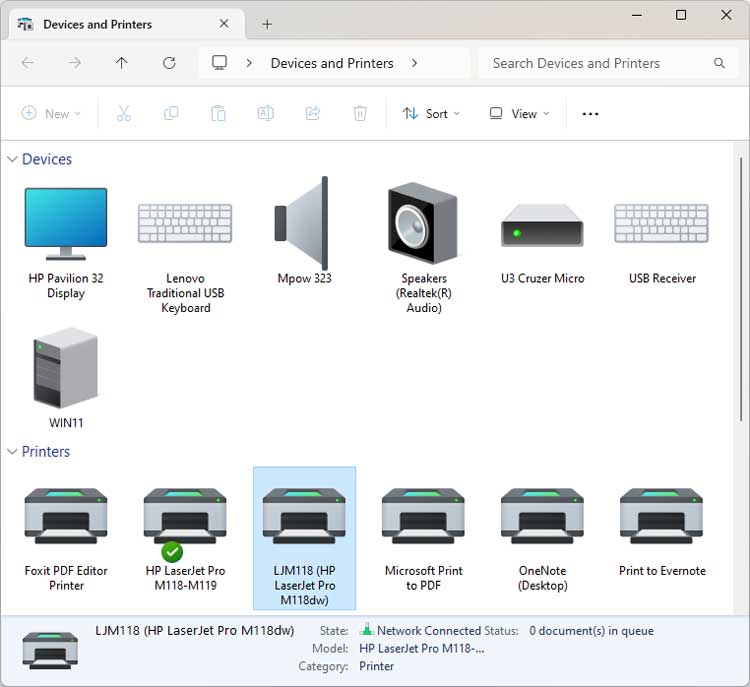
If you are using an older operating system like Windows 10, the process of finding your hardware is a bit more traditional. You can simply open up the classic Control Panel and navigate directly to the Devices and Printers section to view all connected hardware. From that available list, you should easily be able to locate your network or Wi-Fi connected printer alongside your other daily desktop accessories.
3. Open the Web Services Tab
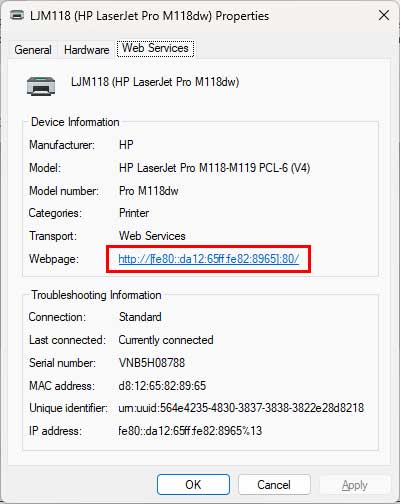
Once you have successfully located your target HP printer in the Windows 10 Devices and Printers list, go ahead and right-click on its icon. From the context menu that appears, choose the Properties option to bring up the advanced configuration window for that specific piece of hardware. Inside that properties window, you should see a dedicated Web Services tab that clearly displays the internal webpage address currently being used to access your printer.
4. Launch the Printer Configuration Page
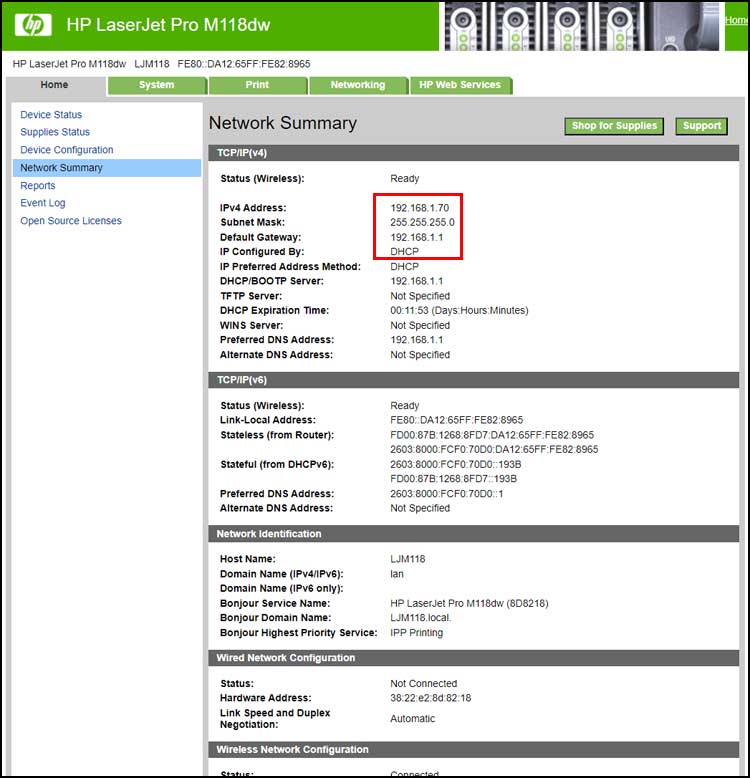
Now that you have found the correct webpage link inside the Web Services tab, go ahead and click on it to automatically launch your default web browser. This action will take you directly to the internal configuration web page screen hosted by your printer, where you can monitor things such as its current ink supplies status and overall device configuration. Specifically, you want to look closely at the Network Summary section, as this is where you can clearly see if your printer is currently set up to use a dynamic DHCP address or if it already has a static IP address assigned.
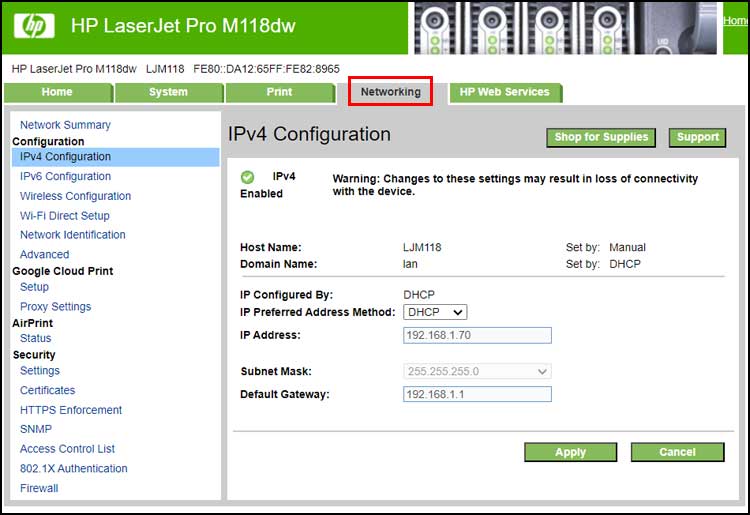
5. Navigate to the Networking Settings
To actually change your current network settings and permanently configure your HP printer to use a static IP address, you need to dive deeper into the web interface. Look toward the top navigation menu of the HP configuration page and click directly on the Networking tab to open the advanced routing options. This specific section houses all the critical IPv4 configuration settings that dictate exactly how your printer communicates with your local router.
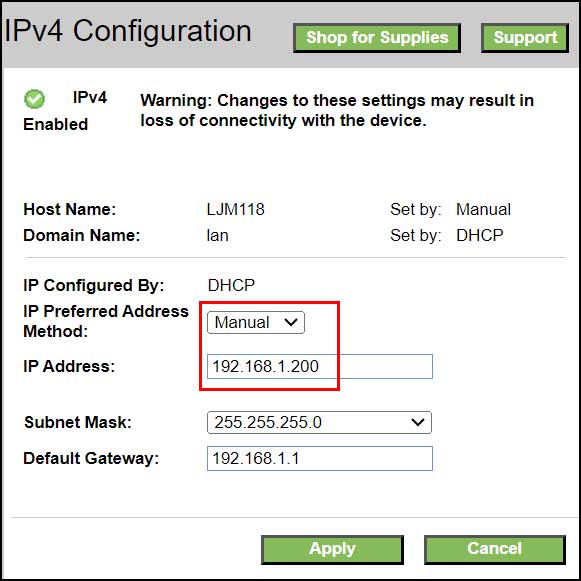
6. Switch from DHCP to Manual Input
Inside the IPv4 configuration menu, you will notice that the IP Preferred Address Method is likely defaulted to an automatic setting. To force the printer to keep the same address forever, you will need to change this specific dropdown menu from DHCP over to Manual. By making this switch, you are essentially telling the printer to stop asking the router for a random address and instead listen strictly to the custom parameters you are about to provide.
7. Assign Your New Static IP Address
With the manual option selected, you can now safely type a new IP address into the designated text box. It is crucial that you choose an IP address that is not already in use by another device on your network, while ensuring it still remains part of your router’s existing subnet range. For the vast majority of home and small office networks, you most likely do not want to change the default subnet mask or default gateway fields, so simply leave those exact numbers as they are.
8. Apply Changes and Reconnect
Once you have double-checked that your newly typed IP address is correct, scroll down and click the Apply button to officially save your custom settings. Because the network address has instantly changed, you will most likely lose your current browser connection to the HP configuration webpage, which is completely normal behavior.
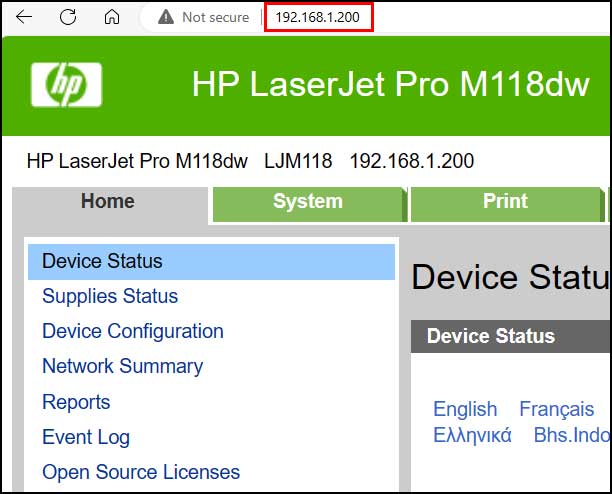
9. Verify Your New Static Connection
Now that the internal IP address has been successfully changed to your new static number (such as 192.168.1.200), you can manually type that exact sequence into the address bar of your web browser. Hitting enter should immediately reload the HP web interface, confirming that the printer is actively listening on its new permanent address. You can now reliably connect to your printer using its static IP address as needed, and you can easily repeat this exact same method for any future networking printers that you decide to install.
Now you can connect to your printer using its IP address as needed and use this method for future printers that you install. Here is a way to use the HP Smart app to view and change your HP printer’s IP address settings.
For additional training resources, check out our online IT training courses.
Check out our extensive IT book series.