
Last Updated on April 30, 2026
Installing a printer in Windows is usually a fairly simple process. Typically, you just connect your printer to your computer via a USB cable or link it to your wireless router with your SSID and password.
Some office environments might even use a dedicated network cable if the printer doesn’t have Wi-Fi. However, the traditional method where Windows automatically detects your printer and handles the installation often fails.
Requirements for IP Printing
In order to connect to a printer using its IP address, the device must be network-enabled. This means it either needs an RJ45 Ethernet port or built-in wireless (Wi-Fi) capabilities.
If the printer is only capable of a local USB connection, it won’t have an IP address assigned to it. In that case, you would need to share it from a host computer instead of connecting to it directly over the network.
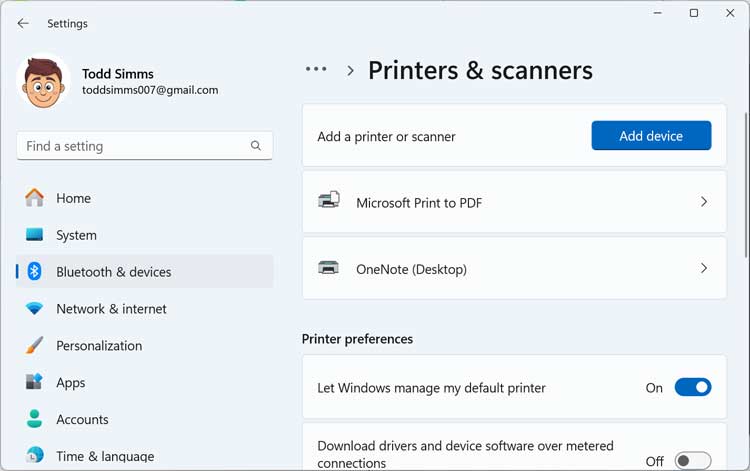
1. Open the Printers & Scanners Settings
To begin the process, you need to navigate to the modern Windows settings menu. Click on the Start button, select the gear icon for Settings, and then choose Bluetooth & devices followed by Printers & scanners.
2. Trigger the Manual Installation Link
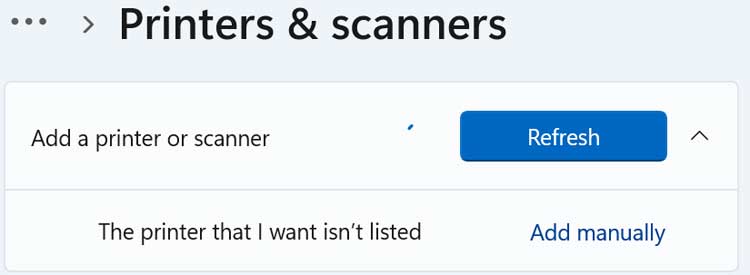
Once you are in the Printers & scanners section, you will see a prominent button that says “Add device.” Click this button to start the add printer wizard. Windows will attempt to scan your local network for any broadcasted printer signals.
3. Select the Manual Connection Option
If Windows cannot find your printer the standard way after a few moments of searching, a specific message will appear. It will say “The printer that I want isn’t listed,” and you will see an “Add manually” link right next to it. You must click this link to move into the advanced IP setup mode.
How to Find and Verify Your Printer’s IP Address
Before you can finish the manual setup, you need to know the actual IP address assigned to your hardware. The most common way to find this is to print a “Configuration Page” or “Network Status Report” directly from the printer’s own control panel.
This printout will have a dedicated network section where the IPv4 address is listed. Since every printer manufacturer uses a different menu system, you may need to look up the specific button combination for your model if it isn’t immediately obvious.
4. Run a Ping Test to Confirm Connectivity
Once you find the IP address of your printer, you can open a command prompt on your PC and try to “ping” it. This ensures that your computer has a solid working connection to your printer over your local router.
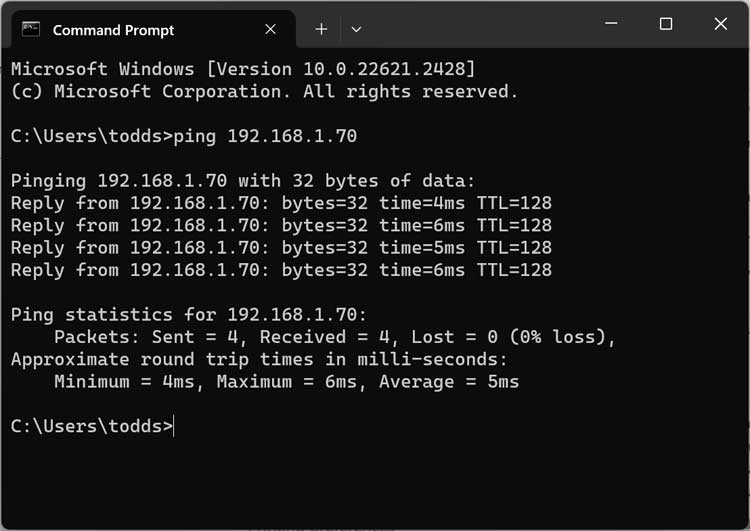
If the ping test is successful, you will see four replies with very low latency. If you cannot ping your printer, that might be an indication of a firewall blockage or a Wi-Fi disconnect that will involve some further troubleshooting on your part.
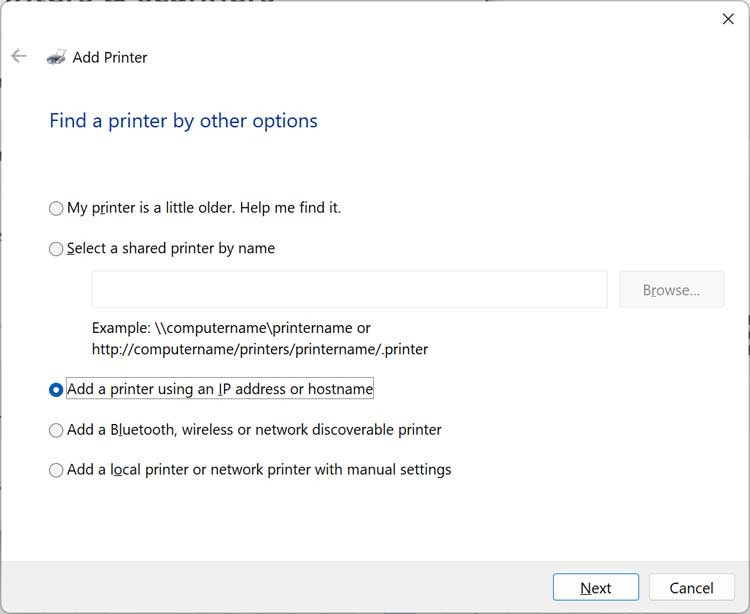
5. Choose the IP Address Setup Method
Once you are able to ping your printer successfully, return to the “Add Printer” wizard that you opened earlier. You will see several radio buttons on the screen. Select the option that says Add a printer using an IP address or hostname and click the Next button.
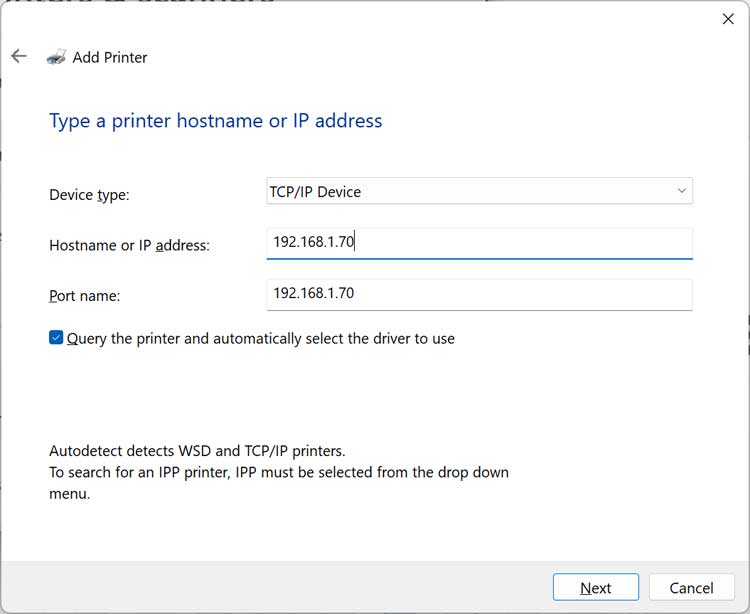
6. Enter the Hardware IP Address
On the next screen, you will need to type in the IP address of your printer in the “Hostname or IP address” box. Windows is smart enough to fill in the “Port name” box with the exact same information automatically as you type.
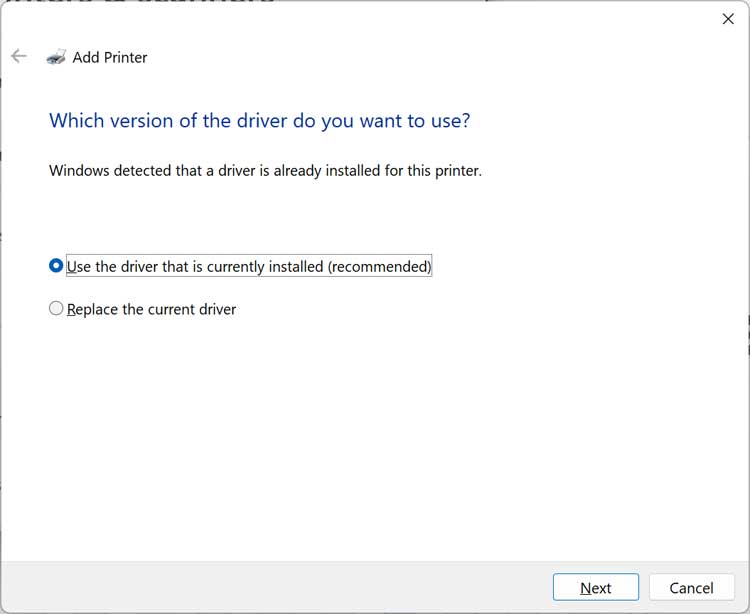
7. Select the Printer Driver Version
If you have had this specific printer installed on this computer before, you might get a screen asking about the driver. It will ask if you want to use the currently installed driver or replace it with a fresh one. For the most part, using the currently installed driver option should work fine and save you time.
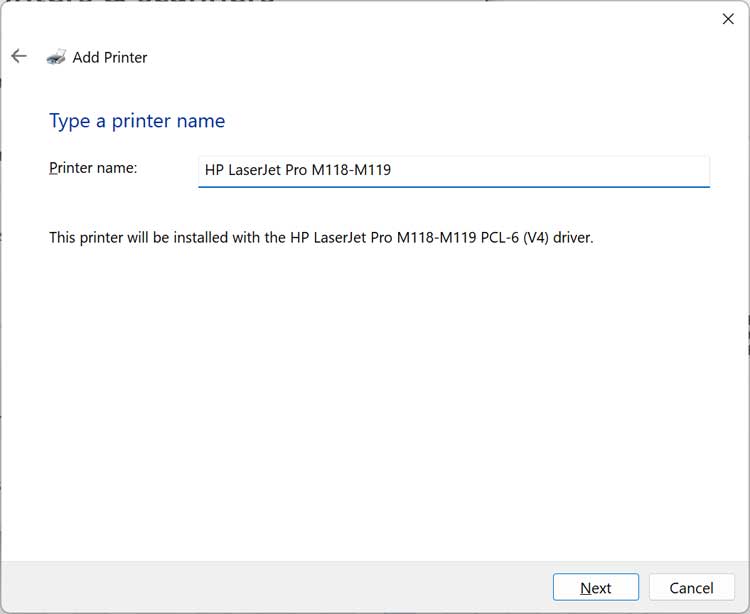
8. Assign a Name to the Device
You will then be shown a printer name based on the driver you selected, which usually includes the manufacturer and model series. You can keep this default name, or you can change it to something more personal if you have multiple printers in your home or office.
9. Finalize the Installation Status
After you click next, you will see the printer installation status in a new window with a progress bar. Windows is now creating a virtual TCP/IP port and linking it to the system spooler. This process usually finishes in just a few seconds.

10. Configure Printer Sharing Settings
After the printer is successfully installed, you will be given the option to share the printer on your local network. If you choose this option, other computers in your house will be able to print to this printer, but only if your computer is currently turned on.

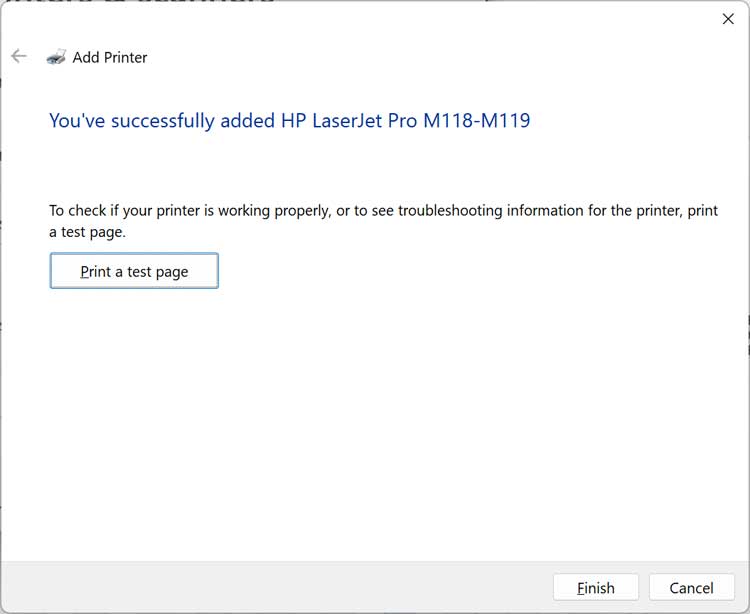
11. Print a Test Page
Finally, you will be given the option to print a test page to make sure your printer is functioning properly. I highly recommend clicking this button before you close the wizard. It is the only way to be 100% sure the IP address and the driver are communicating correctly.
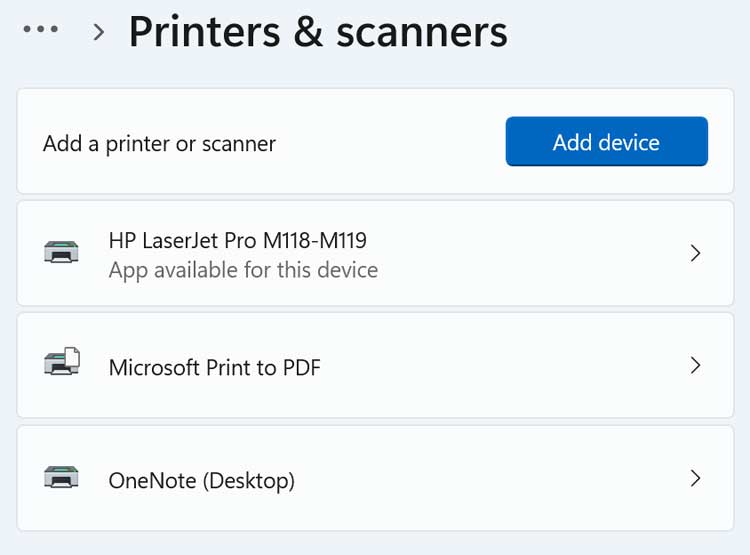
Verifying Your New IP Port
Once the wizard closes, you should see the printer listed in your Printers & scanner section. You can click on the printer’s icon to see more details and ensure that the status is listed as “Ready” or “Online.”
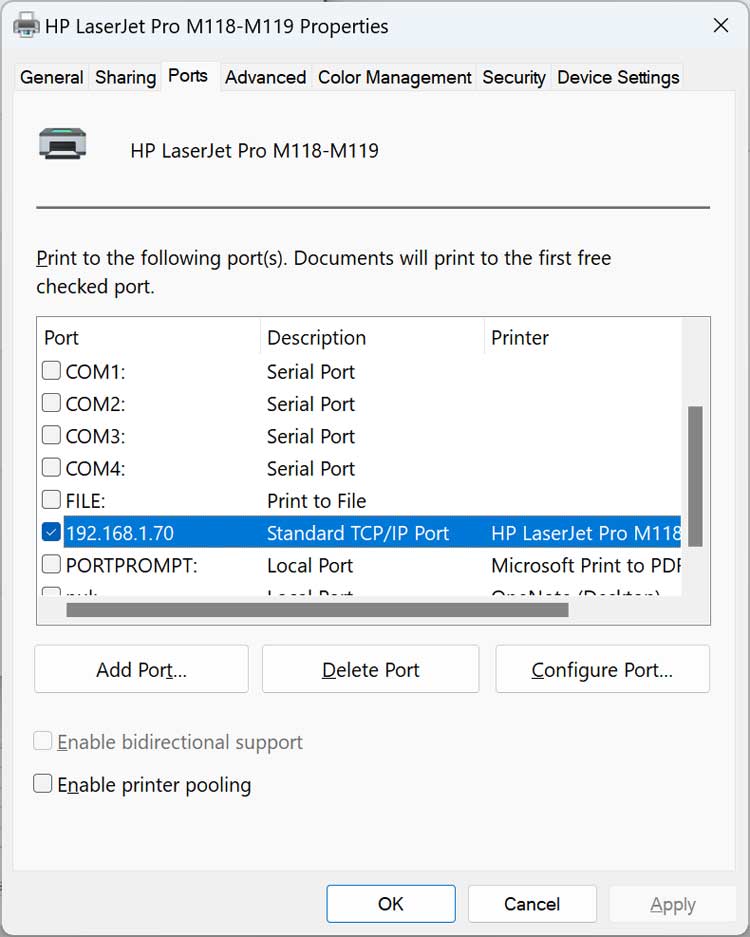
If you want to see the technical details of the new port, you can go to the printer properties and then click on the Ports tab. You should see the specific IP address that you added in the printer setup shown as the connected port for that device.
Here is a video on how to install a printer using its IP address in Windows 10.
For additional training resources, check out our online IT training courses.
Check out our extensive IT book series.


