Backing up your computer is one of the most important tasks you can perform on your computer. If your computer ever crashes or you delete some important data, you will need these backups to get you up and running again. Generally, there are two types of backups you can perform. File and folder backups and system image backups.
System image backups are used to make a backup of your entire Windows drive including the OS itself, your programs and your applications. It’s similar to cloning a drive but is not meant to be used as a replacement for another drive or to be used in a different computer like a clone would be.

Windows 11 has its own built in system image backup tool, but it does not have all the bells and whistles like many of the third-party backup apps have. When it comes to these other backup applications, you have many to choose from. In this article, we will be showing you how to create windows system image backups for emergency PC recovery using the free Lazesoft Recovery Suite Home Edition. You can download the software from their website.
Creating a System Image Backup Job
After you download and run Lazesoft Recovery Suite, you can then go to the System Backup section to configure your backup job.
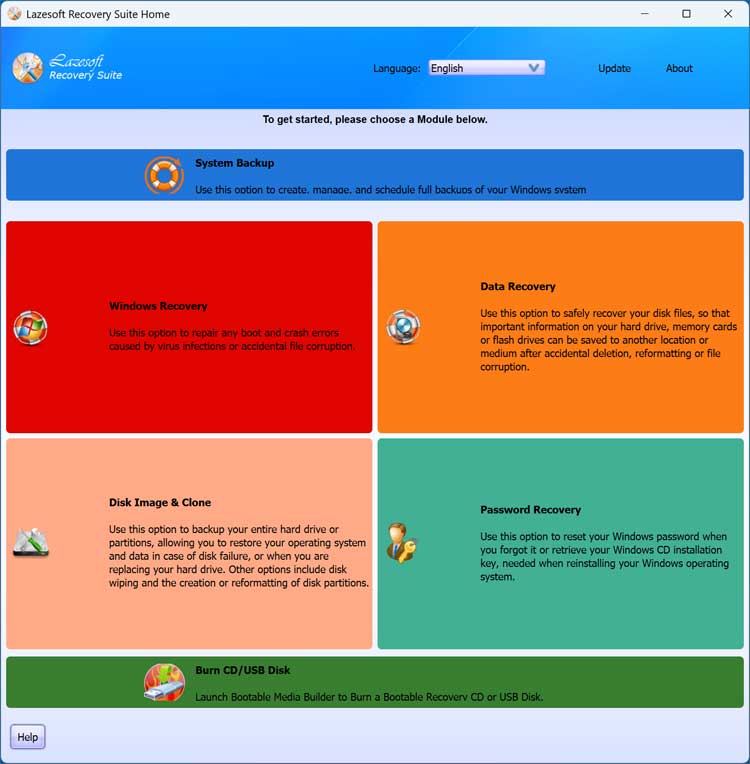
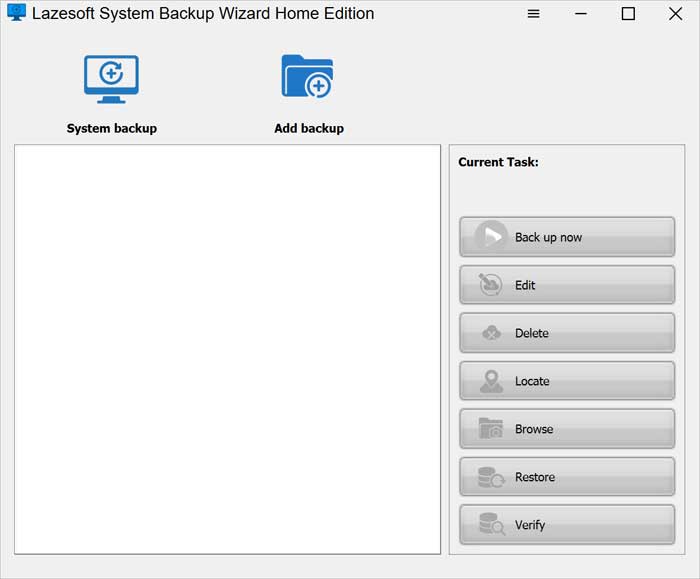
The first time your run the backup tool, you will see that you have the option to create a backup job (System backup) or add an existing job that you have run in the past. We will click on the System backup option to configure our first job.
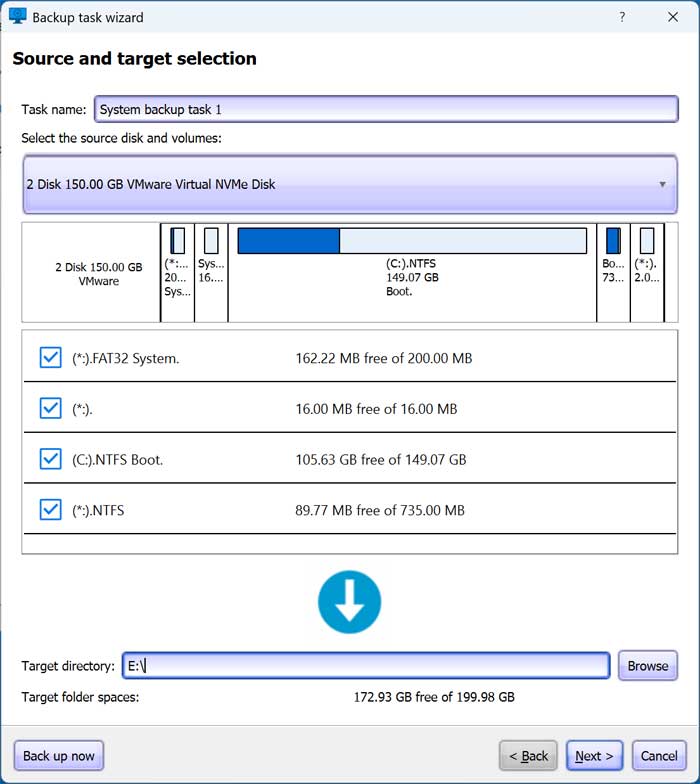
We will then choose the hard drive that has Windows installed on it from the dropdown list. We will also be sure that all the partitions are checked, which should already be selected by default.
In the target directory box, you can choose the location where the backup will be created. Be sure not to place the backup on the same drive that has Windows installed since during the restore process, the Windows drive will be overwritten, and you can restore to a drive that contains your backup if you are restoring that particular backup.
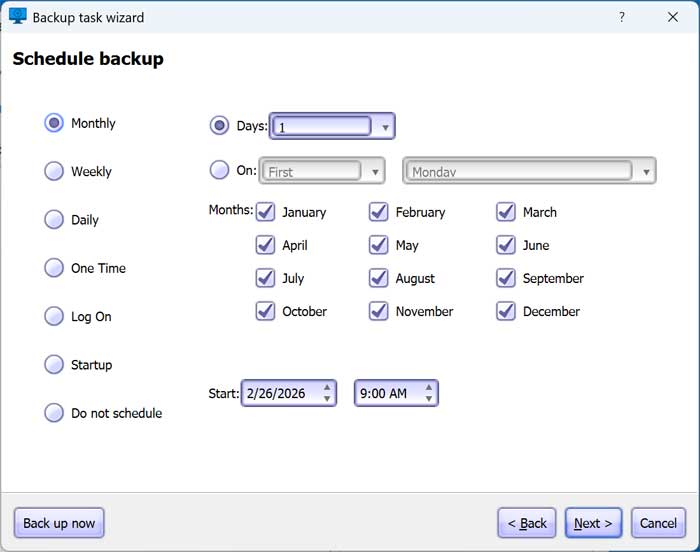
In the schedule backup section, we can then choose to have the backup run monthly, weekly, daily or once at a specific date and time. It can also be run when a particular user logs in or when the computer starts up. Or if you just want to back it up one time now, you can choose the do not schedule option.
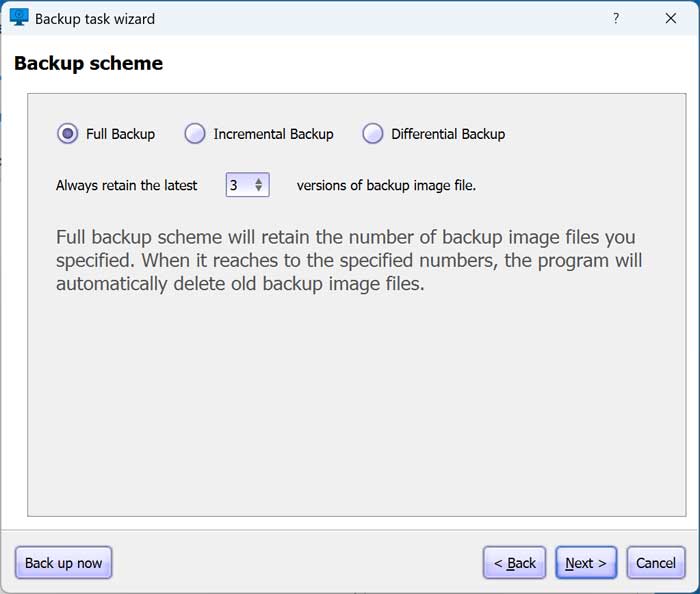
Since this is our first backup, we will need to run a full backup. Then we can configure incremental or differential backups to run later as needed. An incremental backup saves only the files that changed since your last backup of any kind, keeping each step as small and fast as possible. A differential backup saves all changes made since the most recent full backup, growing larger over time but restoring more quickly. You can also configure how many backups are kept before the oldest ones are overwritten to reclaim disk space.
The next section is where you can configure many different options for your backup job.
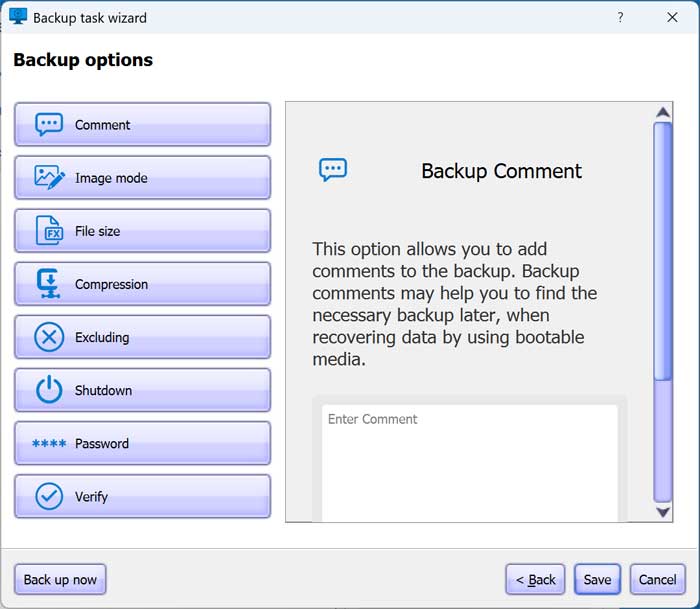
- Comment – Add a note to the job.
- Image mode – Here you can have the backup job copy only used sectors or all sectors.
- File size – If you want your backup file split into multiple files, you can configure this here.
- Compression – This is used to reduce the size of the backup file but can make the backup job take longer at the same time.
- Excluding – Here you can configure the backup job to exclude the Windows page file and hibernation file.
- Shutdown – If you want the computer to be shutdown after the job is run, you can configure this here.
- Password – You can add a password to or even encrypt your backup file.
- Verify – If you want your backup job to be verified for integrity, you can do that here but expect the backup process to take longer.
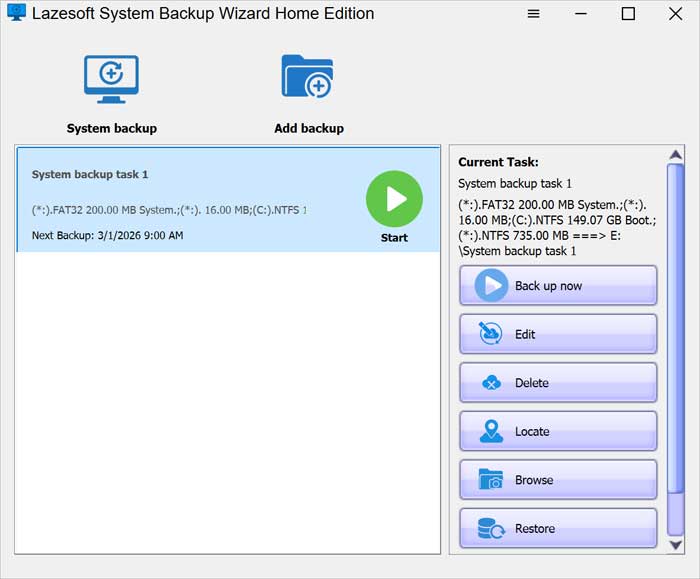
Now that the backup job is configured and in our list, we can simply click the Start button to begin the backup procedure. How long this process takes will depend on the speed of your drives and how much data you are backing up.
Restoring a System Image Backup Job
In order to restore your system image backup, you will need to boot your computer using the Lazesoft bootable media that you can create from the main Lazesoft Recovery app. To see how this is done, refer to the video at the top of this page.
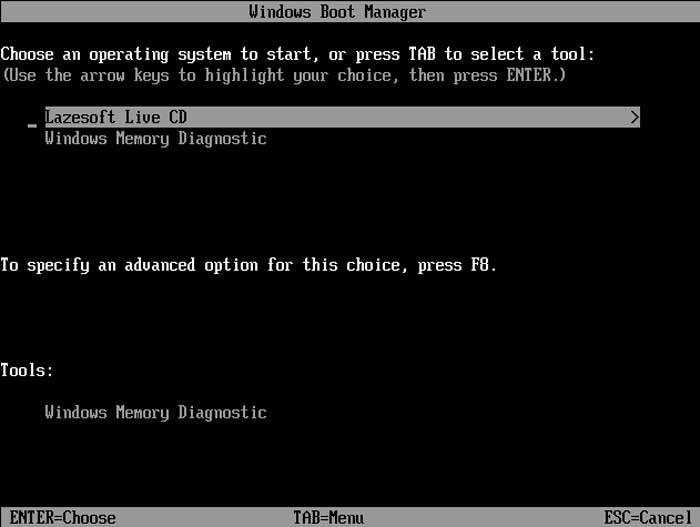
Once you boot to the Lazesoft recovery media, you will then need to select the Lazesoft Live CD option. You can also run the Windows Memory Diagnostic tool from here if needed.
Once the Lazesoft software loads, you can then go back to the System Backup section just like you did for the backup process.
We will now click the Add backup button and browse to the location of the backup job file on our hard drive.

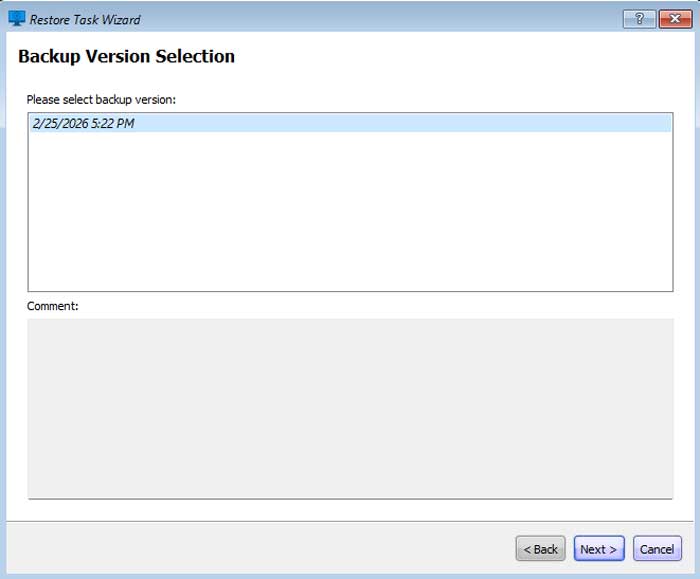
Since we only have one instance of this backup, we will choose the version from the list.
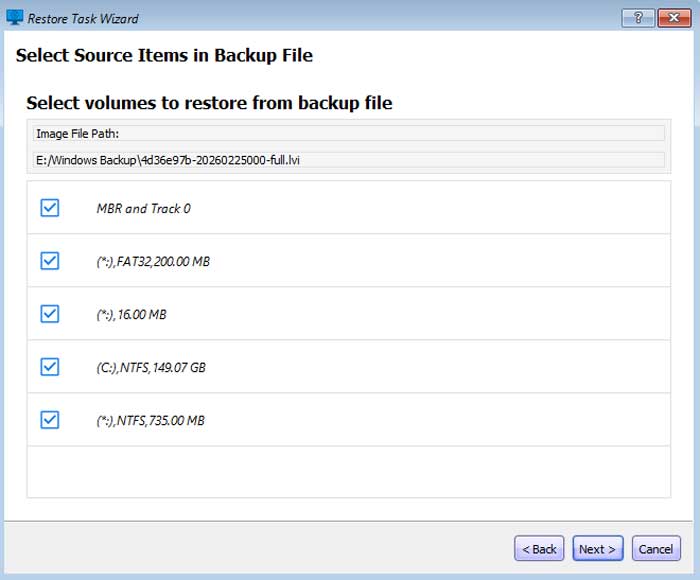
The image file path should match the location of your backup image file. It should also show you the Windows partitions contained within your backup file.
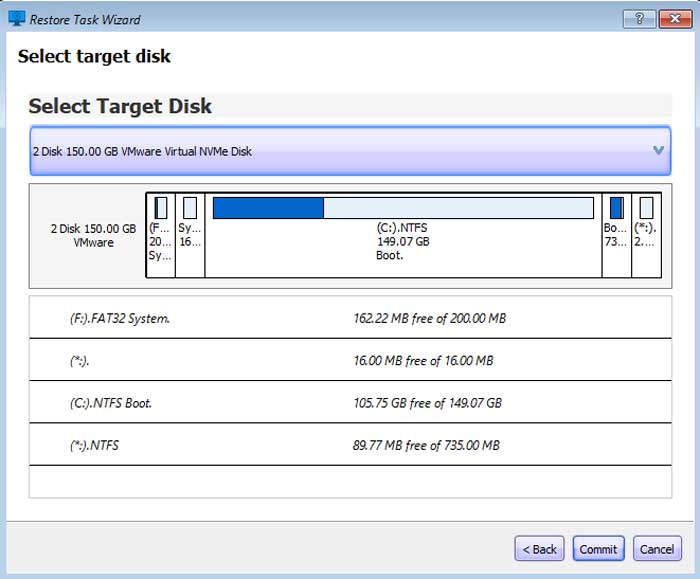
Next, we will select the target disk which will be our Windows C drive since we are restoring Windows over the current version of Windows we have installed.
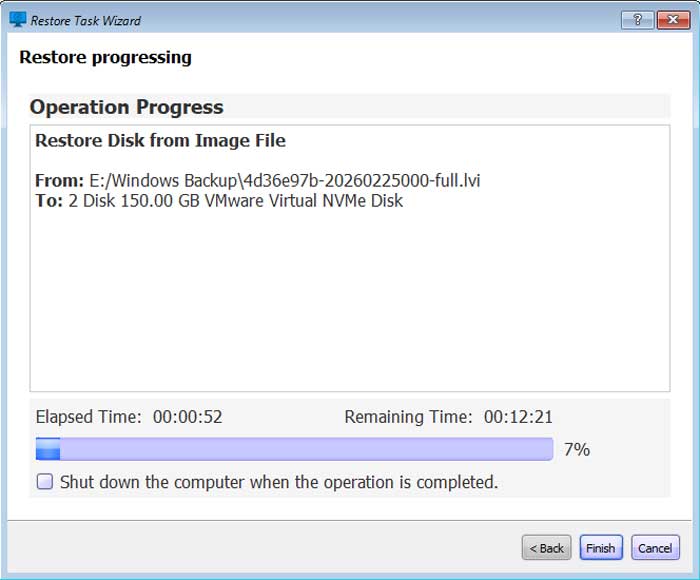
The restore process will take several minutes but probably not as long as the backup process.
When the restore process is complete, you can close out of Lazesoft and there will be a start button you can click on to restart or shutdown the computer. You should then reboot to make sure that the restore process has completed successfully.
For additional training resources, check out our online IT training courses.
Check out our extensive IT book series.