
Last Updated on March 13, 2026
As you probably (or should) know, backing up your computer is critical to avoid data loss from things such as hardware failures, file corruption and viruses. So if you are not backing up your computer on a regular basis, its time to start doing so now! There are many apps you can use for backups and you can backup individual files such as Windows File History or you can also create a system image to backup your operating system, programs and files.
The process for creating and system image backup is different than file level backups because it’s a manual process compared to the file level backup which can be automated or scheduled. In this article, we will be showing you how to create and restore a PC system image in Windows 11. This process will also work for Windows 10. By doing this, you can have a complete backup of your entire computer that can then be restored if something catastrophic happens.

One important thing to remember about system image backups is that they can only be used to restore your computer to the date and time that the image was taken. So if you use one to restore your computer, any files you added or changed since the backup image was taken will be lost. Fortunately, you can create multiple backup images to keep them as updated as possible if you have the hard drive space to do so.
Creating the PC System Image in Windows
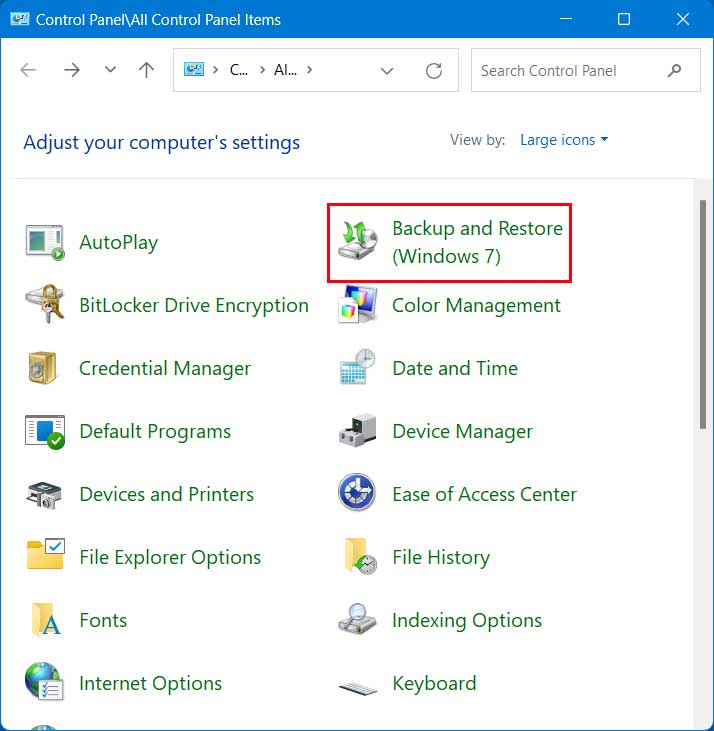
1. Open Backup and Restore (Windows 7)
There are many programs out there that you can use to create a Windows system image, but we will be using the app that comes built right into Windows. This native tool has been around since Windows 7 and remains incredibly reliable today. In fact, it is actually called Backup and Restore (Windows 7) and can be found directly in the legacy Windows Control Panel.
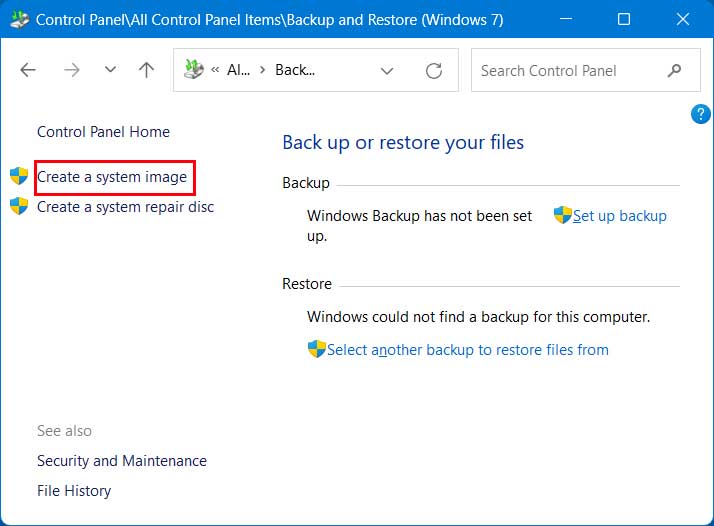
2. Select the System Image Option
Once you open the program you will have options to perform file backups, create a system repair disk or create a system image. You will want to select the option to create a system image from the left side navigation pane. You can even open the File History tool from here if you need to manage individual document backups.
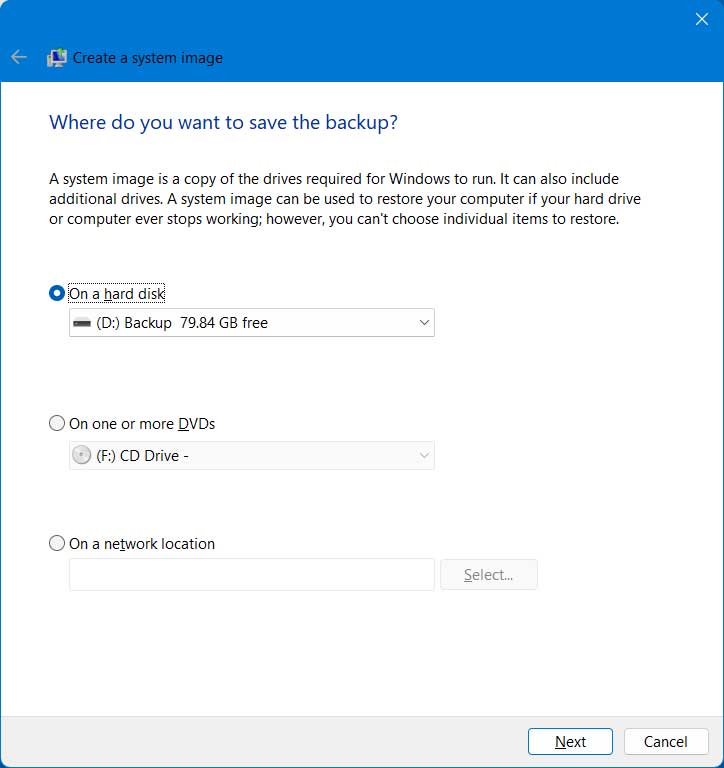
3. Choose Your Backup Location
You will then need to select the backup location and this will need to be on a completely different hard drive than where Windows is installed. You also have the option to burn the image to a DVD. This will most likely require several blank DVDs since Windows takes up much more space these days than it did with older versions. You can also use a network location if you have some space available on a mapped network drive.
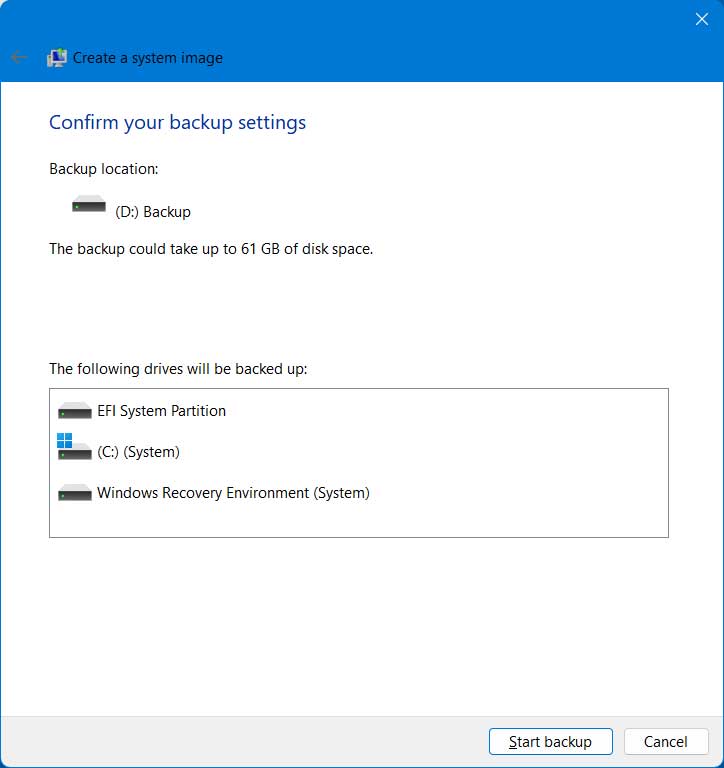
4. Confirm Your Backup Settings
Once you choose your location and click the Next button, you will be asked to confirm your specific storage choices. As you can see in the image below, our backup will be taking 61GB of space on the external backup drive. And since a standard DVD holds 4.7GB, that would be quite a few physical discs to burn through!
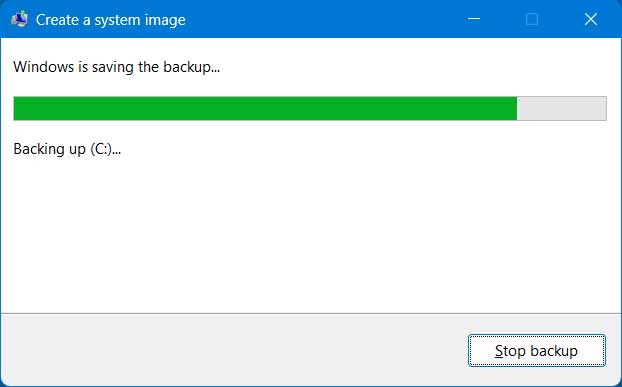
5. Start the Backup Process
Once you click the Start backup button, the background process will begin immediately. This procedure will take several minutes to complete depending on the speed of your hard drive. The backup will be stored safely in a folder called WindowsImageBackup directly on the root of your target backup drive.
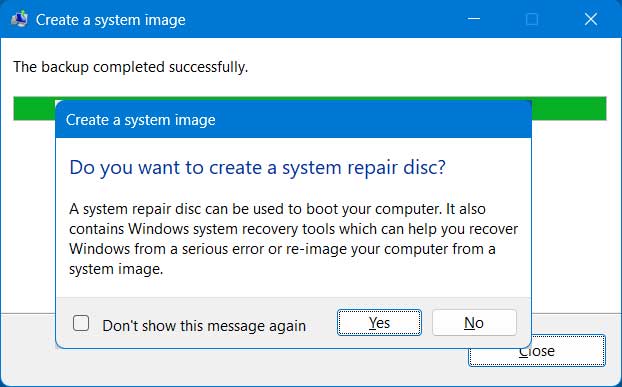
6. Create a System Repair Disk
When the process is complete, you will be asked if you want to create a system repair disk. This is used to boot your computer with if Windows will not load so you can start the image recovery process. You can also use a Windows 11 installation USB drive if you already have one handy. If not, you can download the media creation tool from the Microsoft website.
Restoring Your PC With Your System Image
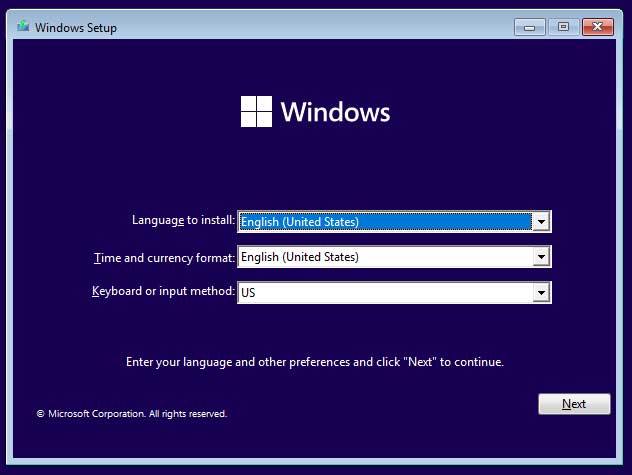
1. Boot From Your Recovery Media
To restore your Windows system image, you will need to boot your computer with the system repair disk you created in the last step. You can use a bootable flash drive to trigger the recovery environment. For our example, we will use a Windows 11 bootable disk to start the process. When using this method, you will see the typical Windows installation screen and you will need to click Next at the first prompt.
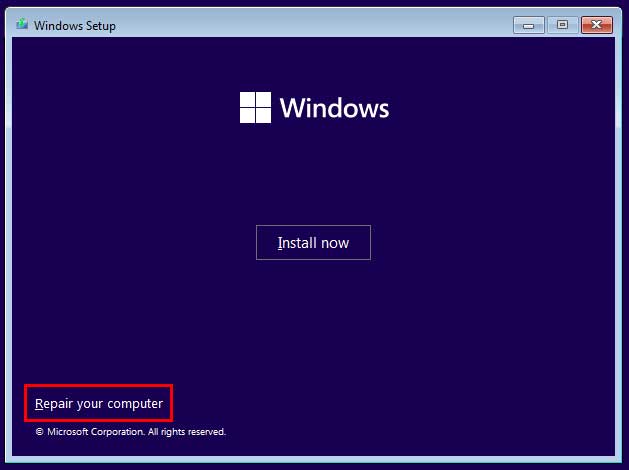
2. Access the Repair Options
On the very next screen you will need to click on the Repair your computer link. This specific text link is located in the lower left hand corner of the setup window. Clicking this bypasses the standard installation and opens the advanced recovery tools.
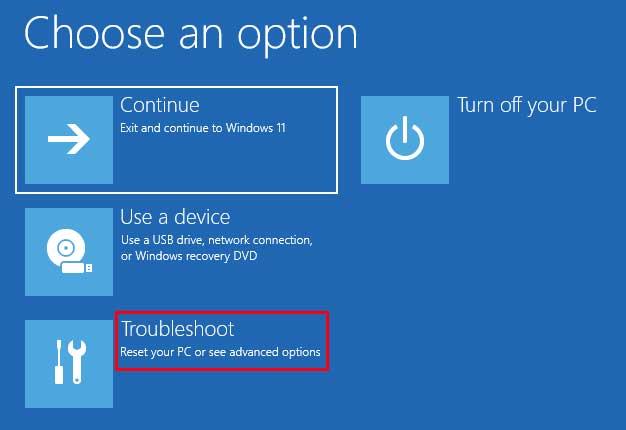
3. Select the Troubleshoot Menu
Windows will then load the blue recovery options screen. You will then click on the Troubleshoot block to view the advanced system recovery choices. This menu contains all the tools needed to fix a broken operating system.
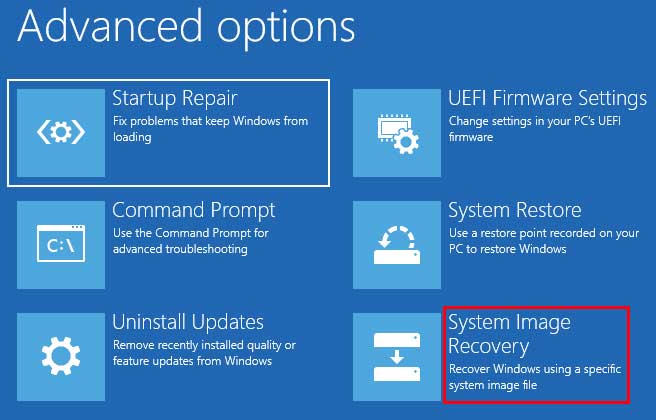
4. Launch System Image Recovery
Next, you will click on the System Image Recovery option. This tells the computer to look for the specific WindowsImageBackup folder we generated earlier. It will scan all connected drives to locate the necessary recovery files.
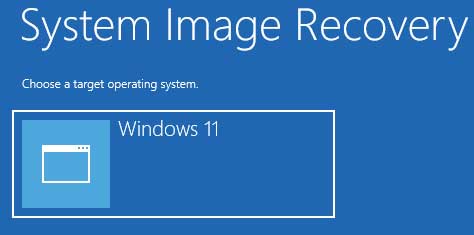
5. Choose the Target Operating System
You should then see Windows 11 listed as your target operating system. If you are using an older machine, this might display Windows 10 instead. You will need to click on the target operating system block to continue with the restoration.
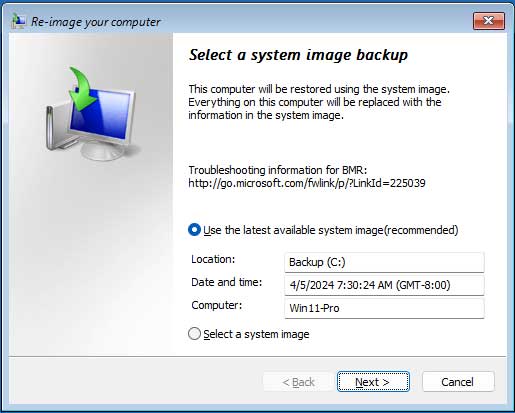
6. Select Your Specific Image Backup
If you only have one system image backup or want to use the most recent image, you can stick with the default option as seen in the image below. If you want to restore an older image, you can choose the Select a system image option to manually browse for it. Do not get confused because it is showing the location as being on your C drive. The drive letters often shift around in the recovery environment.
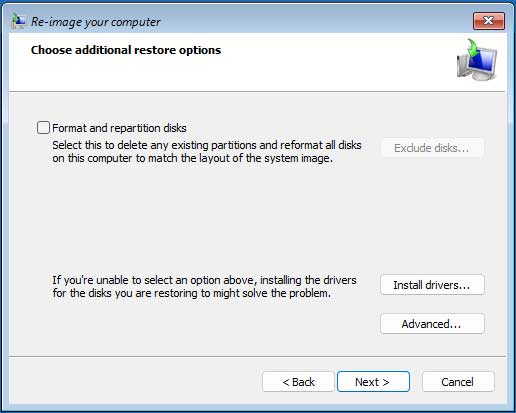
7. Configure Additional Restore Options
Once you click Next, you will have some additional options such as reformatting your disks or installing additional storage drives. For most standard recovery cases, you just click the Next button to continue without changing these checkboxes. Only reformat the disks if you are installing a brand new blank hard drive.
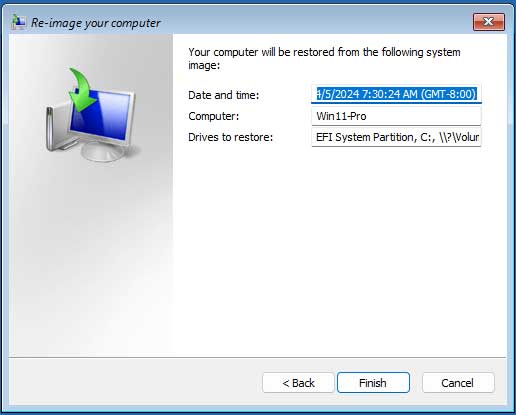
8. Review the Final Summary
You will then be shown some specific details about the image you will be restoring. Review the date, time, and target drives to ensure everything is absolutely correct. You can click the Finish button to continue once you verify this information.
9. Accept the Data Replacement Warning
You will then be shown a critical warning screen. This prompt tells you that all of the data on the drive that you are restoring the image to will be completely replaced by the data from the backup image itself. Anything saved after that backup date will be destroyed.

10. Complete the Restoration
Once you click on Yes, the restore process will begin immediately. If everything works out correctly, Windows will be started automatically. Your computer will be restored perfectly to the exact point in time when you made the backup image.
Check out our extensive reviews of various computer backup applications.
For additional training resources, check out our online IT training courses.
Check out our extensive IT book series.


