Last Updated on September 20, 2026
As Microsoft releases new versions of Windows, they usually change the way the user interface looks to justify calling it “updated”. But many times, these changes are not what users want to see and many of us like to stick with tried and true features that have always worked for us. When Windows 11 came out, Microsoft changed the start menu once again. Most people think it’s better than what we had with Windows 10 but still not as good as the simpler Windows XP and Windows 7 versions.
Thankfully, there are always developers out there willing to put in the time to make apps or fixes that restore the functionality that we never wanted to go away. And this applies to the Windows start menu. In this article, we will be showing you how to bring back the Windows 7 or classic style start menu to Windows 11 with Open Shell. This app will also work well with Windows 10, and in some cases even better. The Open Shell app has been around for years and used to be called Classic Shell but that was discontinued back in 2017. Then some other developers took it over and renamed it Open Shell.

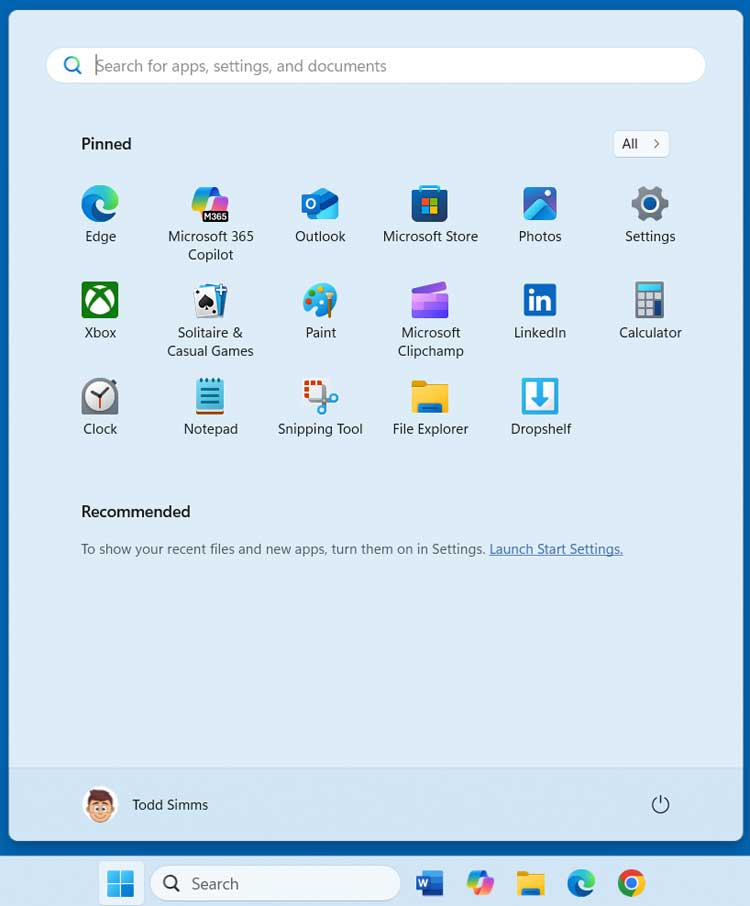
The image below shows the default Windows 11 start menu. You have your pinned apps on the top and any recommended files at the bottom (which can be disabled). Then you have a search box at the top that can be used to search for apps and other things. The All button will then open up your main program list where all your apps will be listed in alphabetical order.
Install and Configure Open Shell
1. Download the Application
To use Open Shell, you can download it for free on their GitHub page here. Then all you need to do is install it just like any other app. The setup wizard walks you through the entire process in just a few clicks.
2. Choose a Start Menu Style
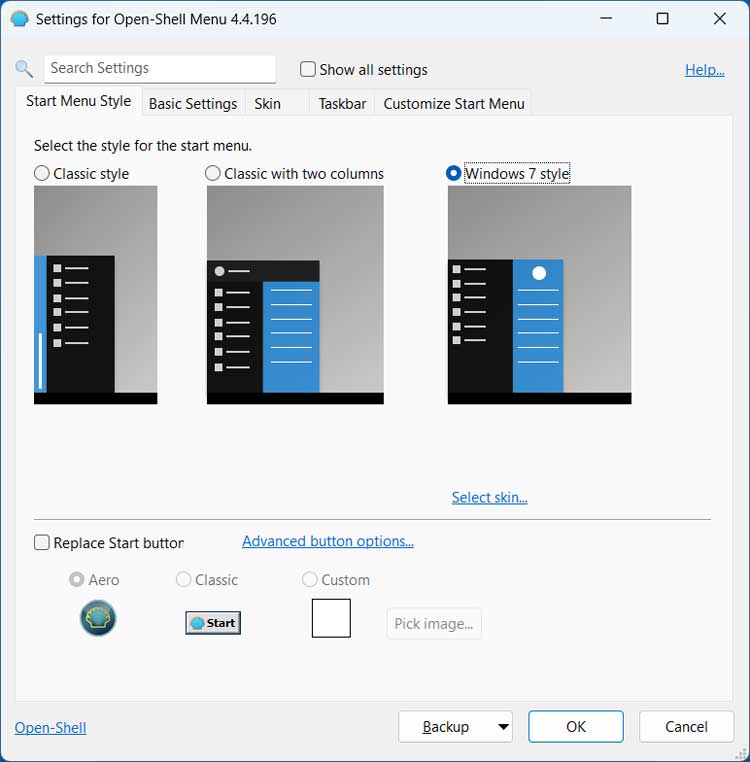
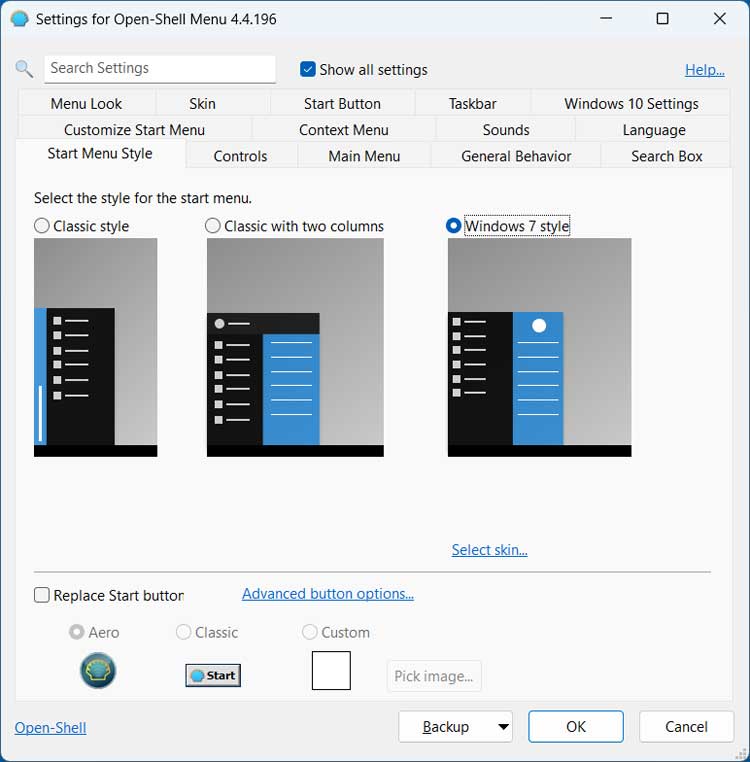
Once it is installed you can click on your start button. You will instantly be prompted to choose a start menu style for the initial configuration. You can always come back later and change this if you want to try something different. You can also change your start button if desired and add your own by using a custom image file.
3. Modify Basic Settings
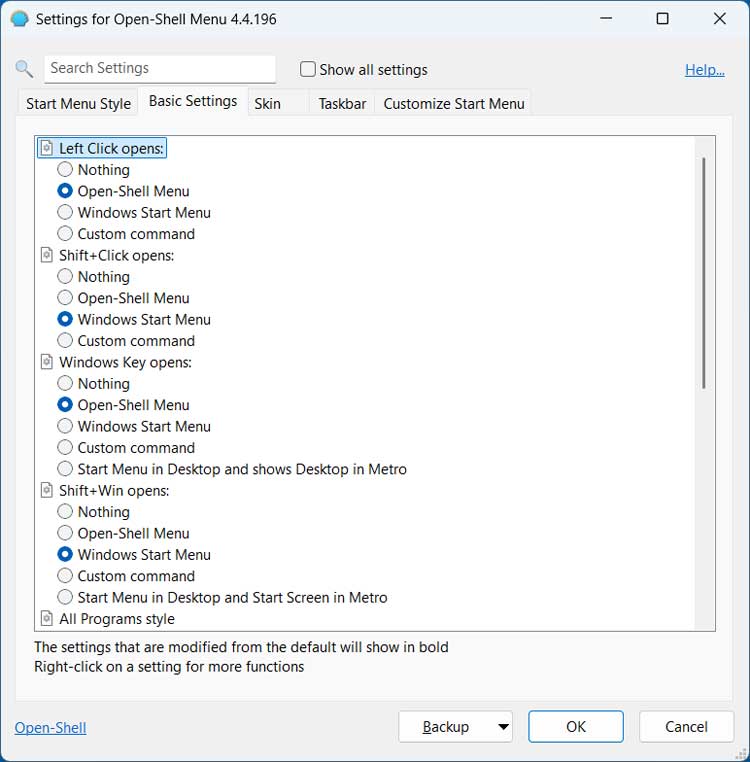
At the top there are several tabs that have additional settings you can configure. One thing to keep in mind when it comes to changing settings with Open Shell is that you may run into a situation where something is blocked by Windows. Sometimes the change does not actually do anything because of strict system policies. The Basic Settings tab has options for things such as what happens when you click the start button or use the Windows key on your keyboard. You can even do things such as change what the Shut down button does or hide it altogether.
4. Apply a Custom Skin
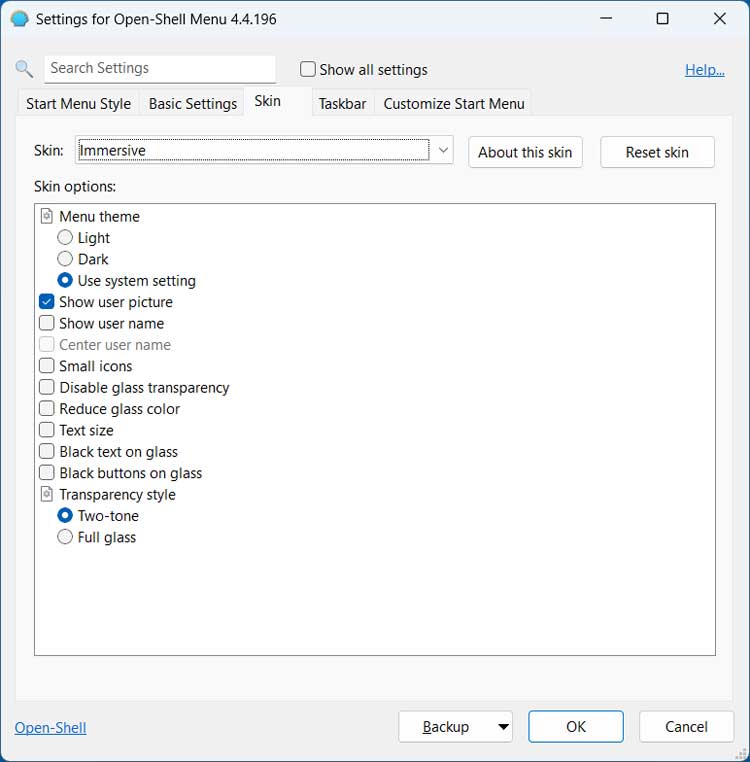
The Skin tab has appearance settings for the start menu. You can easily apply a completely new theme or hide your user picture. This helps you match the exact look of older Windows operating systems.
5. Customize the Taskbar
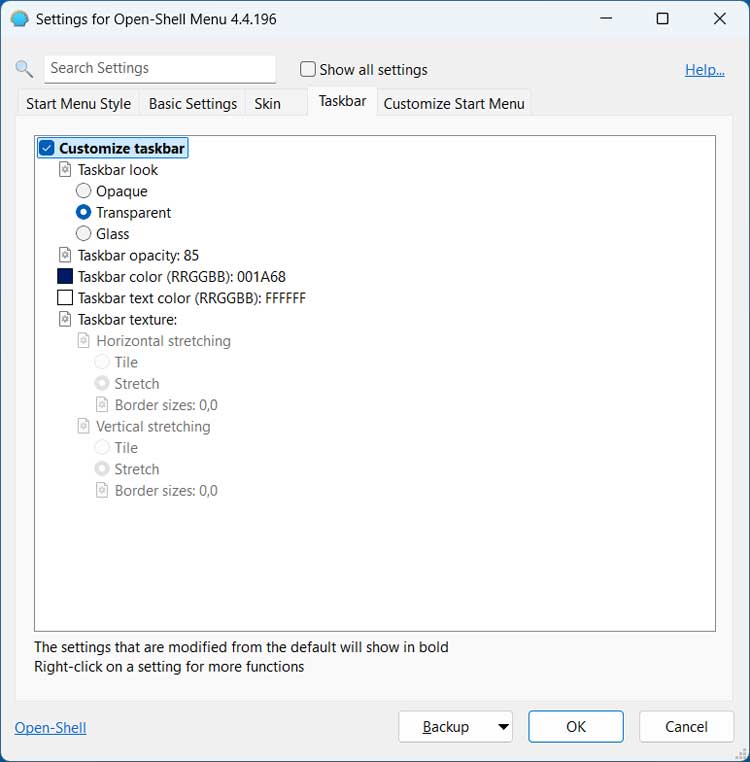
The Taskbar tab is used to customize the Windows taskbar. For the most part these specific options will not do anything on modern builds. If you use another customization app such as ExplorerPatcher or StartAllBack along with Classic Shell, you should have better luck with many of these settings.
6. Edit Start Menu Items
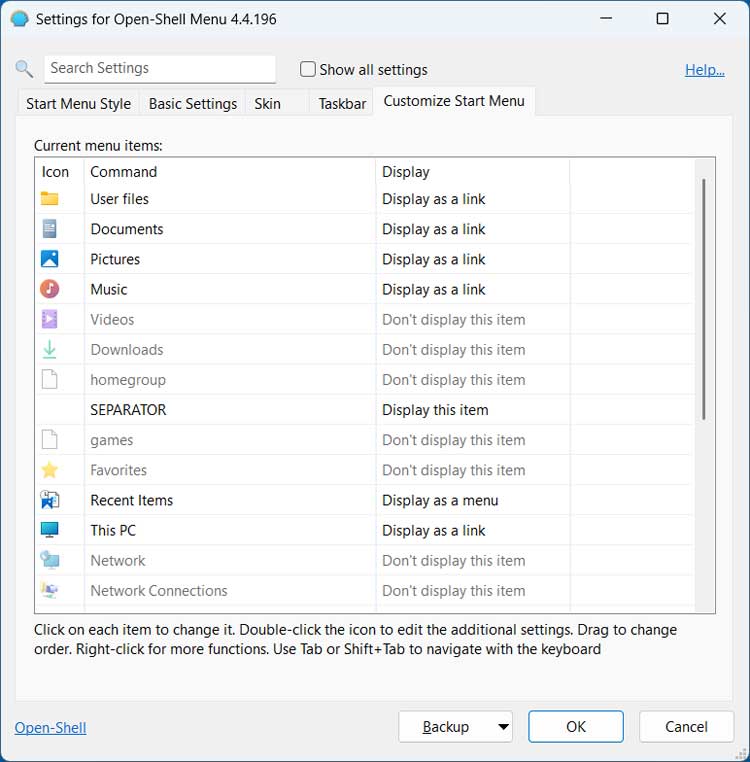
The Customize Start Menu tab has many options as to how your start menu actually works. You can do things such as show or hide certain items. You can also have the items displayed as clickable links instead of expanding menus.
7. Reveal Advanced Settings
If you click the Show all settings checkbox, you will see many more tabs. These contain even more options that you can use to thoroughly configure your start menu. We will not be going over all these extra tabs today. You can check them out yourself after you install Open Shell.
8. Test Your New Start Menu
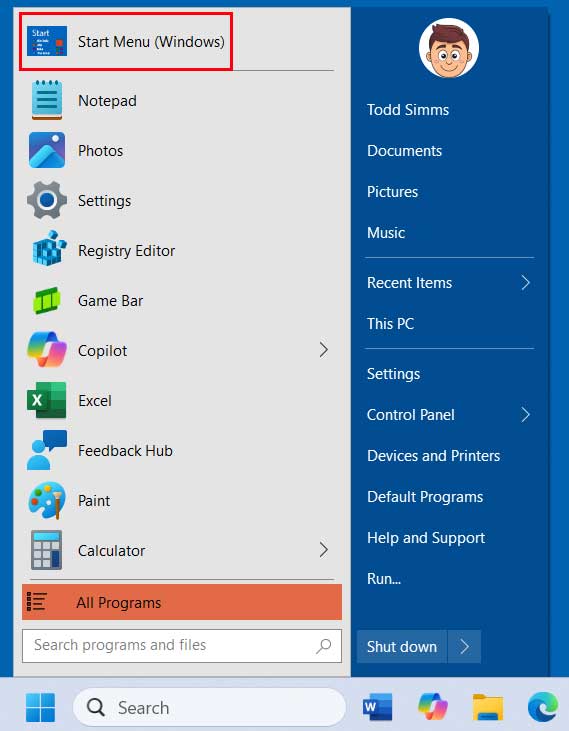
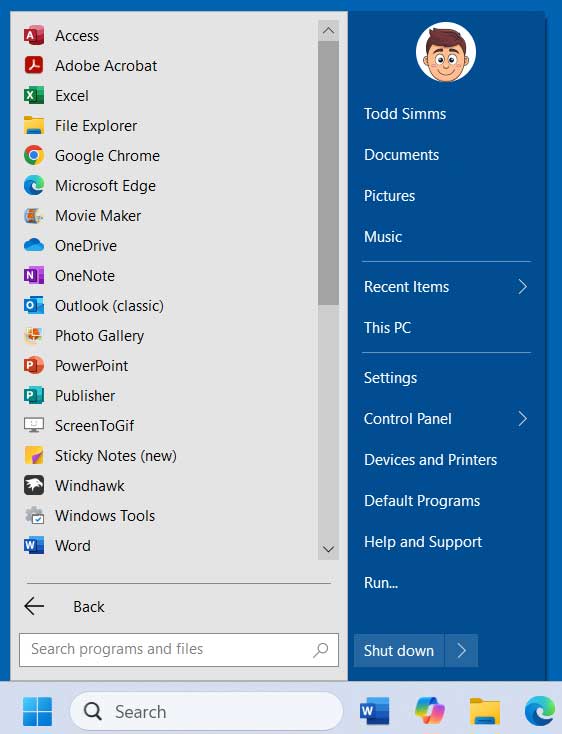
The image below shows the Windows 11 start menu after enabling Open Shell. It looks very similar to the old Windows 7 start menu. You even get the categories on the right such as Control Panel and Devices and Printers. If you click on Start Menu (Windows) at the top of the start menu, that will open the default Windows 11 start menu one time.
9. Access All Programs
When you click on All Programs, you will have everything listed in one place. This looks exactly like you did in the old days. It makes finding your installed software much faster than scrolling through clunky modern interfaces.
Tweak File Explorer with Classic Explorer
1. Open Classic Explorer Settings
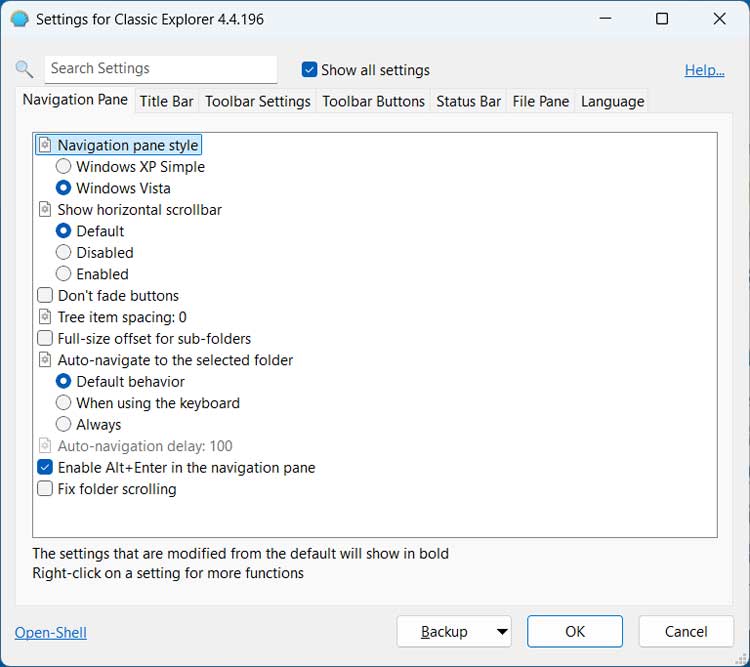
There is another tool you might want to check out that comes bundled with Open Shell. If you go to the Open Shell program folder, you will see an icon for Settings for Classic Explorer. This can be used to tweak how File Explorer works. Many of these settings will not change anything since Windows 11 is pretty locked down. You can still try them out and see which ones work for your specific system build.
2. Add Custom Toolbar Buttons
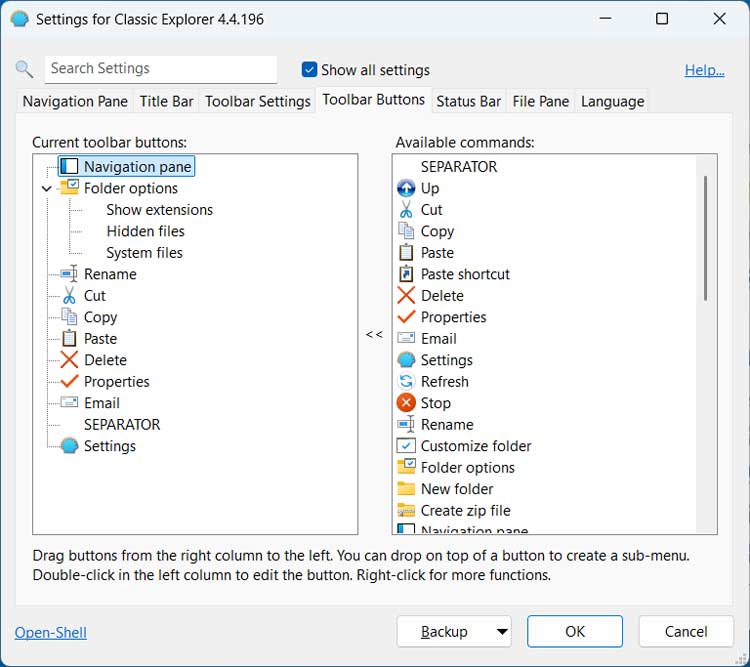
The Toolbar Buttons tab allows you to add or remove buttons from File Explorer as needed. You can drag and drop your favorite commands directly into the active column. This gives you instant access to actions like cut, copy, and paste.
3. View the Classic Toolbar
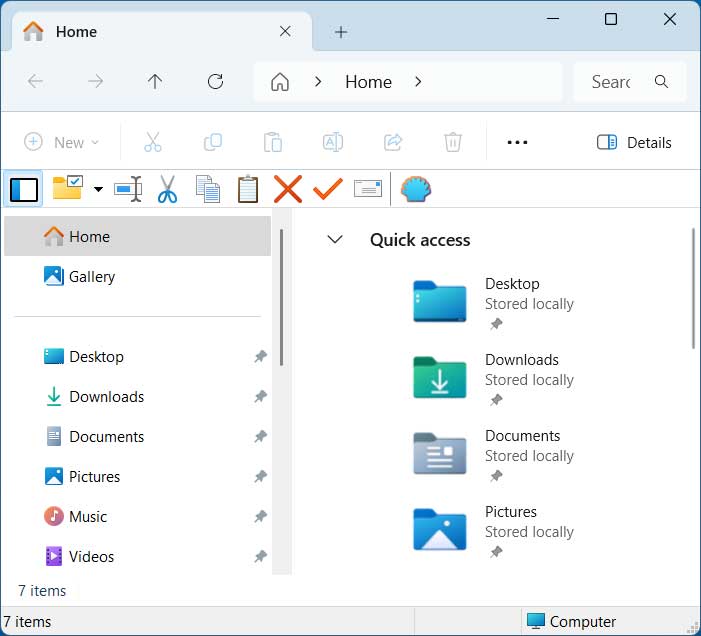
The image below shows the Windows 11 File Explorer app after Open Shell has been installed. You now have more of a classic toolbar with older style icons. These icons are not normally there in the modern operating system.
4. Backup Your Configuration
While in the Open Shell options, you can click the Backup button at the bottom of the window. This allows you to backup or import your Open Shell settings. This is perfect in case you want to bring them over to another computer or if you uninstalled Open Shell for some reason.
For additional training resources, check out our online IT training courses.
Check out our extensive IT book series.