
Last Updated on June 6, 2026
When it comes to Windows file management, there are usually several ways to get the same task done. For example, copying a file from one folder to another or searching for a file that has a particular date or file extension.
You might securely copy a file from one folder to another or actively search for a specific file that has a particular date or file extension. Renaming a single file is generally a very easy thing to do on any machine.
All that is actually involved is to simply right click on the target file and explicitly choose Rename. You then type in a brand new name for the file while making absolutely sure not to change the file extension. But what exactly do you do when you urgently need to safely rename multiple files at once?

Sure you can stubbornly rename them one at a time. If you have a massive number of files then this quickly becomes a terrible time consuming process. There is a built-in way to do this within Windows but this legacy method might not be exactly what you are looking for. Let’s say you had 30 distinct image files you desperately wanted to rename instantly.
Using the Legacy Windows Rename Method
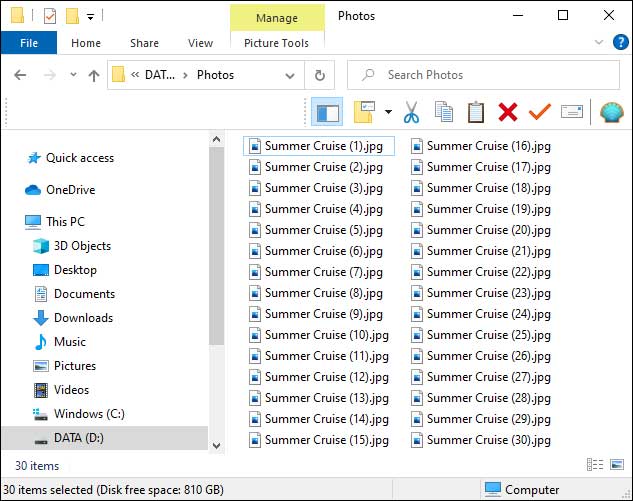
1. Highlight and Rename
You could highlight absolutely all of the target files at once using your mouse cursor. You would then right click directly on the very first file and specifically choose Rename from the context menu. Then you would explicitly type in the base name you want to permanently apply to all of the selected files.

2. Review the Numbered Files
Once you pressed the enter key, you will instantly have all the files renamed with the exact same base name. Windows forces them to have a sequential number in brackets directly after each one of them. This basic file numbering system might be perfectly acceptable for your specific needs.
Advanced Bulk Renaming with PowerRename
1. Install Windows PowerToys
If you are actively looking for a much more advanced way to securely rename your files, you need a different software tool. You definitely want to thoroughly check out the free Windows PowerToys PowerRename utility. If you have previously used the Image Resizer Tool, then you probably already have the PowerRename module actively installed on your local computer.
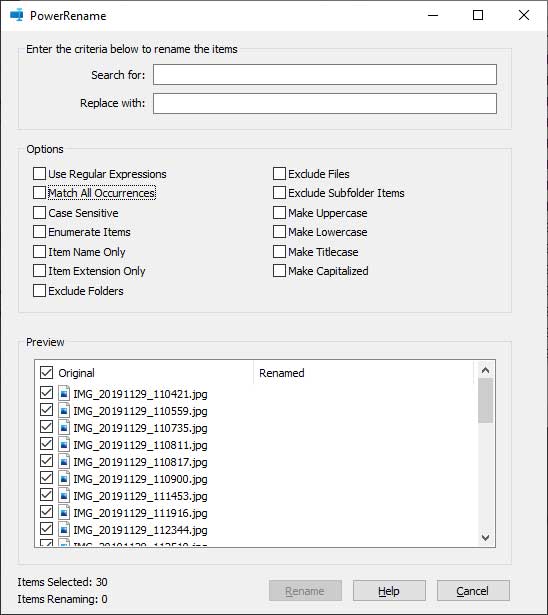
2. Launch the PowerRename Interface
The PowerRename tool will perfectly allow you to actively rename multiple files at the exact same time. Rather than just blindly adding a number to the end of each file, it has many more advanced configuration options. This guarantees significantly greater control over the entire batch renaming process.
3. Replace Target Words
Once you have the tool installed, highlight the specific files you safely wish to rename. Right click on any of them and specifically choose PowerRename from the context menu. You will then clearly see all of the renaming features you have to choose from. A live visual preview of your files sits right in the bottom pane.
4. Execute the Name Change
At the very top of the window, you have a direct option to search for a specific word or letter. You can easily have it completely replaced by another custom word or letter. So if you had a bunch of files with the name Steve in them and needed to change it to Steven, you can have them all instantly changed at one time.
Configuring PowerRename Options
1. Use Regular Expressions
The first advanced option allows you to use specific Regular Expressions. The Search value will be actively interpreted as a complex regular expression string rather than basic plain text. This is an incredibly powerful feature for advanced programmers manipulating massive datasets.
2. Match All Occurrences
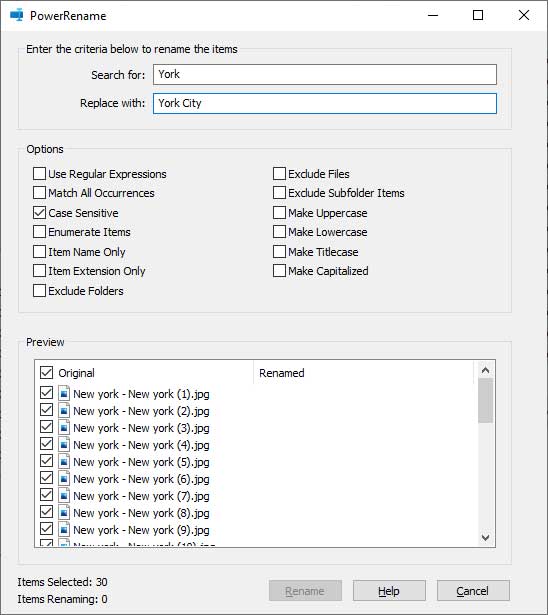
This specific checkbox will actively rename any occurrence of the exact same word in the file name. For example, you might need to safely change your files from New York – New York to New York City – New York. You could simply search for York and have it replaced strictly with York City.
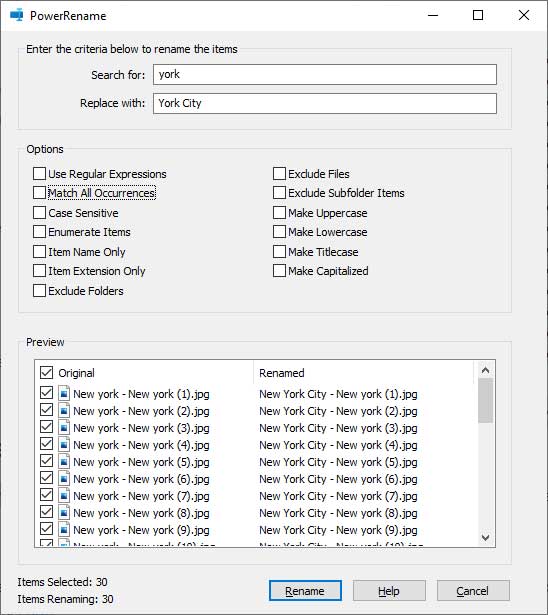
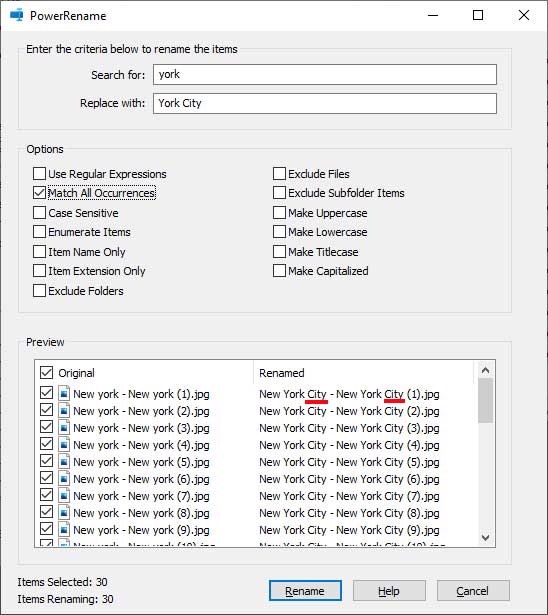
3. Review the Multiple Replacements
Leaving the previous setting unchecked would only replace just the very first instance of the word York with York City in the file name. Checking the box forces the software to aggressively find and replace absolutely all instances of the target word. The live preview box will instantly update to vividly show both replacements.
4. Enable Case Sensitive Searching
This specific toggle option will strictly search for words using the exact same text case. So if I actively searched for uppercase York to change it to York City, it would not find anything at all to change if my file name currently uses a lowercase york. To successfully make this targeted change I would explicitly need to search for lowercase york instead.
5. Enumerate Your Items
You might actually want your targeted files to be perfectly numbered in sequential order. This perfectly mimics the very first example where the files were simply renamed Summer Vacation (1). You can explicitly use this enumeration option to add structured numbering right back into your batch jobs.
6. Target the Item Name Only
This specific box will aggressively change the core file name only. It will completely ignore the trailing file extension. This is exactly what you will be doing in most normal batch renaming cases. It prevents you from accidentally breaking your system files.
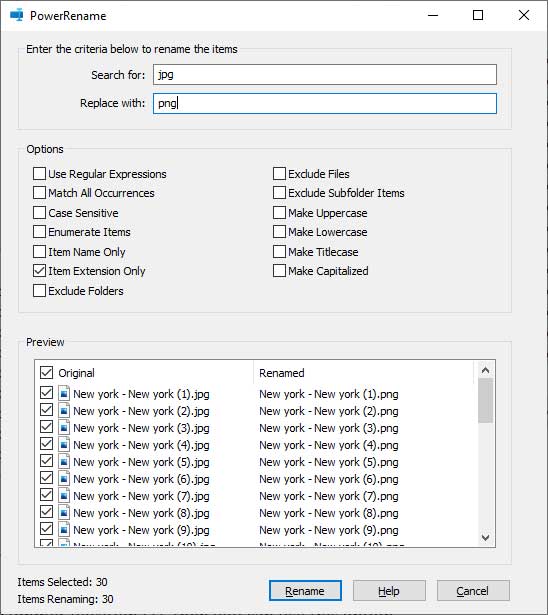
7. Target the Item Extension Only
If you desperately want to quickly change the actual file extensions for all of the files, you can absolutely do so. For example, you can actively search for jpg and have it instantly changed to png. Just be warned that blindly changing the raw file extension will usually create a massive problem where Windows simply does not know how to securely open your file.
8. Exclude Folders or Files
Look closely at the Exclude Folders checkbox. If this is completely unchecked and you have accidentally highlighted some folders along with your files, any active name changes will dangerously apply to the folders as well. Checking Exclude Files forces the rename process to only apply to any highlighted folders and skips the target files completely.
9. Make Uppercase or Lowercase
The Make Uppercase toggle will instantly change all of the selected letters to full uppercase. This explicitly includes the trailing file extension unless you specifically check the box for Item Name Only. The Make Lowercase option will aggressively remove any capital letters and make all of the characters in the exact file name strictly lowercase.

10. Format with Titlecase or Capitalized
The Make Titlecase option will cleanly change the first letter of each major word to be capitalized like they would be in a book or movie title. It will smartly avoid changing any minor words that are normally not capitalized such as ‘the’ or ‘for’. Make Capitalized strictly forces the very first letter of every single word to be capitalized regardless of standard grammar rules.
11. Combine Multiple Parameters
You can seamlessly use multiple configuration choices at the exact same time with the PowerRename tools to get the precise desired results. Try it out on a random test folder and see what it can do for your workflow. You can easily download the completely free Windows PowerToys utility directly from Microsoft here.
For additional training resources, check out our online IT training courses.
Check out our extensive IT book series.


