
Last Updated on May 18, 2026
You may have not known this, but Windows will allow you to log into your computer without having to type in your password. Keep in mind that this doesn’t mean you don’t have a password or are using a blank password, but rather Windows is entering your password for you when you start your computer.
Generally, it is not a good idea to do something like this because that means anyone can access your computer just by turning it on since it will log in your account automatically. But if this is a computer you are using at home, or it is never around people you don’t trust then you should be ok not having to type in your password each time you boot up.

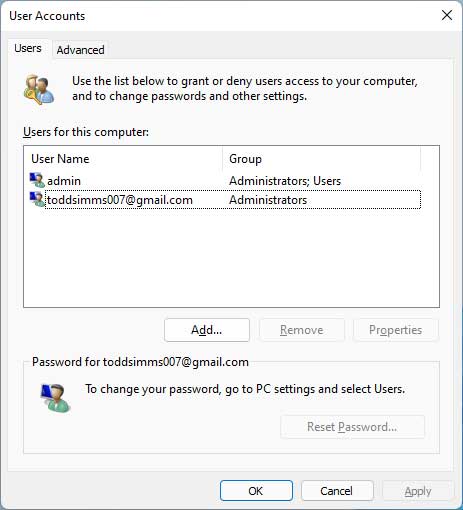
To configure this automatic login process you usually type netplwiz from your run menu to bring up the Windows User Account utility. You might suddenly realize you are missing the standard checkbox that says Users must enter a user name and password to use this computer. You absolutely cannot set your user account to log in automatically if this specific checkbox is missing.
1. Open the Windows Settings Menu
Fortunately, fixing this missing checkbox is incredibly easy. You just need to make a quick change inside your active user account settings. Open your main Windows settings panel by clicking the Start button and hitting the gear icon. Navigate directly to the Accounts area located on the left side of the screen.
2. Disable Windows Hello Sign-in
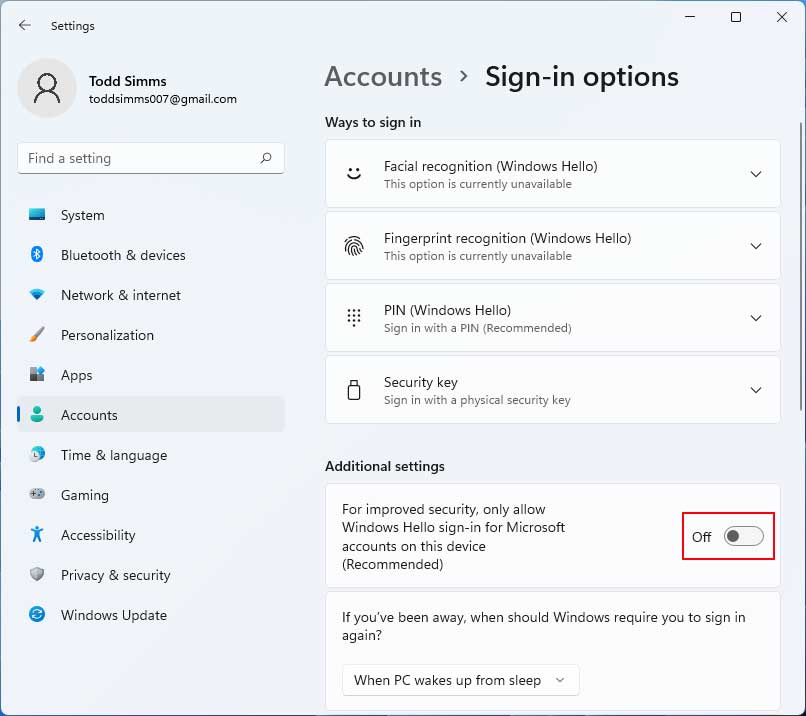
Scroll down the page until you find the Sign-in options menu and click on it. Look for the Additional settings section near the middle of the window. You must toggle the switch for Windows Hello sign-in completely off. If you happen to be using a local account rather than a Microsoft account, this setting should actually be disabled already.
3. Relaunch the Netplwiz Utility
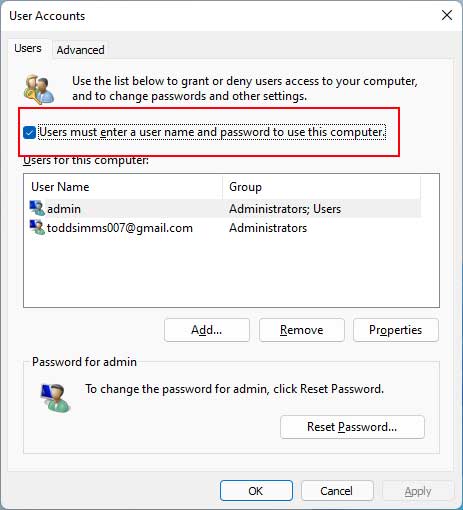
Close the settings window entirely. Press the Windows key and R on your keyboard at the same time to open the Run dialog box. Type netplwiz and press enter to launch the advanced user accounts panel again. You will immediately see that the missing checkbox has successfully returned to the top of the interface.
4. Configure the Automatic Login
You need to highlight the exact username of the account you want logged in automatically. Click on that specific name in the list before unchecking the master box at the top. Click the Apply button at the bottom of the window. Windows will immediately prompt you to enter the password for that specific user account to store it for the boot sequence.
5. Manage Multiple User Accounts
You have to keep a specific workflow in mind if you have multiple users sharing this computer. Starting the machine will instantly log into the exact account you just configured. You will need to manually log out of this primary profile from the Start menu if you want to access a different user account. Make sure you memorize your actual password. You still need it to log back in after switching profiles.
6. Revert the Login Changes
You can always change your mind later and disable this automatic login process. Go straight back to the User Accounts section using the netplwiz command. Check the box requiring users to enter a username and password to lock the machine down again. Other administrators on the computer can also recheck this box from their own profiles. If you are interested in knowing how to create a new account in Windows 11, check out this article.
For additional training resources, check out our online IT training courses.
Check out our extensive IT book series.


