These days, cloud storage services such as Dropbox, OneDrive and Google Drive do much more than just store your files so you can access them from anywhere you have an internet connection. Now these services are capable of much more and depending on how much you are willing to pay each month, you can do just about anything. In this article, we will be showing you how to use Dropbox Automated Folders. And its free to use for any Dropbox account type.
This added functionality means cloud storage has evolved into a productivity tool rather than just a backup location. Features like automation, file processing, and intelligent organization allow users to streamline repetitive tasks without relying on third‑party software. Instead of manually managing files after they’re uploaded, these services can now handle much of the work in the background, saving time and reducing the chance of mistakes.
What Automated Folders does is perform a specific process on any files that are added to that folder such automatically renaming files, categorizing them for you and even converting added files to PDF documents.
Creating an Automated Folder
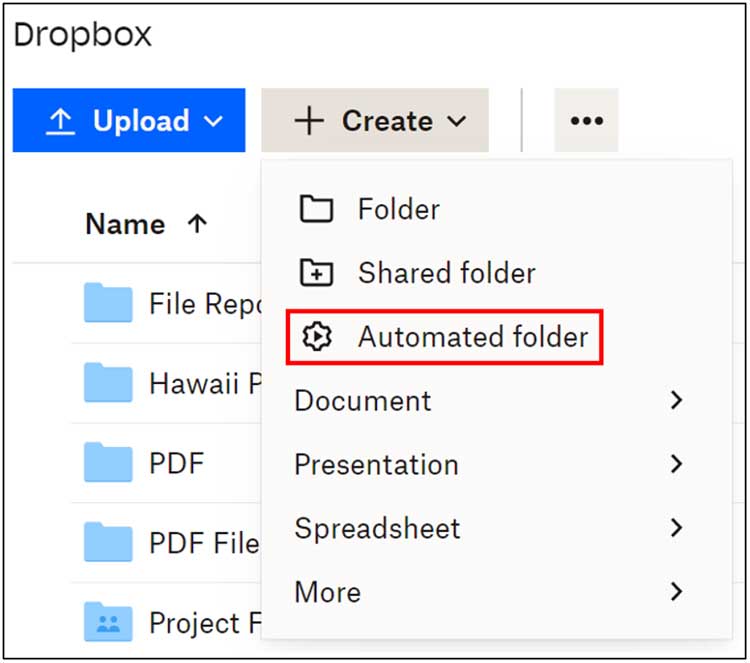
To create an automated folder, navigate to the area in Dropbox where you would like this folder to be created. Then click on the Create button and choose the Automated folder option.
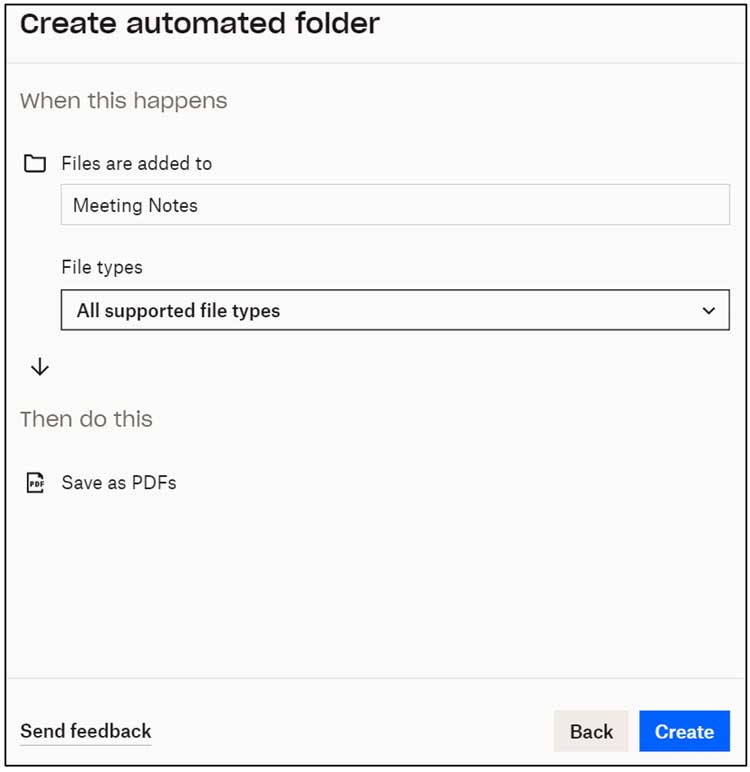
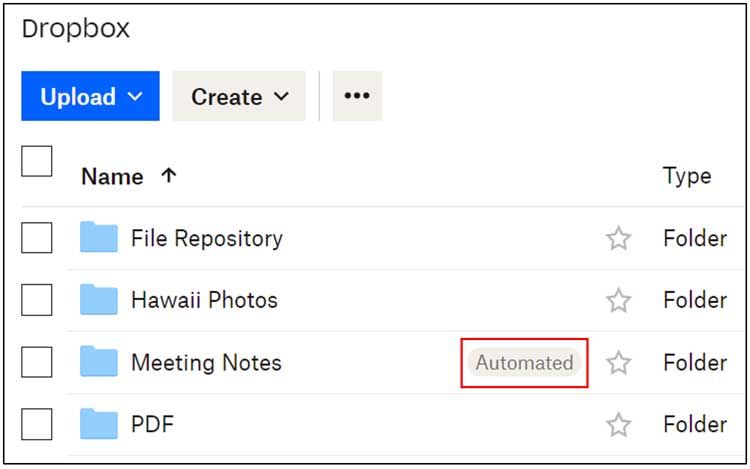
Next, you will give the folder a name and choose which type of automation you would like to apply to it. I will call my folder Meeting Notes and have any files that are added converted to PDF files.
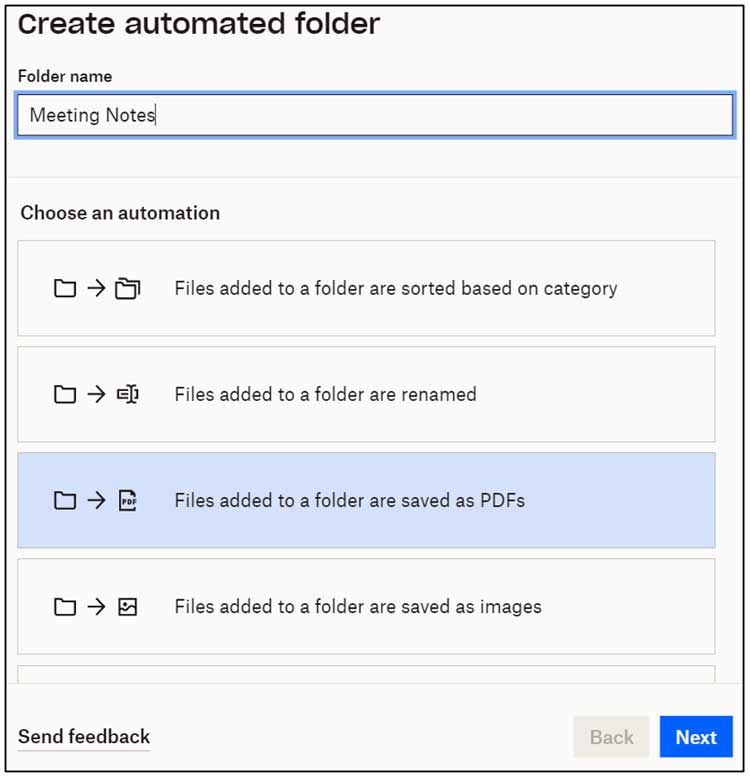
Each automation type will have its own set of criteria that you can adjust. For this type of automation, I have the option to choose which types of files I want to apply this process to. I will choose all supported file types. Some automation types will have more options than others.
After you create the automated folder, it will be placed with your other folders but will labeled as automated. Once you create an automated folder, you can go back and edit the options if needed.
The Automated Folder Process
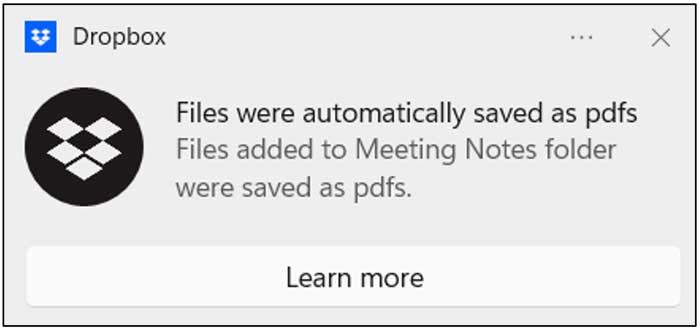
Next, I will drag and drop some Microsoft Word documents into that folder. You can also use the upload option if that is what you are used to. When I upload these Word files, I get a notification telling me that they were automatically saved as PDF files.
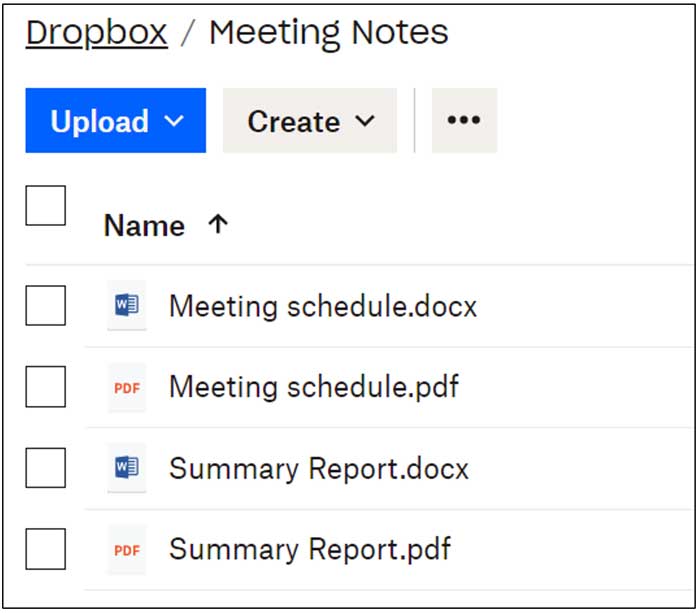
When I go to that folder, I will see my original Word files and their associated PDF files. This process does not replace the Word files but rather creates PDF files and leaves the original files as they were when you uploaded them.
You can also share an automated Dropbox folder with other people. Then when they add files to the folder, these files will also be acted upon based on the automation type.
By using Dropbox Automated Folders, you can remove the manual steps from common file‑management tasks and let Dropbox handle them for you automatically. Whether you’re organizing documents, standardizing file formats, or collaborating with others, these automations help keep your files consistent and your workflow efficient without any extra effort. It’s a simple feature that can make a noticeable difference in how you manage files every day.