With hard drives getting faster, larger and sometimes cheaper at the same time, it makes sense that doing a hard drive upgrade is an easy way to get more performance out of your PC. You may also have a situation where your hard drive is failing, and you want to copy your OS, apps and files to a new drive before it does. Or you may just be building yourself a new computer and want to transfer all your data to your new drive without reinstalling everything.
There are many disk cloning apps that you can download and use for Microsoft Windows, but when it comes to Linux, your choices are a bit more limited. Fortunately, Linux comes with a built in command line tool that you can use to clone operating system to a different drive. In this article, we will be discussing how to clone a Linux disk with the dd command and expand partitions as needed when cloning to a larger disk.
The tool we will be using is the dd command which stands for Data Duplicator or Dataset Definition. It’s also known as Disk Destroyer since you can wipe data from your hard drive if you are not careful when using it.
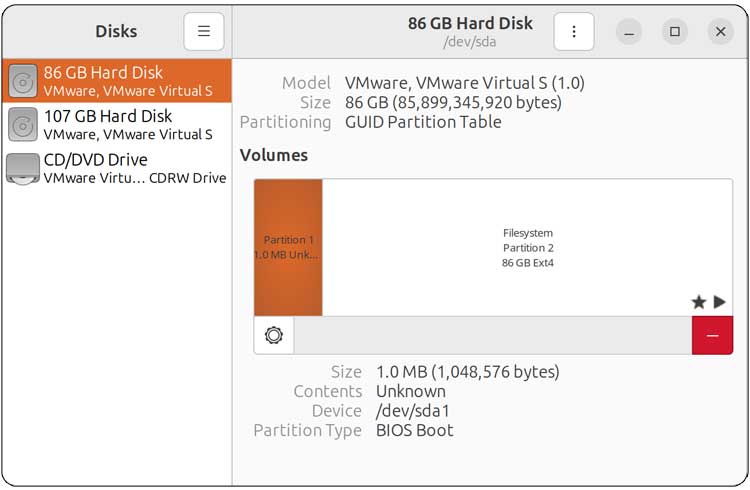
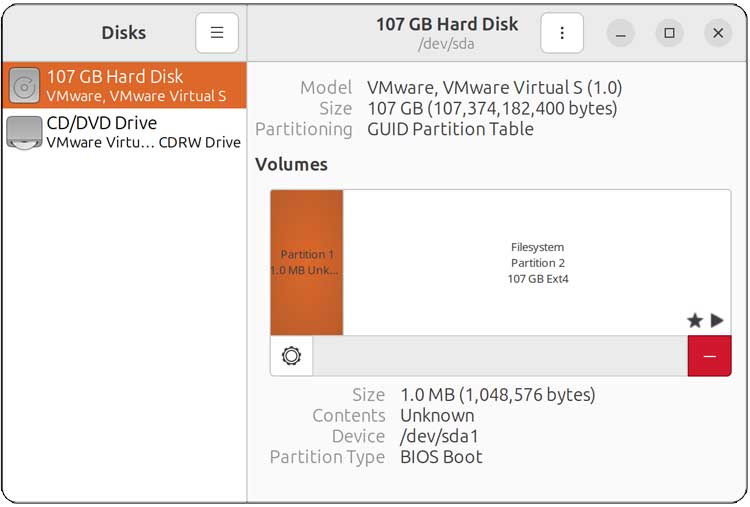
For our example, we will be cloning an 80GB disk running Linux to a larger 100GB hard drive. If we open the Disks tool in the Linux GUI, we can see the layout of each of these drives. The 80GB drive has two partitions while the 100GB drive has one. For some reason Disks can show the drives as a bit larger than they really are.

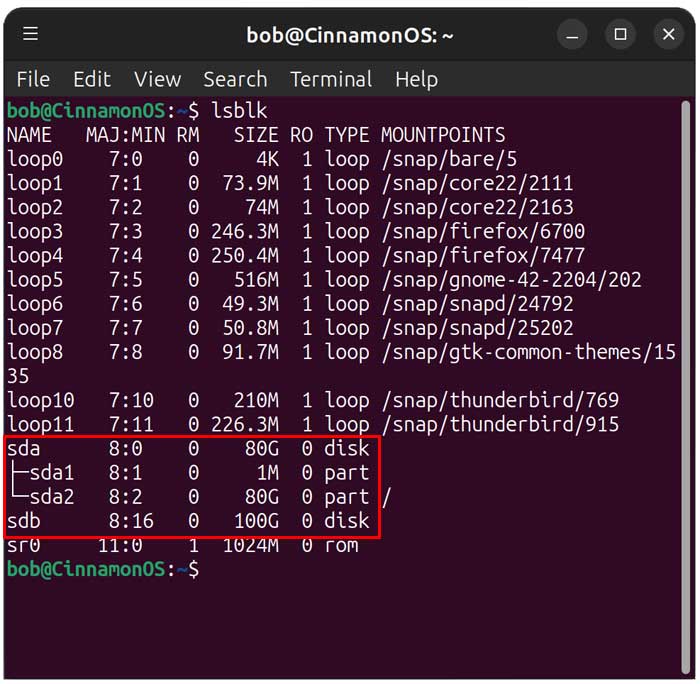
We will now open the terminal app and use the lsblk command to identify the source and target disks.
We will then unmount target disk to avoid any potential conflicts using the sudo umount /dev/sdb* command. You will need to enter your administrator password during this step.
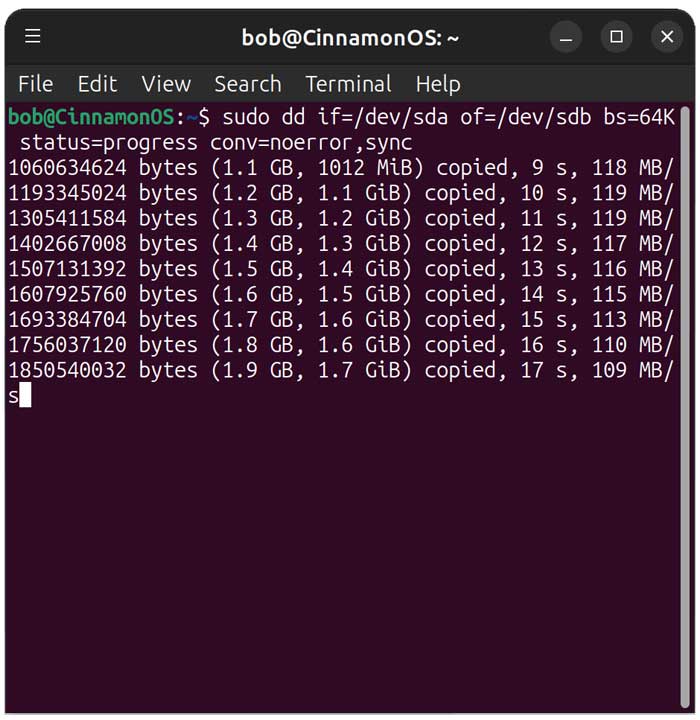
Now we can run the dd command to clone the source disk to the destination disk. This is the command we will be using.
sudo dd if=/dev/sda of=/dev/sdb bs=64K status=progress conv=noerror,sync
Here is what each part of the command is used for.
- if= (identifies source disk)
- of= (identifies destination disk)
- bs=64k (block size for speed)
- status=progress (shows progress)
- conv=noerror,sync (continues on read errors and keeps block alignment)
This process will take several minutes and the speed of your drives and amount of data to be cloned will also affect how long it takes.
If we go back to the Disks app, we can now see that the 100GB drive has the 80GB filesystem partition as well as 21GB of unallocated free space.

Now that the disk is cloned, we need to extend the partition to use the unallocated space leftover on the new drive for the Linux OS. To do so, we will be using the growpart command. You can also use the parted command to accomplish this. You can also use the Disks or Gparted tool in the Linux GUI to accomplish this.
Here is the command we will be using for the growpart command. The drive/partition designation may vary for your computer so keep that in mind. Also be sure to have a space between sdb and the number 2.
sudo growpart /dev/sdb 2
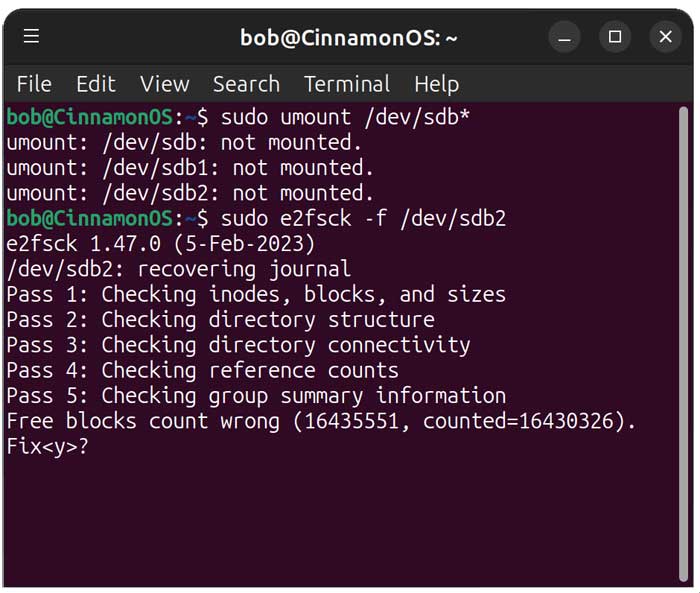
We will then need to resize the filesystem. But before we do that, we will need to check the disk for errors. It is also a good idea to unmount the drive before doing so. Even if you think the drive may still be unmounted, it wont hurt to run the command again.
Unmount command
sudo umount /dev/sda2
Disk check command
sudo e2fsck -f /dev/sda2
If the disk check finds any errors during the process, you can type Y to have them fixed at the prompt.
Next, we will need to resize the filesystem. When you clone a Linux disk to a larger drive, the partition size may increase, but the filesystem inside that partition doesn’t automatically expand to use the extra space.
Here is the command we will be using since we are using the ext4 filesystem.
sudo resize2fs /dev/sdb2
Here are the commands for the XFS filesystem.
sudo mount /dev/sdb2 /mnt
sudo xfs_growfs /mnt
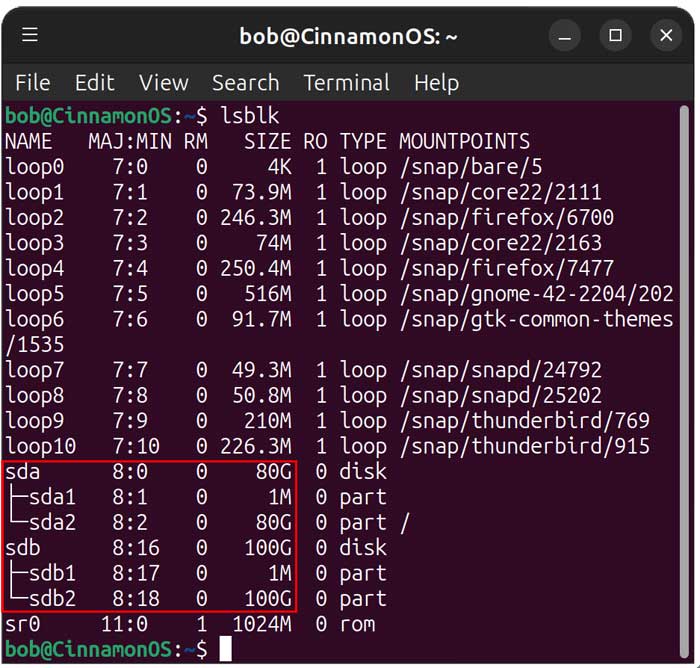
Now that the disk and filesystem have been expanded, we can verify once again with the lsblk command.
Now we will shut down the computer, remove the old 80GB drive and boot up with the new 100GB drive. As you can see from the image below, we are now running our Linux computer using the new 100GB cloned drive.
If you run into a boot issue, you can try Reinstalling GRUB from a live Linux boot disk with the following commands.
sudo grub-install /dev/sdb
sudo update-grub
As you can see, it’s not too hard to clone a Linux disk with the dd command and expand the partitions. Of course, you can always use a graphical interface such as Rescuezilla or Foxclone.
For additional training resources, check out our online IT training courses.
Check out our extensive IT book series.