Last Updated on March 21, 2026
VirtualBox is Oracle’s free desktop virtualization platform that you can run on your Windows PC and create your own virtual machines for purposes such as testing new operating systems and software etc. You can create as many VMs as your host computer’s hardware can handle and these virtual machines will be able to use the host computer’s internet connection to go online. They VMs will also be able to communicate with each other on their shared internal network.
But you can do more than just share the internet connection of the host computer with your virtual machines. You can also share files and folders making it easy to transfer files between your host and virtual machine. This way you do not need to do anything such as upload files to a cloud service such as OneDrive or Google Drive and then download them from there.

But what if you want to share files between your host and virtual machine? One method is to enable the Shared Folders feature on VirtualBox as seen in this video.

But if you want to configure your virtual machines to communicate with each other as if they were physical machines on the same network as your host computer, then you can setup their network adapters.
Checking the Default VirtualBox IP Addresses
1. View the Guest VM IP Address
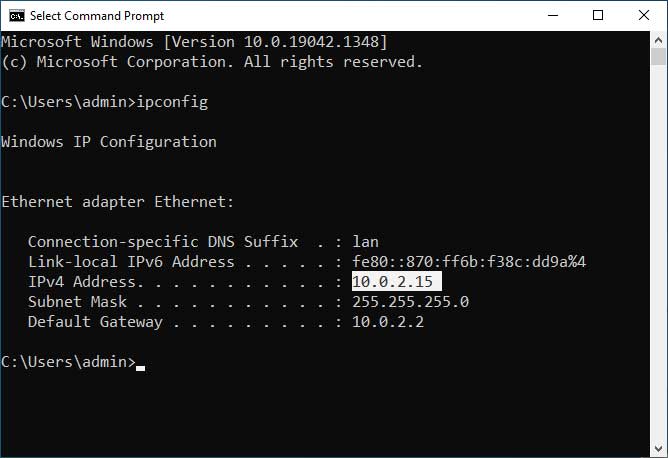
By default, VirtualBox VMs are configured to use NAT (Network Address Translation) to share the internet connection that the host PC is using. If you were to run the ipconfig command on a virtual machine, you would get a result similar to the image below. Your specific IP address will most likely differ from the example.
2. Understand the Virtual Subnet
As you can see, the VM has an Ethernet adapter with an IP address of 10.0.2.15. It is using a standard class C subnet mask of 255.255.255.0. This isolates the VM from your local physical network.
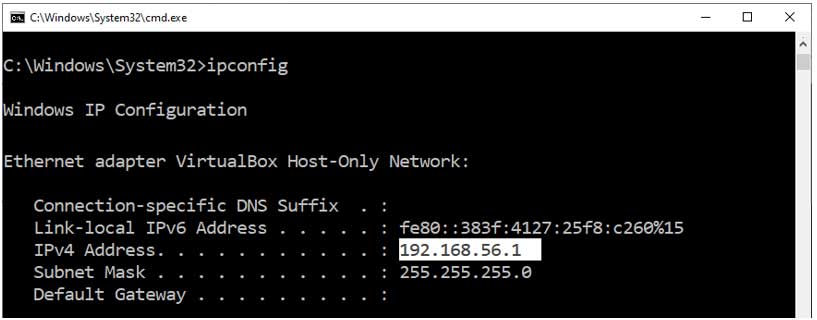
3. View the Host Computer IP Address
Running ipconfig on the physical host computer shows a VirtualBox Host-Only Network Ethernet adapter. It has an IP address of 192.168.56.1. This is the specific subnet you want to use to communicate with the host computer over the network.
Adding a Host-Only Network Adapter
1. Open the Virtual Machine Settings
To configure the virtual machine to communicate on this network, you will need to add an additional network adapter. You must do this from the virtual machine’s settings menu. To add this adapter, the VM will need to be completely powered off.
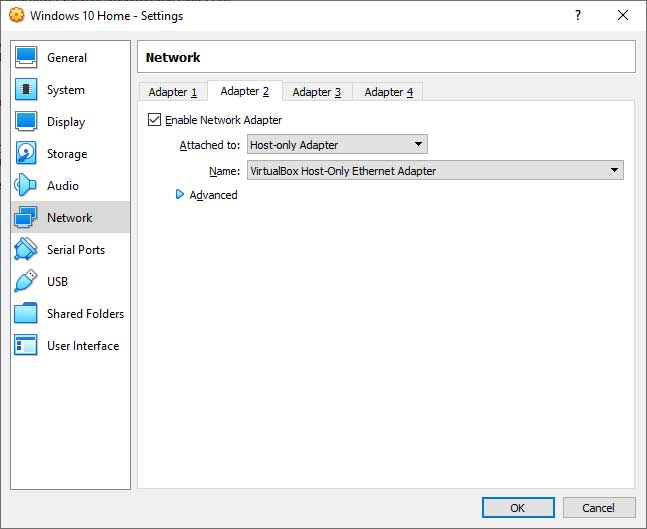
2. Configure the New Adapter
When you get to the settings for the VM, go to the Network section on the left. Then click on the tab that says Adapter 2. If you are already using Adapter 2 for something else, then you can go to Adapter 3 instead.
3. Attach the Host-Only Network
Once you are there you can check the box that says Enable Network Adapter. Then select Host-only Adapter where it says Attached to. Then you can click the OK button and restart the virtual machine.
4. Verify the New IP Address
On the virtual machine, you can once again open a command prompt and run the ipconfig command. You should see your new Ethernet adapter configured on the same subnet as what was seen on your host for the Host-Only Network.

Configuring the Windows Firewall and Sharing Settings
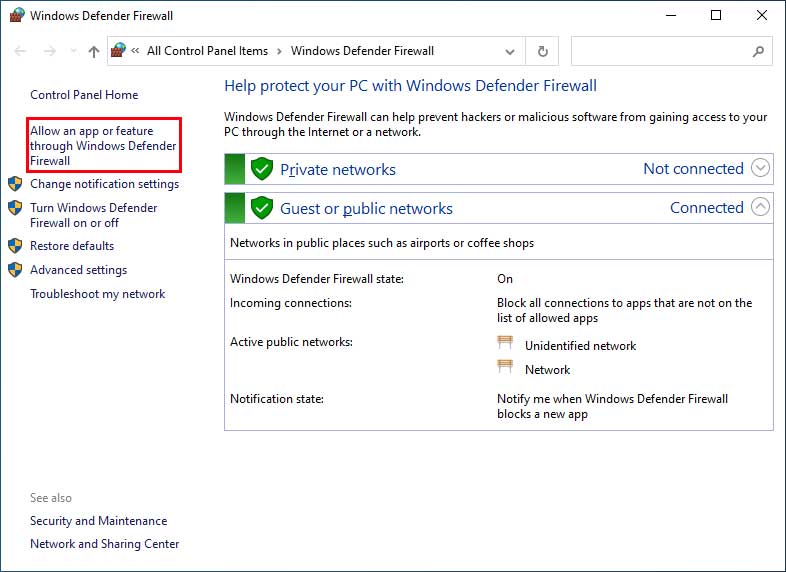
1. Open the Windows Defender Firewall
In order to get your networking to work you might need to make some changes to the Windows Firewall. To do this, do a search for Windows Defender Firewall in your start menu. Then click on the link that says Allow an app or feature through Windows Defender Firewall.
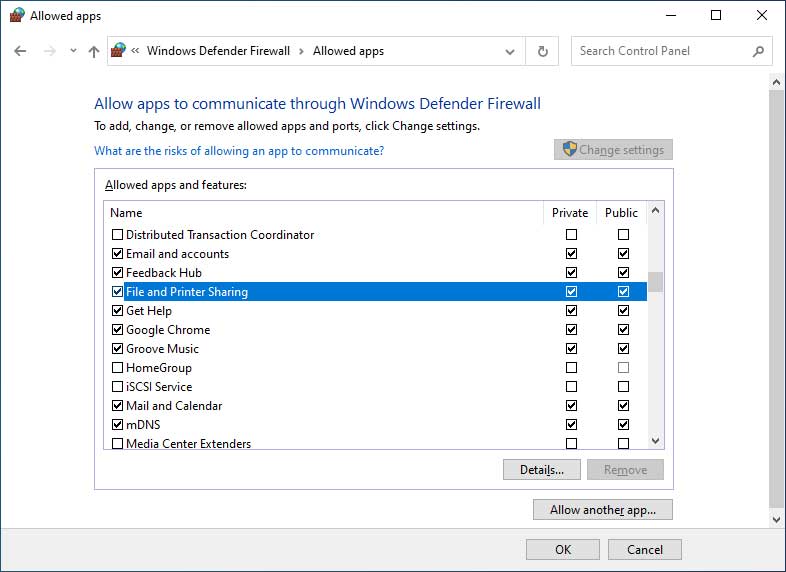
2. Enable File and Printer Sharing
Then you can click on the Change settings button to enable editing mode for the firewall. Scroll down the list of allowed apps to File and Printer Sharing. Enable it by clicking the checkboxes for both Private and Public networks.
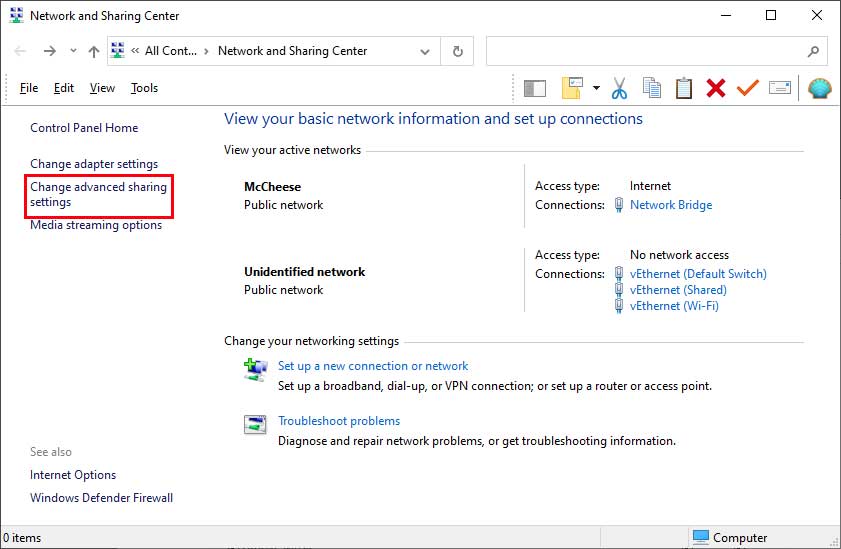
3. Open the Network and Sharing Center
You might also want to make sure that Network discovery and File and printer sharing are enabled in the Network and Sharing Center. Open the classic Control Panel to find this menu. Click the link on the left side that says Change advanced sharing options.
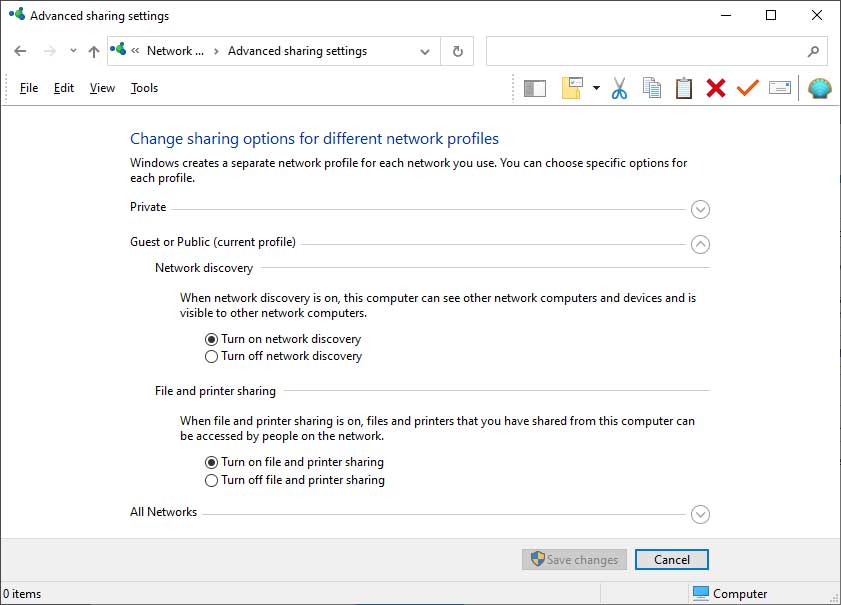
4. Turn on Network Discovery
Expand the Guest or Public profile section. Click the radio buttons to Turn on network discovery and Turn on file and printer sharing. Click the Save changes button at the bottom of the window.
5. Configure Your Specific Folders
After getting all of this set up, it will be up to you to configure folder sharing and permissions on your host computer and virtual machines. You will also need to know the login information for a user with appropriate access levels on the VMs. You will be asked to provide these credentials to access the shared folders across the network.
For additional training resources, check out our online IT training courses.
Check out our extensive IT book series.