Cloning Windows to a new drive is a fairly common practice these days. With hard drives becoming faster, larger and often times cheaper, it makes sense to do this type of upgrade. You may also want to clone your drive if it’s failing to transfer your OS, files, and settings to a new drive before it dies completely. Or if you have built your own computer and want to transfer everything to a new drive, this is a great way to do so without needing to reinstall everything.
If you do not have a new blank drive for your destination disk, you can still clone Windows to this drive and keep your existing data. In this article, we will be showing you how to migrate (clone) Windows to a drive with existing partitions and preserve its data at the same time.

Configuring the Destination Drive for Cloning
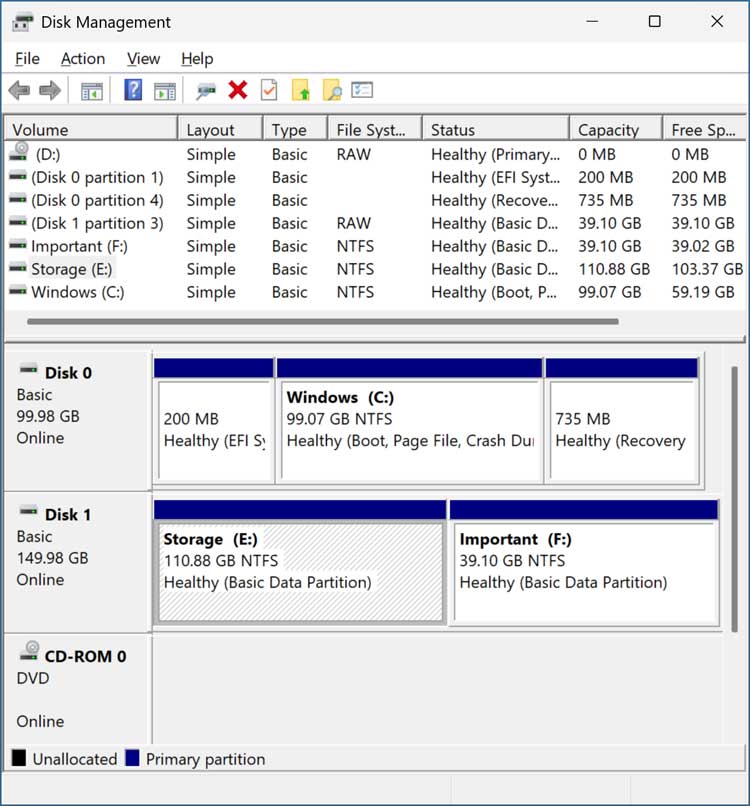
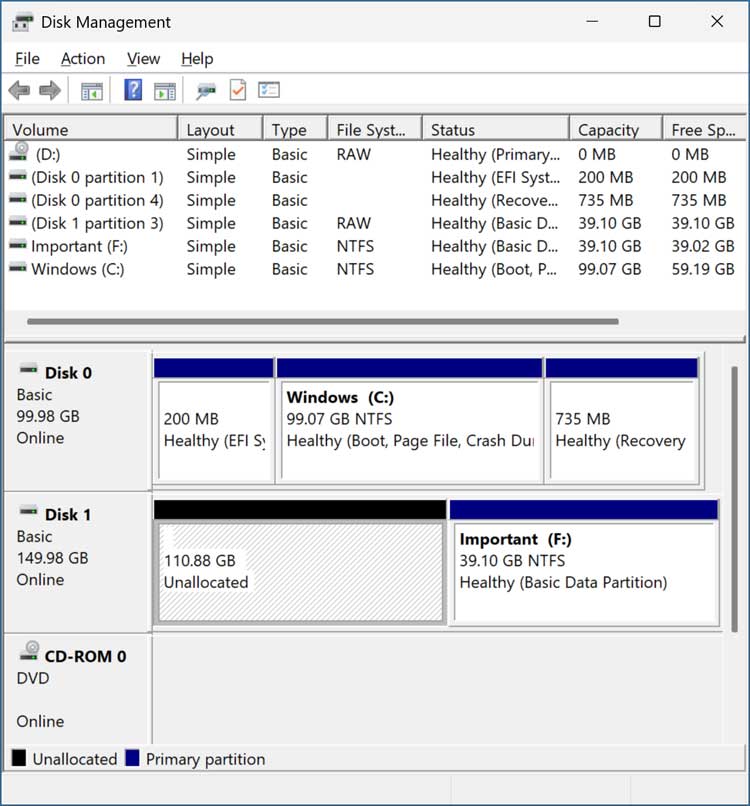
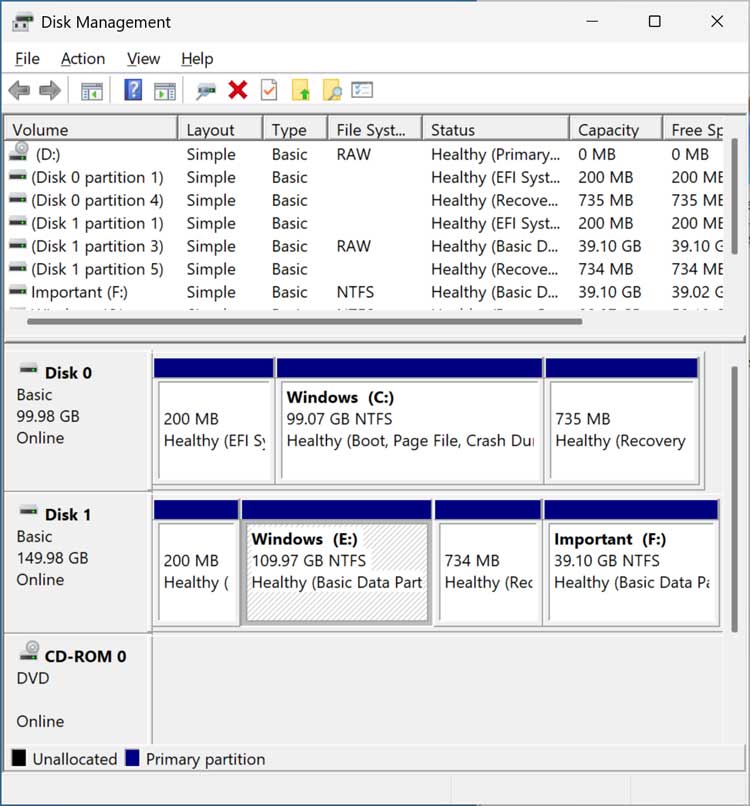
The image below shows the Windows Disk Management tool, and you can see that Disk 0 is our Windows drive while Disk 1 is the drive we want to clone Windows to. For our example, we will use the space currently allocated to the E drive (Data). The F drive (Important) contains the data that we want to keep.
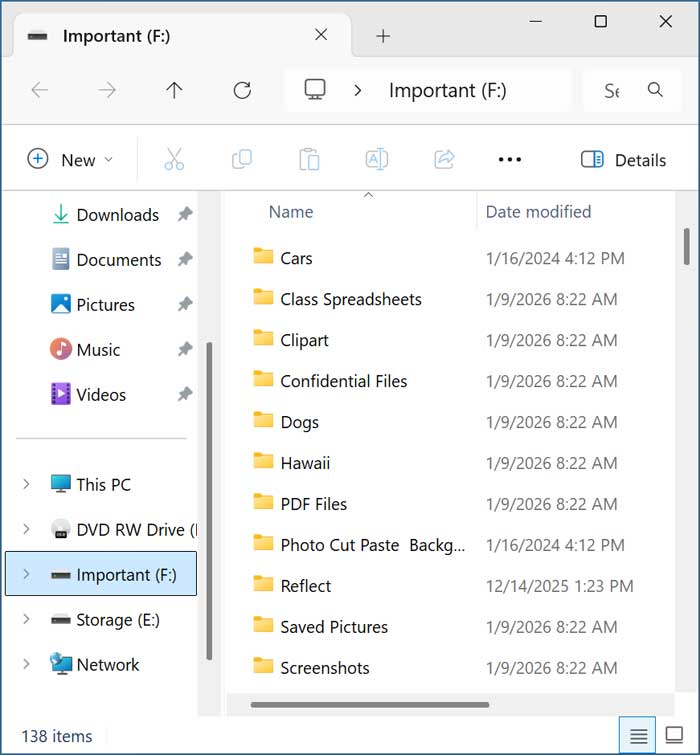
The image below shows the files contained on the F drive that we need to preserve. Always make sure to back up any files you need to save before performing and type of disk cloning procedure.
In order clone our Windows drive to this disk, we will first need to ensure there is some unallocated space that can be used by the cloning software. Since we will be using the current E drive for Windows, we will need to delete the partition first. Before doing something like this, be sure to back up any data you need to keep.
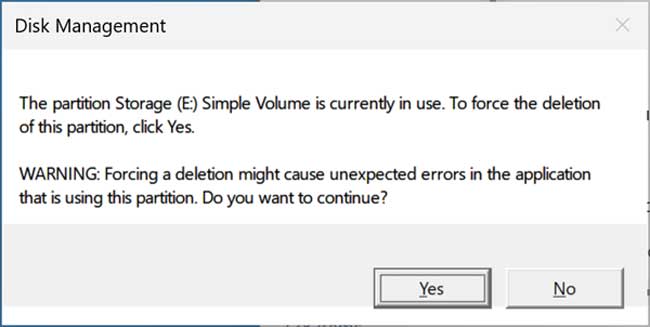
To do this, we will right click on the E drive (Storage) and choose Delete Volume and click the Yes button when notified that this process will erase all the data on this volume. If you get a message saying the partition is in use, you can simply click the Yes button to force delete it.
As you can see in the image below, we now have 110GB of unallocated space that used to be the E drive. This is just enough room for our 100GB Windows drive that we will be cloning. Always make sure you have enough free space on the destination drive before trying to clone another drive to it.
Configuring the Windows Drive to the New Disk
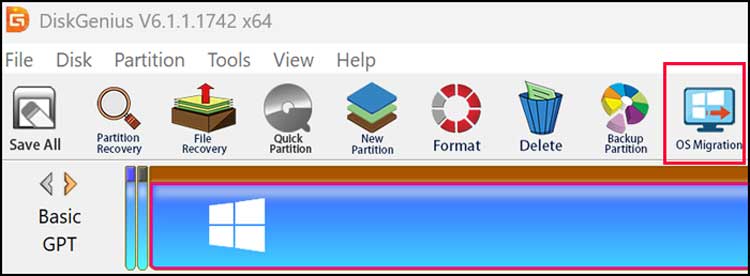
The software we will be using to clone our Windows drive to the destination disk is called DiskGenius. You can download DiskGenius for free from their website here.
Once we open DiskGenius, we will need to click on the OS Migration button to begin the cloning process.
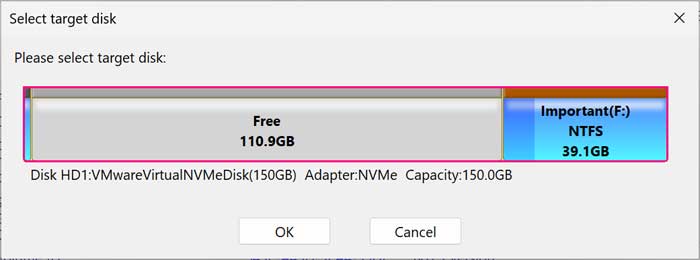
We will then be prompted to choose the target (destination) disk. Even though it looks like the existing partition we want to preserve is going to be wiped, you will see that it will not be in the next step.
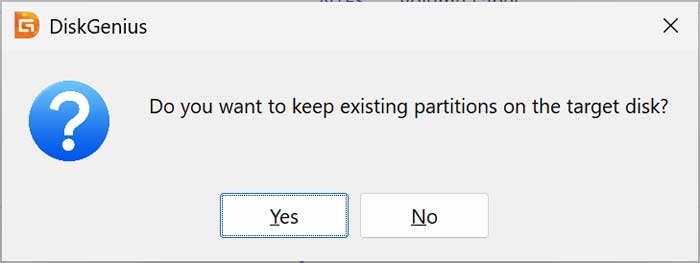
Once we click the OK button, we will then be asked if we want to keep any existing partitions on the target disk. We will need to click the Yes button to preserve our Important partition (F drive).
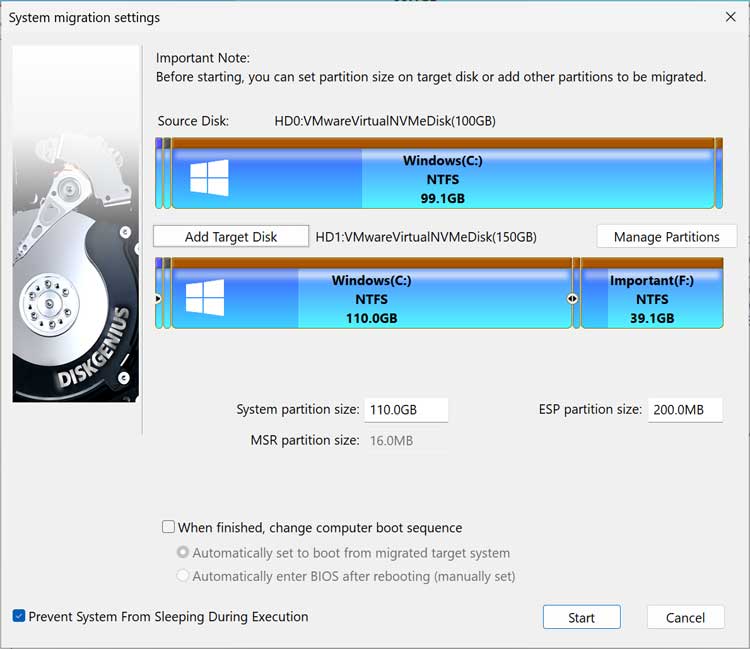
We will then receive a warning that the ESP and MSR partition on the target disk will be overwritten and will click the OK button to continue.
We can then click the Start button and will be shown another message saying all files and partitions on the target disk will be overwritten and will click the OK button once again.
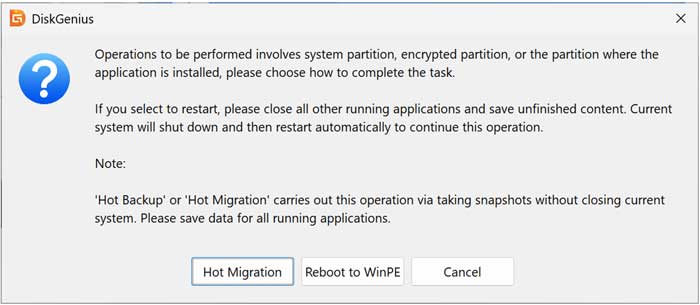
After clicking the Start button, we will be given the choice to perform a hot migration or boot into the WinPE environment to perform the clone. The hot migration process allows us to clone the Windows drive while running Windows. The WinPE option can be used if you are getting any errors trying to clone the drive while running Windows.
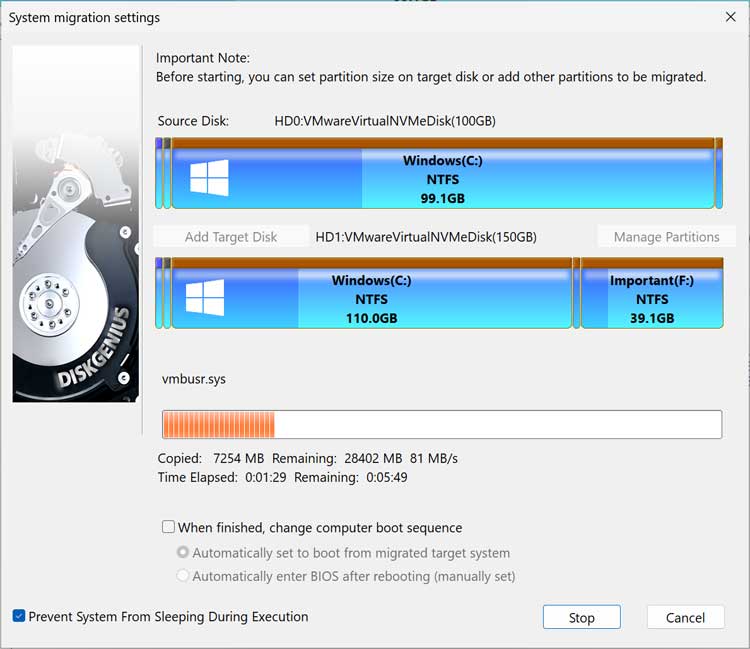
DiskGenius will then create a Windows snapshot and clone the Windows drive to the new disk. This process will take several minutes depending on the size and speed of your drives.
When the cloning process is complete, DiskGenius will ask if you want to restart the computer so you can change your boot order. You can click the No button if you do not want to do this yet.
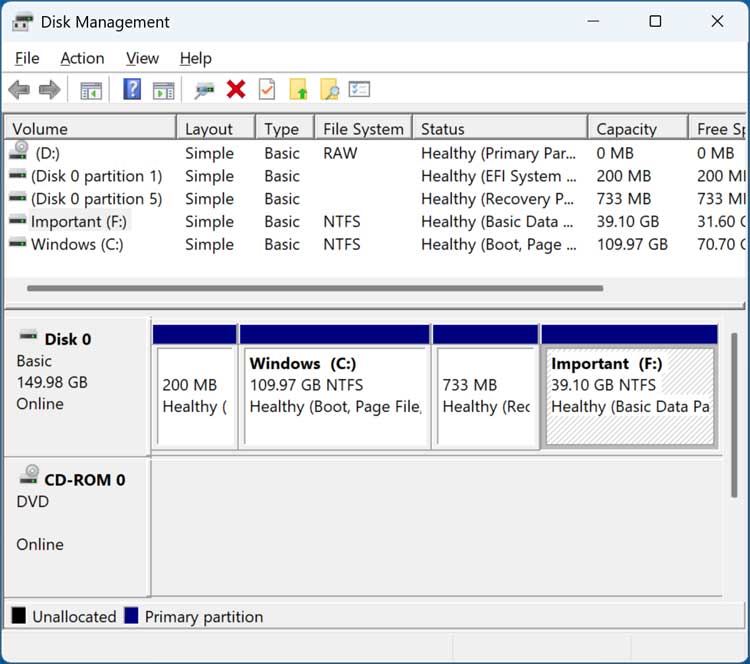
Now when we go back into Disk Management, we can see that the E drive is now a copy of the Windows drive and we also have the other Windows partitions such as the recovery and EFI system partitions. Our Important partition is still there as well.
Now we will shut down the computer and remove the original Windows drive (Disk 0) so we can run Windows off the new disk.
Now when we go back into Disk Management, we can see we only have one hard drive installed and it has windows and the Important partition on the same disk.
For additional training resources, check out our online IT training courses.
Check out our extensive IT book series.