
Last Updated on June 28, 2026
By default, Microsoft wants you to use a Microsoft Account to log into your Windows computer. These Microsoft accounts are used to log into all your devices with one account and password, and also to sync many of your settings between these devices. Plus, if you have a Microsoft 365 account for Office and other apps, you can use the same login for that as well.
Back in the older days of Windows, we used to have local accounts that were stored on only the computer it was configured on. This simplified things to some degree since you didn’t need to worry about connecting all of your devices together and sharing information.
One issue is that if you forgot your password, you would need to have another account configured on the computer with admin rights to be able to reset it, or you would have to use a password reset boot disk.

When creating a non-Microsoft account (local account) on your computer, you can have either a standard user or an administrator user, but both are added the same way to your computer. Once you create the local account, you can then make it an administrator type account. In this article, we are going to show you how to create a local administrator account in Windows 11.
Navigating to the Windows Accounts Settings
1. Open the Windows Settings App
The first step in creating a local administrator account in Windows 11 is to go to the main Windows settings app. You can click the start button and select the gear icon to launch it. Navigate to the Accounts section on the left side menu.
2. Verify Your Administrator Rights
You must perform these steps while logged in with an account that already has administrator rights. Otherwise you will not have the required permissions to add a new account. Standard users are completely blocked from this specific configuration screen.
3. Add a New User Account
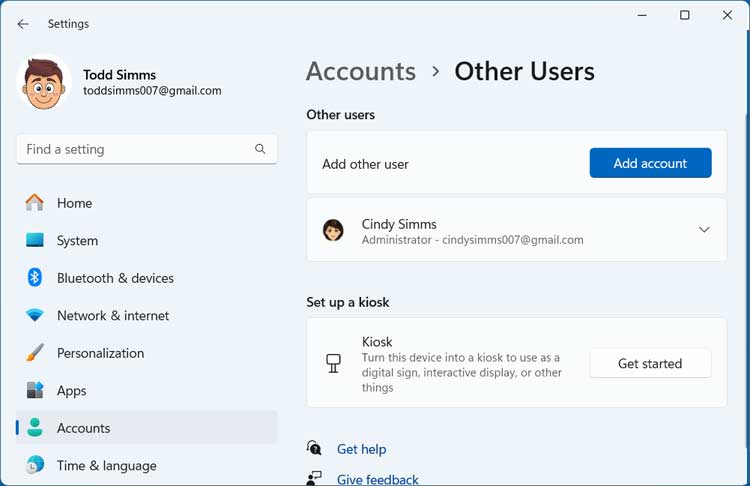
Here you will see what other user accounts you currently have configured on your computer. You will also see what specific types of accounts they are. From there, you will need to go to the Other Users section and then click the Add account button.
Bypassing the Microsoft Account Prompt
1. Skip the Initial Sign-In Screen
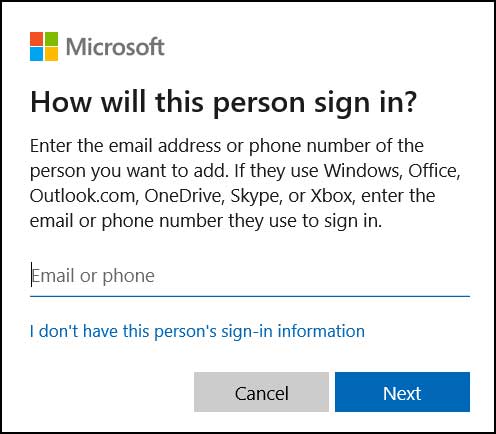
Windows will immediately want you to enter the email address or phone number tied to a person’s Microsoft account. This is the type of account the operating system will always try to configure by default. When you get to this screen, you will need to click on the specific link that says I don’t have this person’s sign-in information. Click the Next button to proceed.
2. Skip the Account Creation Screen
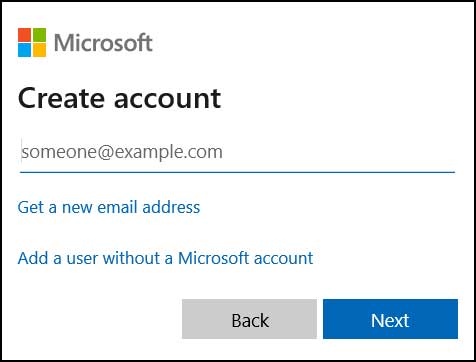
Now Windows will try and have you create a brand new Microsoft account from scratch. To bypass this secondary attempt, you will need to click on the link that says Add a user without a Microsoft account. Click the Next button once again to finally reach the offline configuration.
Setting Up the Local Account Credentials
1. Choose a Secure Username
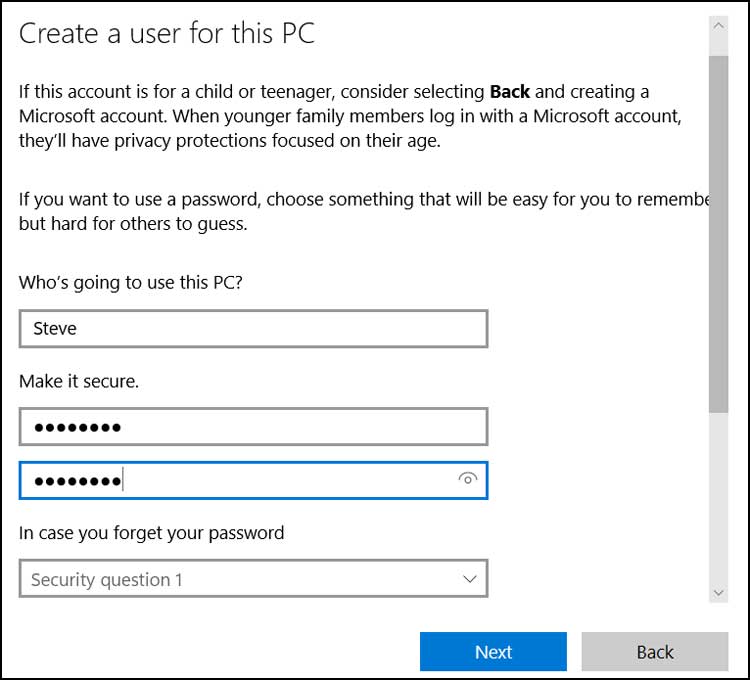
Next, you will need to choose a name for this new offline account. You might want to choose something besides “Administrator” so it’s not obvious that this account will have full admin rights. Hackers frequently target accounts specifically named Administrator.
2. Create a Strong Password
Then you will need to type in the password you want to use with this account. Make sure it is complex but easy to remember. Enter it twice to confirm the spelling.
3. Answer the Security Questions
Finally, you will need to choose and answer three security questions. You must set these up just in case you get yourself locked out or forget your password later. Click Next to finalize the profile creation.
Changing the Account Type to Administrator
1. Locate the New Standard Account
Once this is complete and you click the Next button, you will be taken back to the main settings page. You will see your new account listed with your other accounts. By default, this new offline account will be configured as a standard user.

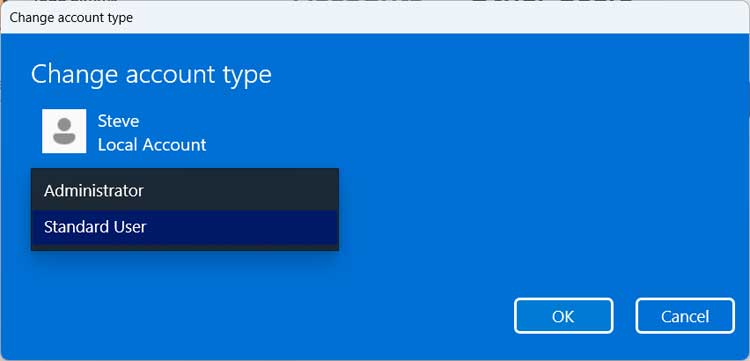
2. Modify the Account Type
To change this, you will need to click on the Change account type button next to the new profile. A small dialog box will appear on your screen. Select Administrator from the dropdown choices, and click the OK button to save the changes.
3. Reboot if Necessary
If you logged in with the new local user before changing the account type, they are technically still a standard user. If they are still logged on, they will have to completely log off and back on for the new administrator changes to take effect.
Finalizing Your New Windows 11 Admin Account
1. Log Into the New Profile
When you log in with this new user account for the first time, Windows will need to actively create its profile folder structure. You will see a blue screen telling you the system is getting things ready. Do not turn off your computer during this phase.
2. Configure the Privacy Settings
Then you will need to answer a few configuration questions regarding telemetry and privacy. Turn off whatever tracking features you do not want enabled. You will then be dropped onto the desktop ready to go.
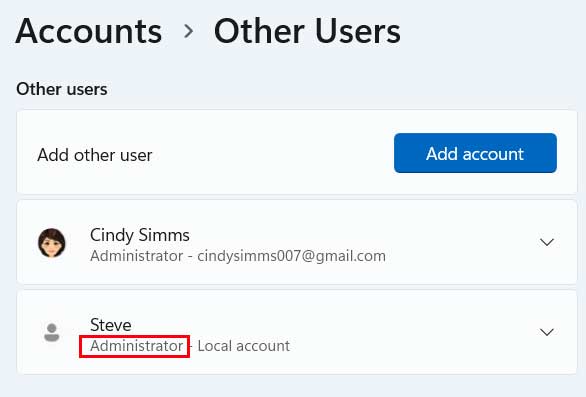
3. Verify the Administrator Status
Now when you go back to Accounts > Other Users, you will see this new local account. It will officially say Administrator underneath it. You can always change it back to a standard user later if needed as well.
For additional training resources, check out our online IT training courses.
Check out our extensive IT book series.


