
Last Updated on August 23, 2026
Computer security and privacy are a hot topic lately thanks to all the cybercrime going on out there on the dangerous internet. These threats also apply to our personal computers and the other people that have access to them.
If you have a computer that you share with other people or that is in a public area, you may have the need to hide, lock or encrypt your files and folders and maybe even attached USB drives. If that’s the case, there is a free program you can use called Wise Folder Hider that can help you secure your files and folders.

One thing you need to be careful of when using these types of programs is that you don’t lock yourself out of your files by forgetting the password to the app or encrypting your files and then removing the software so you can’t decrypt them when you need to access them again. Once you download and install Wise Folder Hider, you can open the program to begin the setup process.
Setting Up Wise Folder Hider
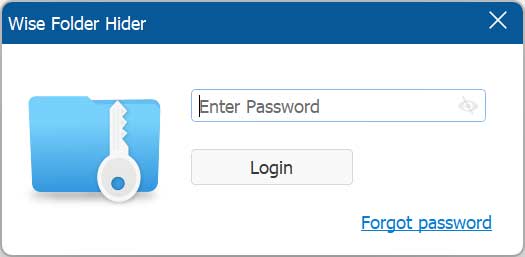
1. Create Your Master Password
You will need to create a master password that is used to access the app and manage your hidden files and folders. This master password is required every single time you access the app. Keep this credential stored safely in a secure password manager.
2. Navigate the Software Interface
The software interface is very straightforward and broken down into three main sections. These distinct sections are called Hide File, Encrypt File, and Lock File. You can switch between these tabs at the top of the application window.
Hiding Files, Folders, and USB Drives
1. Select Items to Hide
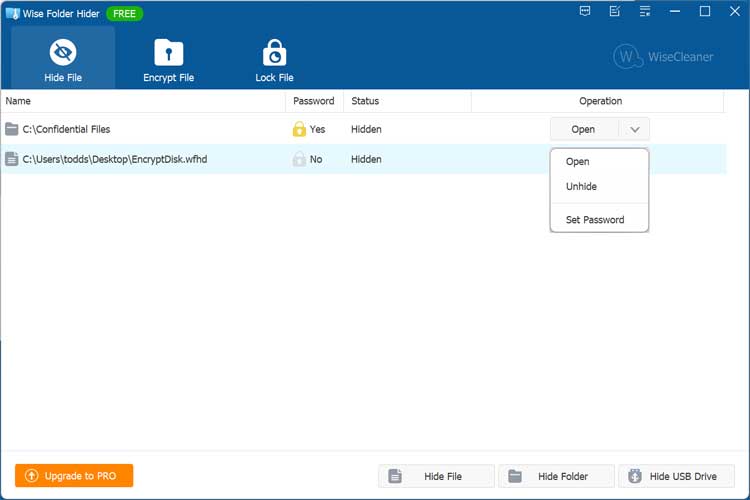
The image below shows an example of one folder and one file added to the app and hidden from view. These items will also be completely hidden from you until you open the program to unhide them. You simply drag and drop your target files directly into the blank dashboard space.
2. Assign Secondary Passwords
You can easily assign a secondary password to any specific file or folder for an extra layer of security. This ensures that other people using the program cannot unhide anything you want kept private. Keep in mind that this secondary password is only for unhiding the item within the app. It does not apply to opening the actual file or folder itself.
3. Verify File Explorer Visibility
Once you hide a file or folder, it becomes completely invisible when opening Windows File Explorer. The data remains hidden even if someone logs into the computer with a completely different user account. The operating system completely ignores the hidden directory paths.
4. Hide External USB Drives
Using the Hide USB Drive option works a little differently regarding visibility. The USB drive itself will still appear in File Explorer when connected to the computer. However, when you open the drive, it will appear entirely empty. It will not show any of the files or folders stored inside until you properly unhide it through the app.
Encrypting Files and Folders
1. Create a Secure Locker
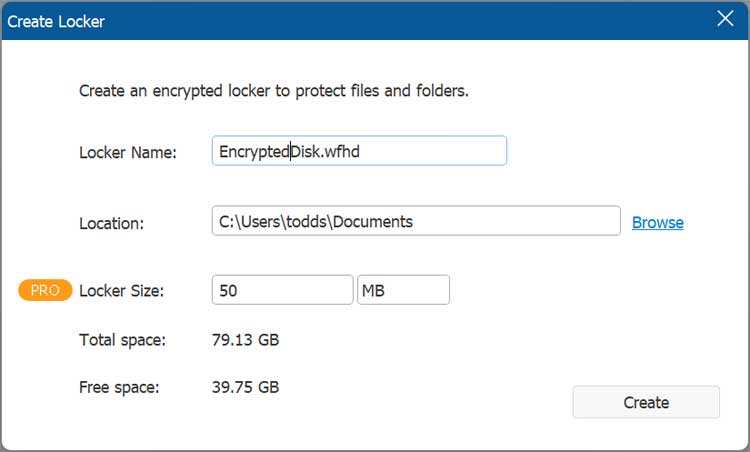
The file encryption process works by creating a secure, encrypted locker to safely store your documents. You have the option to easily change the default locker name and storage location if desired. Pick a storage directory that has plenty of free hard drive space.
2. Manage Storage Limits
If you are using the free version of Wise Folder Hider, your encrypted locker will be limited to 50MB. Fortunately, you can simply create more than one locker if you ever need additional storage space. You can build dozens of these small vaults across your hard drive.
3. Access the Virtual Drive
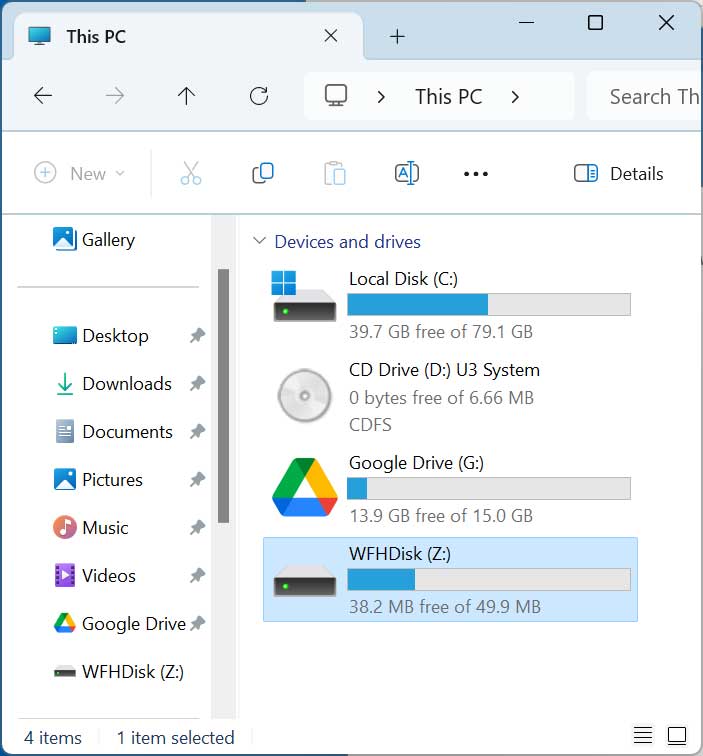
Once you finish creating this new locker, Windows will automatically assign it the drive letter Z. You can then begin placing your private files directly into this secure virtual drive. It functions exactly like a standard physical flash drive plugged into your machine.
4. Unmount the Secure Locker
When you close the Wise Folder Hider program, it automatically conceals the locker and unmounts the associated drive letter. You can create several of these encrypted lockers and store them in completely different locations across your computer.
5. Manage Encryption Settings
When you navigate to the Encrypt File section of the app, you will have a few new management options. From here, you can manually unmount the drive, delete the locker entirely, or set an exclusive password.
6. Locate WFHD Files
You will also notice some new WFHD files stored on your system that are used exclusively for these lockers. Do not delete these specific files manually through File Explorer. Removing them will instantly destroy all your encrypted data.
7. Open Lockers Quickly
When you double-click these specific WFHD files, they will automatically open the Wise Folder Hider program. This allows you to quickly log in and take action on your secure lockers. It saves you from having to navigate through the start menu every time.
Locking a File to Prevent Changes
1. Select the Target File
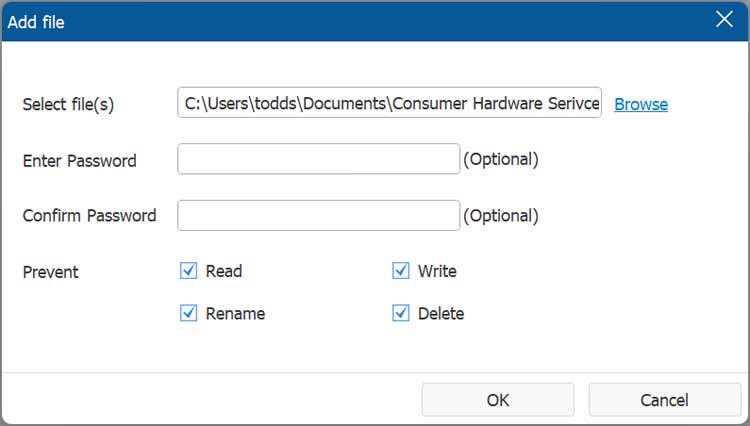
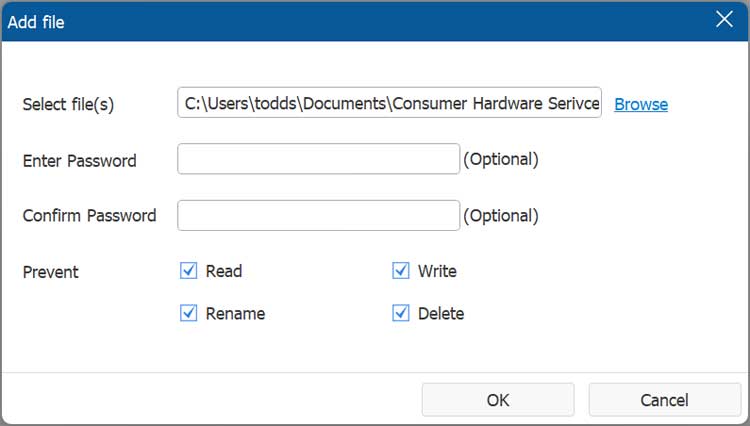
The lock feature is slightly different and allows you to prevent specific actions from taking place on your chosen files. The very first step involves selecting your target file and deciding exactly what you want to lock down. You can browse your entire local directory to find the exact document.
2. Set Prevention Rules
You can easily prevent the file from being read, written to, renamed, or accidentally deleted. The software requires you to select at least one of these specific checkboxes during this step. Check the boxes that match your exact security needs.
3. Assign a Lock Password
You also have the option to assign a unique password to the locked file. This password will prevent anyone else from unlocking the restrictions you just set. Just like the hide feature, this password only protects the software lock and does not apply to opening the file itself.
4. Manage Locked Files
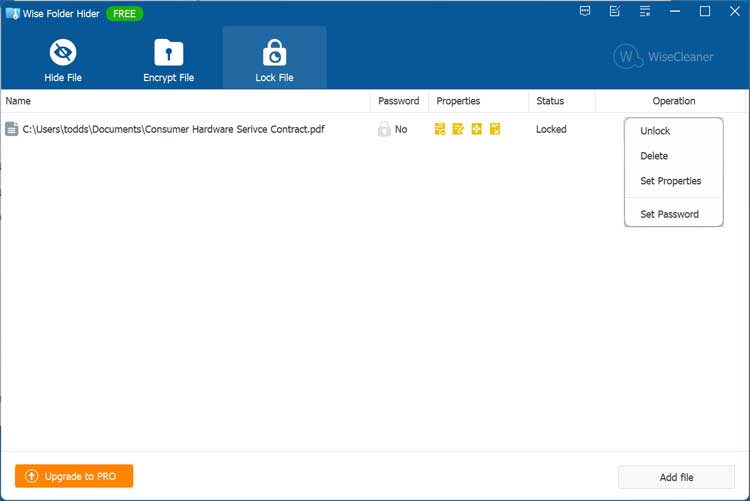
Once you successfully lock a file, you can manage it directly from the application dashboard. You can take actions such as unlocking it, changing the active prevention options, or setting a new edit password. There is also an option to delete the lock entirely. Keep in mind that using the delete option will simply remove the security lock, not the actual file itself.
For additional training resources, check out our online IT training courses.
Check out our extensive IT book series.






