The System Restore feature of Windows is used to return your computer to an earlier saved state without loosing any data files if you have system problems or other failures with your computer. This comes in especially useful for spyware infections that take over your computer and don’t allow you to install or run antispyware software. Another use for System Restore is for reverting back to a previous Windows setting if you installed a Windows update that caused an issue with your computer or other software.
System Restore will take an image of your computer at a given place in time and save it as a restore point. System Restore will take these images or snapshots at times before system changes are made to your computer such as program installations and updates. These snapshots are done without user intervention. You can also create a restore point manually if you feel the need.
Check out this updated video on System Restore for newer versions of Windows.

To use System Restore you will need several GB of free hard drive space on your computer which shouldn’t be a problem with today’s large hard drives. You can increase this limit to stay on the safe side by right clicking My Computer, selecting Properties and then click on the System Restore tab. You can also turn off System Restore from here if you need to. For newer versions of Windows you would click on System Protection and then change your System Restore settings from there.
To create a manual System Restore point, simply do a search for System Restore. Then you would click on Create a restore point and click Next. Next give it a descriptive name. Windows will automatically add the time and date. Finally click on Create.
To restore from a previous restore point you would click on Restore my computer to an earlier time instead of Create a restore point. Click on Next and you will be presented with a calendar view of your available restore points.
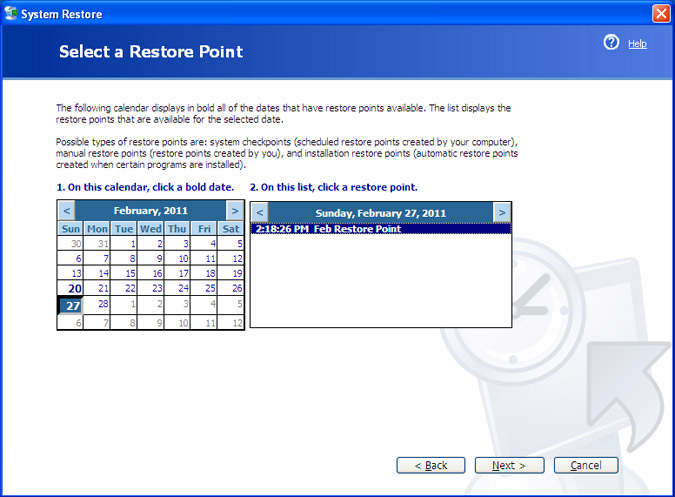
After you click on Next again you will see a message telling you that Windows will need to shut down your computer and that you should close any open programs. It also tells you that you will not loose any documents you have worked on since the restore date. At this point your computer will shut down and Windows will do its thing. After its complete you can review the stability of your system and if it looks good then you are ready for work. If not you can choose another restore point or undo the restoration.
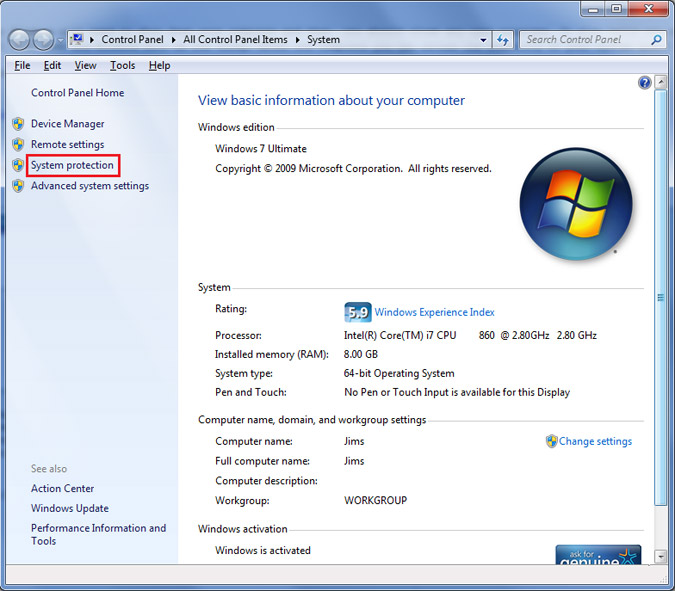
To create a manual restore point for Windows Vista and higher right click Computer and choose Properties. Then click on System Protection on the left.
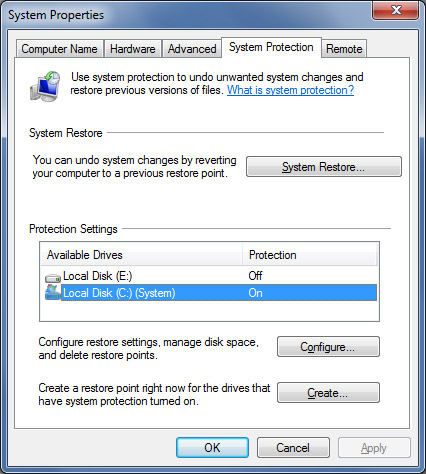
Then make sure your system drive is selected (C drive) and click on the Create button. Then you can name your restore point and have it created for you.
For additional training resources, check out our online IT training courses.
Check out our extensive IT book series.