Last Updated on July 12, 2026
If you work in the IT field for a living and are someone who provides desktop support or are a network administrator, you have most likely had to the need to provide remote support to another user or had the need to connect to another computer that is not in your office but rather at a different location.
If you are on your local area network and running Windows, then you most likely use Remote Desktop which is not available for Windows Home editions. And you can use Remote Desktop over the internet via a VPN connection but sometimes that is not practical. In this article, we will be showing you how to remotely control computers over the internet to offer support for free with HelpWire.
Getting Started with the HelpWire Operator App
1. Download the Operator Executable
HelpWire is a free app you can use to remotely control computers over the internet as well as within the same building assuming your computers have an active internet connection. There is nothing to install so the setup process is very easy to do. To begin, you will need to go to the HelpWire website and download the executable file. They also have macOS and Linux versions available if that is the operating system you are using.
2. Allow Firewall Permissions
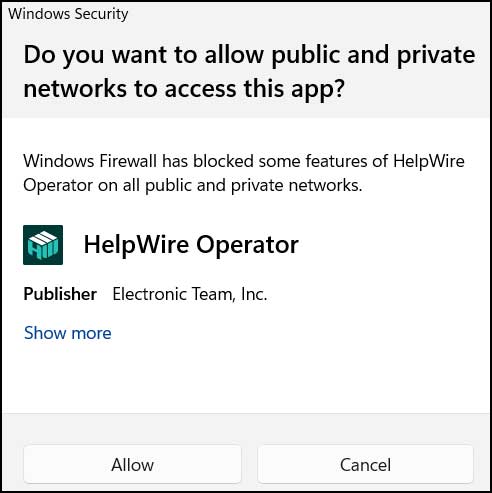
When you run the executable, you will be prompted to allow HelpWire through the Windows Firewall. You will need to click the Allow button to proceed. This ensures the application can communicate securely over your active network connection without being blocked by local security policies.
3. Generate the Support Link
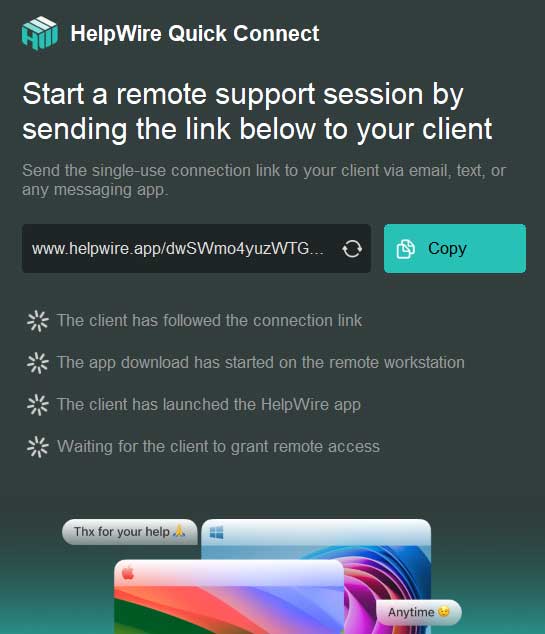
HelpWire will then open their website and generate a link that you will then need to send to the person whose computer you want to connect to in order to provide support for. You can send this link via email, instant messenger or whatever method you choose. The client cannot connect until they click this exact URL.
Connecting from the Client Computer
1. Download the Client App
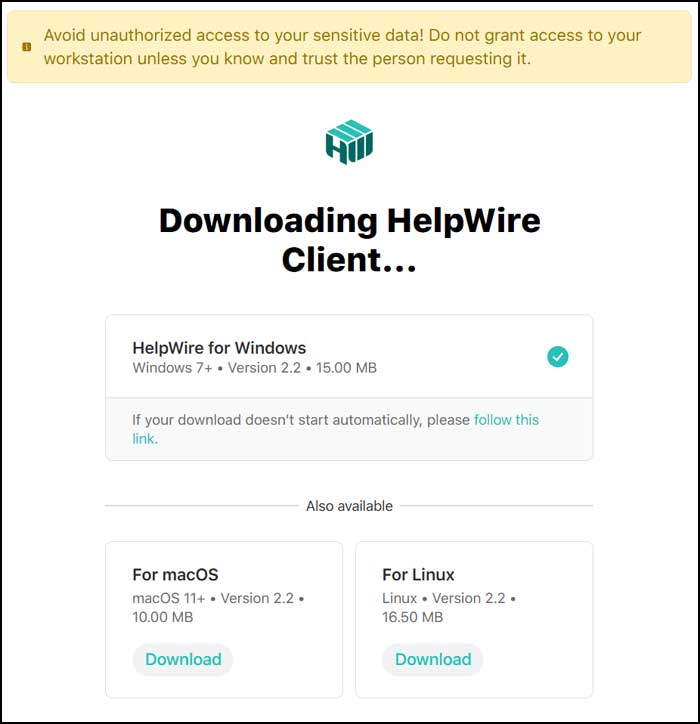
When the user on the other end opens the link, they will be prompted to download the HelpWire client. The browser will automatically detect their operating system. It provides the exact download file they need to proceed with the support session.
2. Run the Client Executable
This will be an executable file for them just like it was for the computer providing the support. They need to locate their downloads folder. Have them double click this file to launch the client interface.
3. Clear the Client Firewall
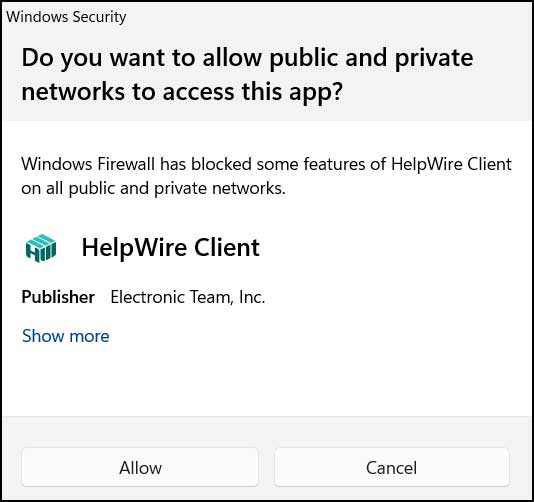
When they double click the HelpWire Client.exe file, they will also need to allow HelpWire through the firewall. They do this by clicking the Allow button at the prompt. Bypassing this step will block the incoming remote connection completely.
4. Grant Remote Access
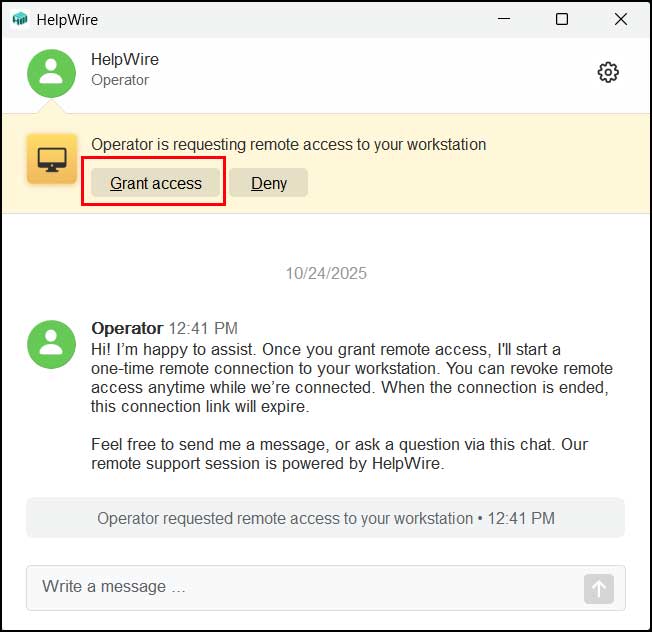
Once the HelpWire client is running, they will need to click the Grant access button to allow you to connect to their computer so you can then control it from your end. They can also send you a message before granting access if needed. This provides an excellent layer of user consent.
5. Manage the Active Session
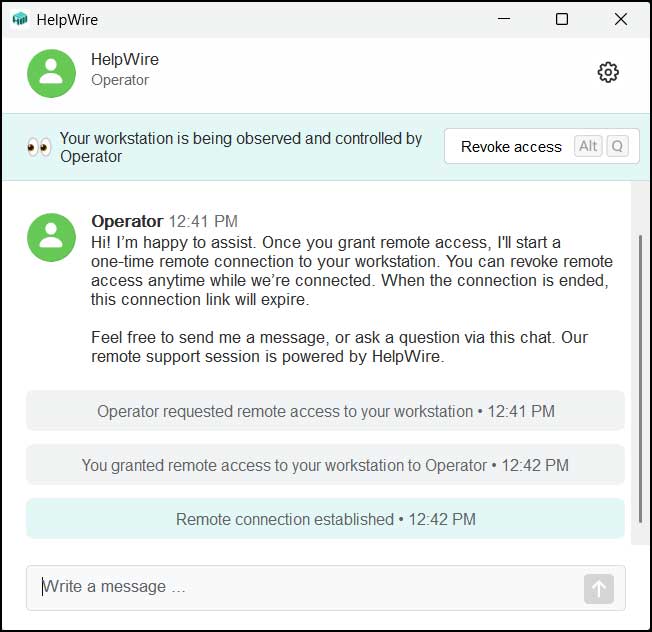
Once remote access is granted, they will have the option to revoke access at any given time. They can also type messages as needed to communicate with the IT technician. This chat box stays open during the entire remote session.
Controlling the Remote Desktop
1. Navigate the Remote Screen
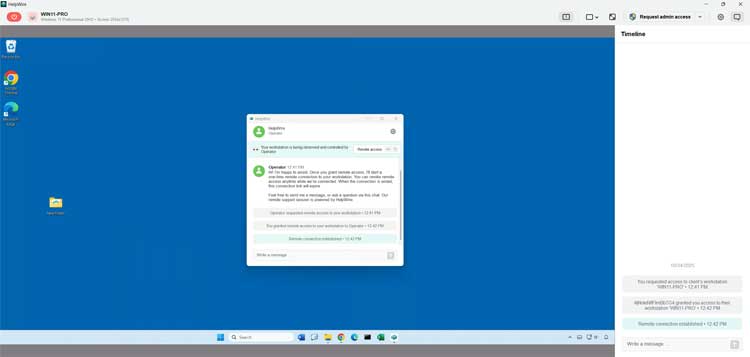
On your end, you will then see their desktop and be able to remotely control it as if you were sitting in front of their computer. Your mouse and keyboard inputs pass directly through the internet to their machine. The connection speed depends entirely on both network bandwidths.
2. Adjust Connection Settings
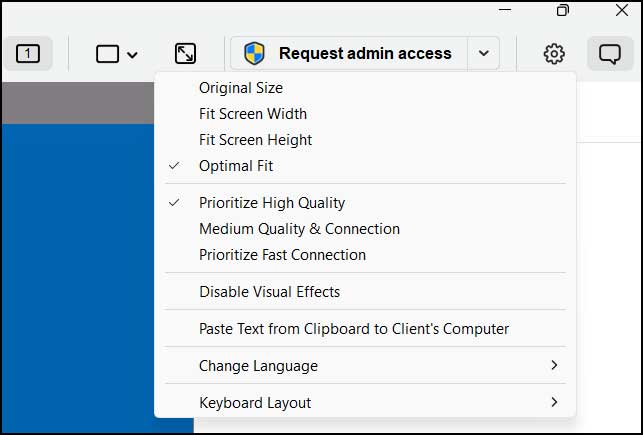
There are some buttons and options at the top of the app that allow you to do things such as choose which monitor you want to use if there is more than one and go full screen if needed. There is also an option to request admin access to their PC or request admin access with credentials. If you click on the settings gear icon, you will see some additional options if you want to fine tune your connection settings.
3. Disconnect the Session
To disconnect the remote session, you can click the power button at the upper left of the app. This will not shut down their computer, but rather just disconnect you from it. The client will immediately see that the session has ended on their screen.

4. Understand Link Expiration
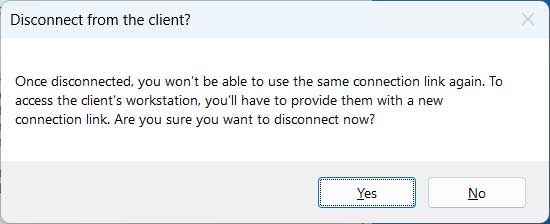
You will then be told that you will need to generate a new connection link to reconnect to the computer since you cannot use the same one more than once. Every single support session requires a brand new generated URL. This keeps unauthorized users from reusing old links.
For additional training resources, check out our online IT training courses.
Check out our extensive IT book series.