Last Updated on June 4, 2026
Having the ability to remotely control other computers over the network or over the internet is one of the more popular and convenient tech related tasks that we can do with our computers. This way we can provide IT support to other users at different locations as well as connect to our other computers at home or at the office without needing to be at these locations.
There are many remote desktop apps that you can use to connect to your other computers. Many are free and some require you to buy the app or pay a subscription fee. And of course, Windows has its built in Remote Desktop and Quick Assist tools that you can use for free. In this article, we will be showing you how to provide remote assistance and configure unattended access to remote computers over the internet using the free StarDesk remote control software.

StarDesk is a high-performance remote control software designed for remote gaming, remote work, and remote assistance across multiple platforms such as Windows, macOS, Android and iOS. You can download StarDesk for free from their website.
Configuring StarDesk for Unattended Access
1. Install and Link Your Google Account
Once you safely install and run StarDesk for the very first time, the program will ask if you want to have it start with Windows. You definitely want to consider enabling this if you plan on using it for unattended access to your computer remotely. You will also be strictly required to log in with your active Google account to use the application. This specific requirement may change in the future so just be aware of that detail.
2. Choose Your Specific Connection Type
Logging in with the exact same Google account on both computers gives you the immediate option to use the unattended access feature. Using completely different Google accounts restricts you to only use the standard remote assistance feature. Obviously if you are going to be directly supporting a client or family member, you will absolutely want them to sign in with their own personal Google account.
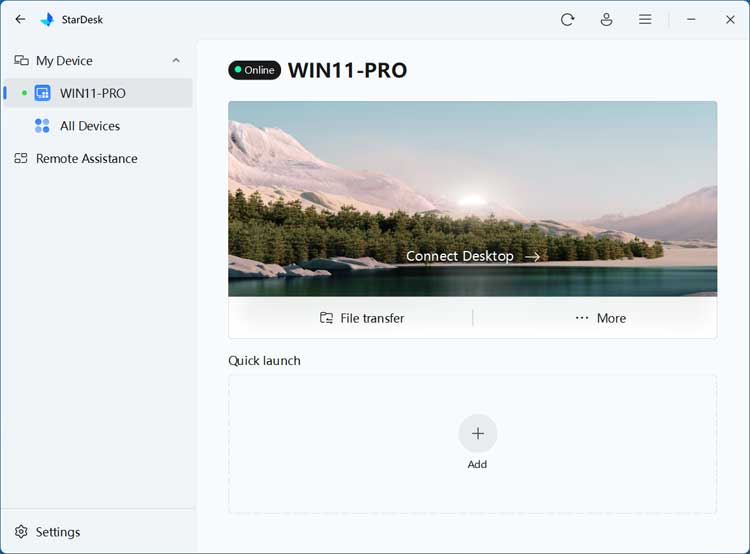
3. Review Your Device Menu Screen
The software interface changes depending entirely on your specific login configuration. The screen will dynamically populate when configured with the exact same Google account on both active computers. You simply will not have the My Device section visible at all if you are using completely different accounts.
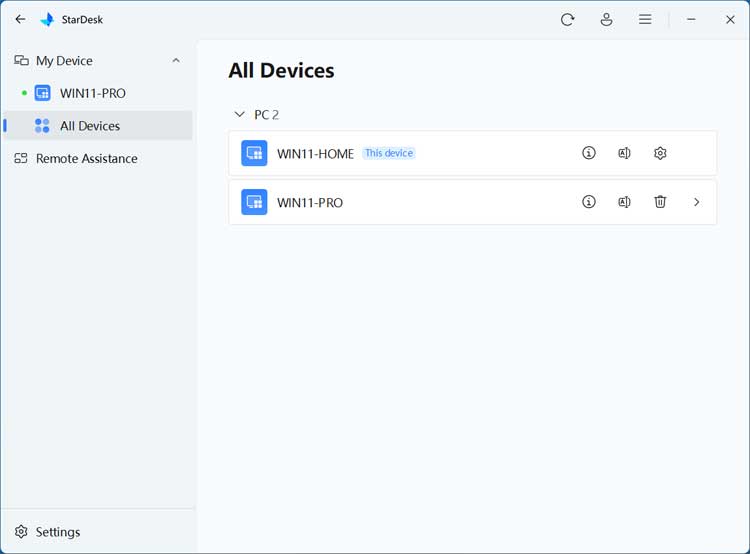
4. Manage Your Connected Devices
You can explicitly click on the All Devices tab to see your entire hardware list. This specific screen shows all the computers that currently have StarDesk installed with your exact same Google account. You can permanently remove any offline machines that you do not need by clicking the trash can icon located right next to the computer name.
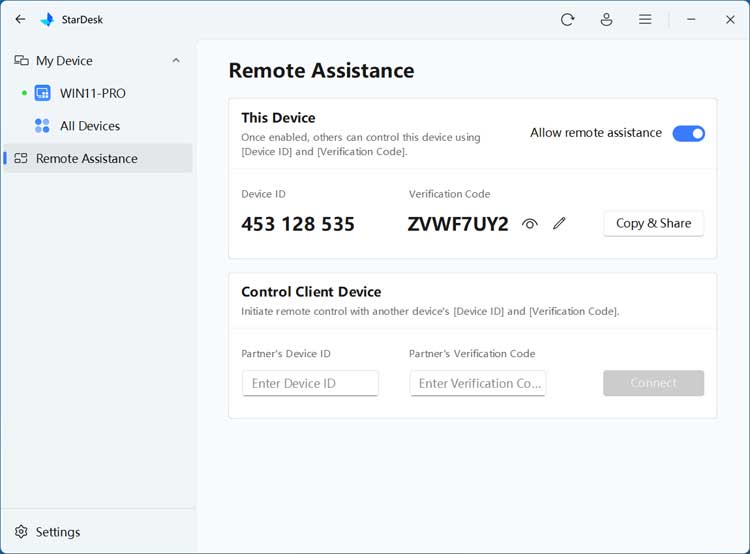
Using the Remote Assistance Features
1. Share Connection Credentials
The standard Remote Assistance feature works exactly like other popular remote control apps such as TeamViewer or AnyDesk. The remote user sitting at the target computer will explicitly provide you with their unique generated ID and temporary password. You can then instantly connect to their computer desktop securely over the internet.
2. Navigate the Virtual Display
Once you successfully connect to the remote computer, the desktop will instantly open in its own dedicated window on your screen. You can use it flawlessly just as if you were sitting right in front of the physical machine. The app also conveniently shows a live network status box right at the lower right side of the active screen.
3. Open a New Virtual Desktop
Look straight at the top of the connection window to find the navigation tabs. You will clearly see a plus button that can be used to open a brand new virtual screen inside a new tab. The Virtual Screen option in StarDesk lets you create a software only display on your remote PC. This specific feature allows you to comfortably work or game without utilizing the physical monitor at all and is very similar to the Virtual Desktop feature in Windows.
Managing Remote Session Options
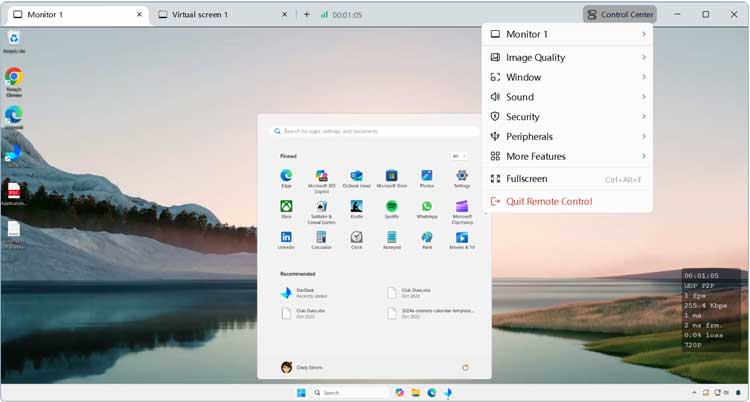
Clicking on Control Center will immediately bring up the advanced options menu for your active remote session.
1. Switch Active Monitors
The Monitor 1 option lets you easily swap between your available displays. You can smoothly toggle between or simultaneously view multiple physical monitors connected directly to the remote machine. This is absolutely crucial for navigating complex multi monitor workstations.
2. Adjust the Window Display
The Window setting directly controls your visual scaling preferences. It adjusts exactly how the remote desktop resolution is physically displayed on your local device screen. You can stretch or shrink the live display to fit your exact viewing needs.
3. Control System Audio
The Sound button acts as your main audio toggle during the active session. This feature directly controls the audio streaming coming straight from the remote computer hardware. You can easily mute background noise or listen to system alerts remotely.
4. Enforce Desktop Security
The Security tab gives you strict administrative control over the active session. It lets you do critical things such as securely lock the computer the moment you disconnect. You can also completely black out the remote physical screen so the remote user cannot see exactly what you are doing.
5. Manage Peripherals and Inputs
The Peripherals option gives you deep control over your physical input routing. This menu specifically lets you manage connected input devices like your local keyboard, mouse, and even a gaming gamepad. It translates your local hardware inputs perfectly to the remote system.
6. Access More Features and Full Screen
Clicking More Features exposes additional advanced options hidden from the main bar. This includes instant file transfer capabilities and an option to completely hide the network status screen when connected to the remote computer. You can also use the Full Screen button to instantly toggle your viewing window to fill your entire local monitor.
Advanced StarDesk Tools and Settings
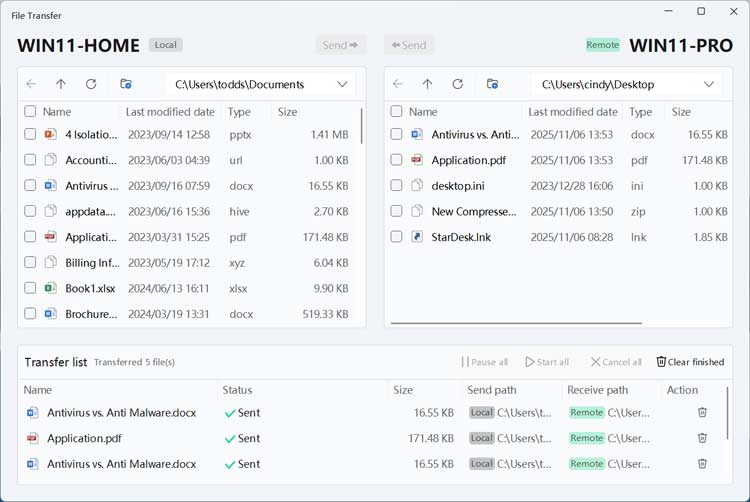
1. Transfer Files Between Computers
StarDesk also has a powerful file transfer feature where you can easily move files and massive folders between your local computer and the remote computer. This specific feature is completely restricted to unattended access connections and will not work for basic remote assistance. You can actually initiate a file transfer without even being fully connected to the remote computer desktop itself.
2. Use the Quick Launch Feature
The Quick Launch feature allows you to completely bypass the standard desktop environment. You can add specific apps installed on the remote computer straight to your local list. You simply click on the exact app you want to launch, and StarDesk will start the remote session and open that application automatically.
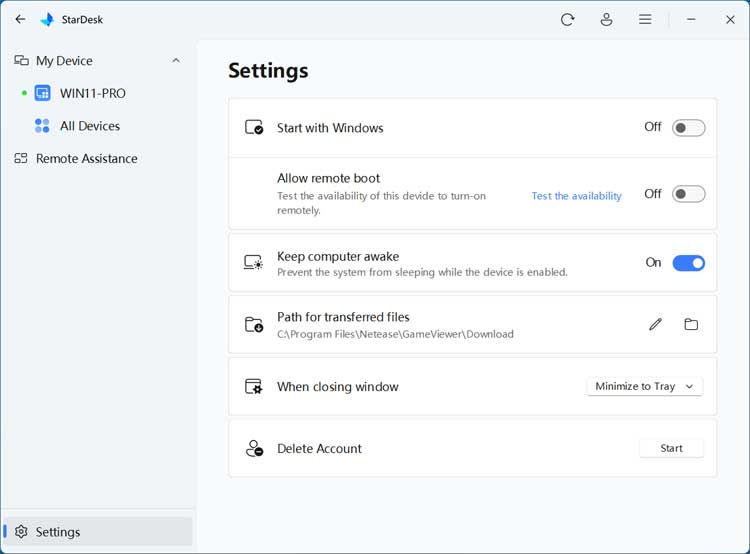
3. Customize the App Settings
If you want to change exactly how StarDesk works, you can go straight to the settings section to configure your preferences. Here you can easily configure the app to always start automatically with Windows. You can also keep the remote computer permanently awake while connected to it and completely change the default folder location for all file transfers.
4. Delete Your StarDesk Account
If you no longer wish to use StarDesk services, you can click on the Start button located right next to Delete Account. This specific action will have your Google account completely and permanently removed from the application database. You will still absolutely need to manually uninstall the StarDesk software from your computer if you no longer wish to use it locally.
StarDesk can be downloaded from their website here.
For additional training resources, check out our online IT training courses.
Check out our extensive IT book series.