Last Updated on May 20, 2026
Whether you check your email using a web based service such as Gmail or if you use a desktop email client such as Microsoft Outlook, eM Client or Mailbird, one thing will be consistent between them. And that is they will show new or unread emails as bold and messages that you have read as not being bold. This is done so you can easily find your unread emails to help keep you organized. This bold feature will also apply to emails that are in different folders.
Microsoft Outlook is probably the most popular email client in use today, especially in the business environment. And if you are the type who gets more email than you can keep up with, you might have trouble keeping track of unread email that you need to get to at some point. In this article, we will be showing you how to use both the unread search filter and unread mail search folder to find unread emails in Outlook.

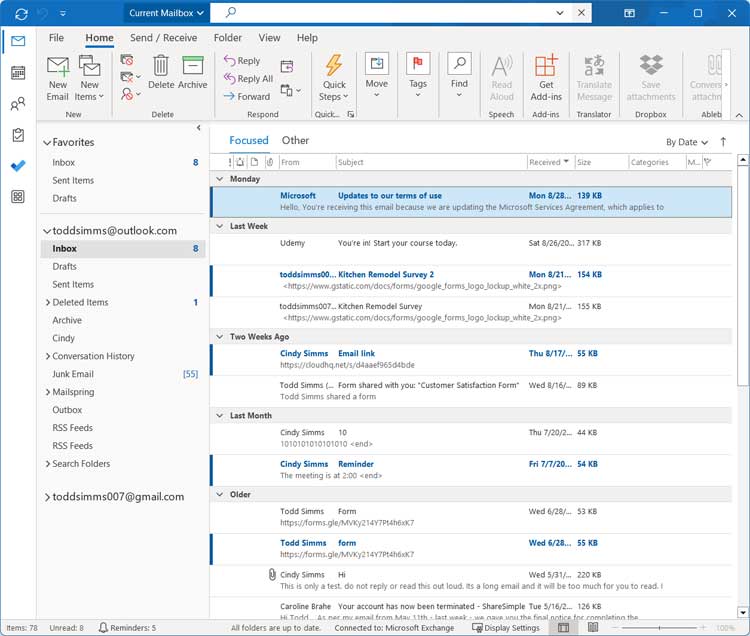
As you can see in the image below, there are multiple unread emails spread throughout the Outlook inbox. If you want to see all the unread messages, you will need to scroll through the entire inbox to find them and if you have a lot of email like most of us do, this can be a bit tedious.
1. Activate the Unread Search Filter
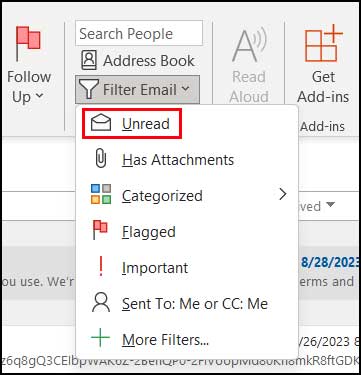
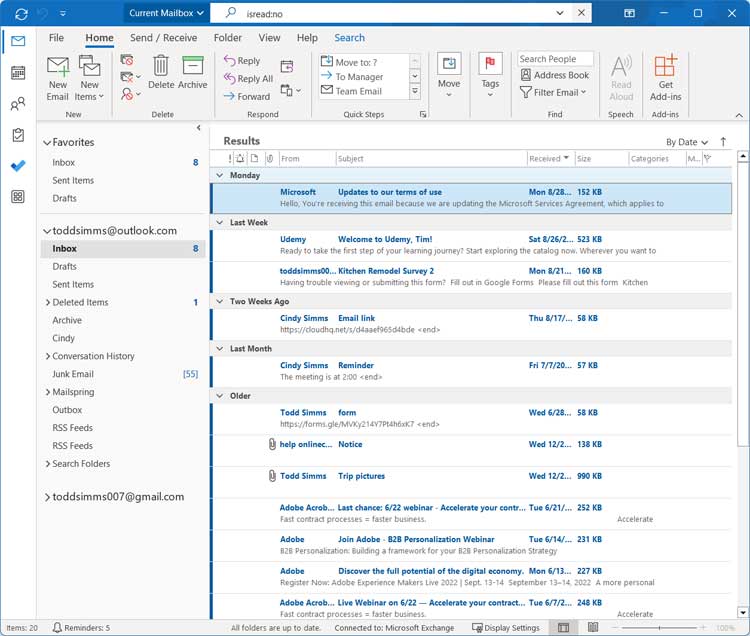
One easy way to see all your unread emails in one place is to use the built in unread search filter. This specific toggle changes your view so your inbox will only show unread messages and nothing else. The only problem with this method is that you will not be able to see your standard read emails without manually turning the unread search filter off.
2. Create a Dedicated Search Folder
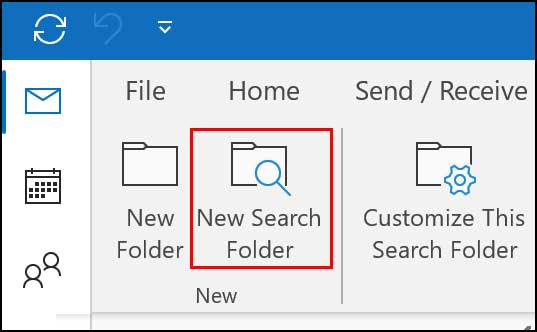
Another powerful option you can use is to configure the Unread mail search folder to find unread emails in Outlook. To enable this dynamic search folder, you will need to click on the New Search Folder button located directly on the Folder tab within the application. This creates a permanent dynamic view that constantly updates as new messages arrive in your primary inbox.
3. Configure the Reading Mail Criteria
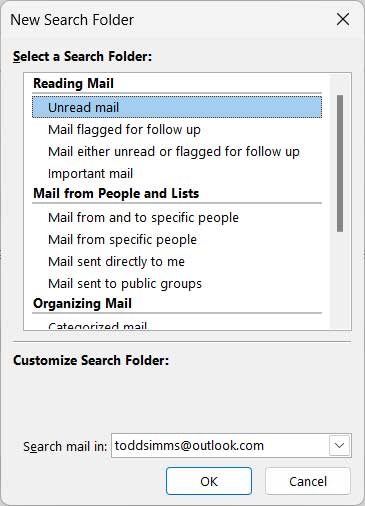
The setup wizard will ask you to define exactly what parameters the system should track. You will need to select the Unread mail folder template located under the standard Reading Mail category list. Make sure you explicitly select your primary profile from the Search mail in dropdown list if you currently have more than one email account configured in Outlook.
4. Navigate Your New Dynamic Folder
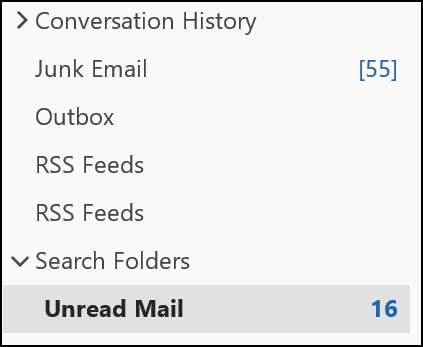
Now you will notice that you have an Unread mail folder permanently listed under your Search Folders category in your left navigation pane. When you click on this folder, you will be shown only your unread emails and you can then easily toggle between your normal inbox and this filtered folder as needed. Keep in mind that this new dynamic directory will grab and display unread messages from all of your connected folders including your hidden Spam and Trash directories.
5. Pin the Folder to Your Favorites
Scrolling to the bottom of your directory tree every single time wastes valuable productivity. You can simply right click the newly created folder and choose Add to Favorites to force a copy to appear right at the top of your Outlook folder list. Pinning the shortcut here gives you instant access to your pending messages the second you launch the mail client.
6. Remove an Unwanted Search Folder
You might eventually decide that your email volume no longer justifies keeping this extra directory pinned to your screen. If you do not want to use the Unread Mail search folder anymore, you can simply right click on it and choose Delete to instantly remove the folder but leave the emails perfectly intact. Just make absolutely sure you do not accidentally choose the Delete All option because that strict command will permanently delete the actual email messages themselves.
7. Switch Back to the Classic Ribbon
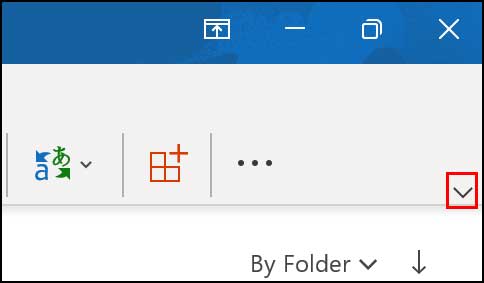
The modern Microsoft 365 app design sometimes hides advanced configuration menus to save screen space. If you are missing the Search Folder option or Folder tab, you will need to temporarily switch back to the old Ribbon layout until Microsoft decides to add the option to the new compact interface. You can switch back instantly by clicking on the small down arrow at the far right of the Ribbon to toggle between the classic and modern interface.
For additional training resources, check out our online IT training courses.
Check out our extensive IT book series.