Last Updated on July 6, 2026
As you probably know, Microsoft Word allows you to place images in your documents so they do not to be only text based. Once you start adding pictures to your documents, you may find that they are getting quite large in size, and it also makes the number of pages in the document increase as well.
If you have a document with many pictures, you can delete them one by one but there is an easier way to remove all the pictures from a Word document in one step. This comes in handy to reduce the size of the file and also for printing if you do not need to include the pictures in your printout. And yes, there is also a way to print a Word document without the images if you want to keep them in your file.

Our sample document is 192 pages and 30MB in size. We are going to strip every single image out of this file simultaneously. To remove all the pictures from this Word document in one step, we will use a hidden trick inside the Find and Replace tool.
Using the Find and Replace Tool for Images
1. Open the Replace Dialog Box
First, we will open the target document in Word. Then from the Home tab on the main ribbon, look for the Editing group on the far right side. We will click on the Replace button to launch the utility. You can also press Ctrl+H on your keyboard as a shortcut.
2. Access the Special Search Options
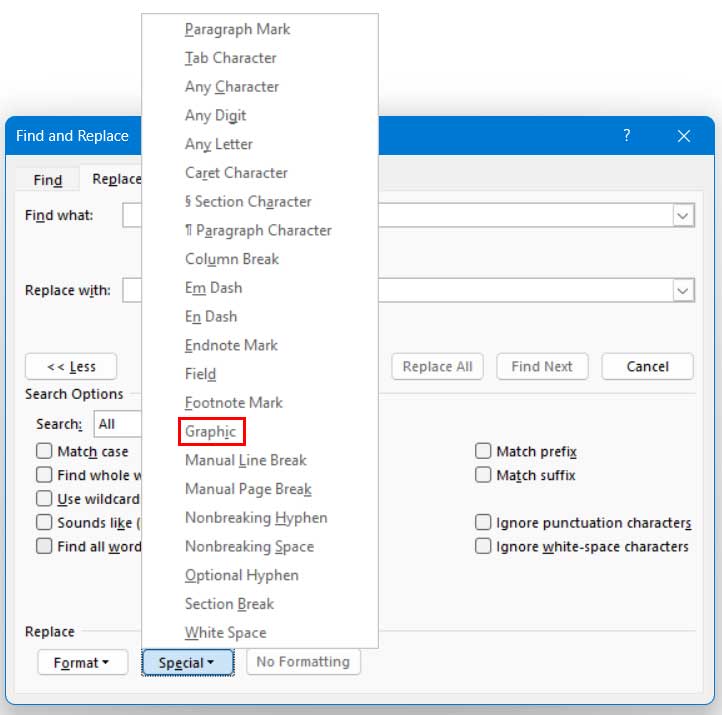
This will then bring up the Find and Replace dialog box that is normally used to search for specific words and phrases within your document. From the Replace tab you can click on the Special button at the bottom to bring up some additional hidden find and replace options.
3. Select the Graphics Parameter
A long list of formatting options will pop up on your screen. From there we will click on Graphic to tell Word to specifically look for images in the document instead of text.
4. Verify the Search String
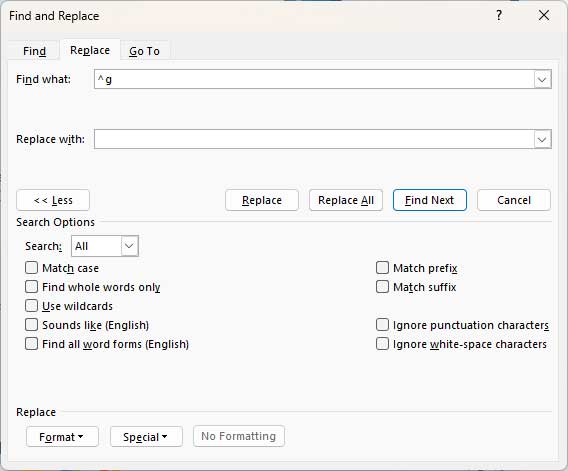
After clicking on Graphic, Word will automatically place ^g in the Find what box. You can also manually type ^g in the Find what box to save yourself a step next time. You do not need to type absolutely anything in the Replace with box for this procedure to work. Leaving it completely blank is what triggers the deletion.
5. Execute the Mass Deletion
Next, we will click on the Replace All button. This forces Word to scan the entire document for the ^g parameter. It will instantly have all of the images be replaced by nothing technically since we didn’t put anything in the Replace with box.
6. Review the Confirmation Prompt
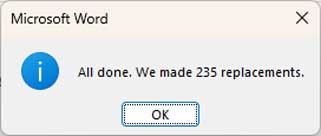
Once the process is complete, you will see a small popup window telling you exactly how many images were removed. In our case, there were 235 pictures in the document that are now permanently gone. Click OK to close the prompt.
7. Verify the File Size Reduction
Now that the images have been removed from the Word document, we went from 192 pages down to just 60 pages. The document was successfully reduced from 30MB to a tiny 5MB in size. It is also possible to hide and unhide text in your Word Document if you need to do that as well to further format your file.
For additional training resources, check out our online IT training courses.
Check out our extensive IT book series.