Last Updated on July 25, 2026
You may run across a situation where you have two Microsoft Word documents that look similar, but you are not sure which one has the information you want to use. So rather than read each document line by line and try to manually spot the differences, you can use the Word compare feature to find the differences between the 2 documents for you.
By using a tool like this, you can then find out which document is the one you want to keep, or you can also use it to edit or combine the two documents into one final file. Then you will have the correct information from each document combined into one complete file.

Using the Compare Feature in Microsoft Word
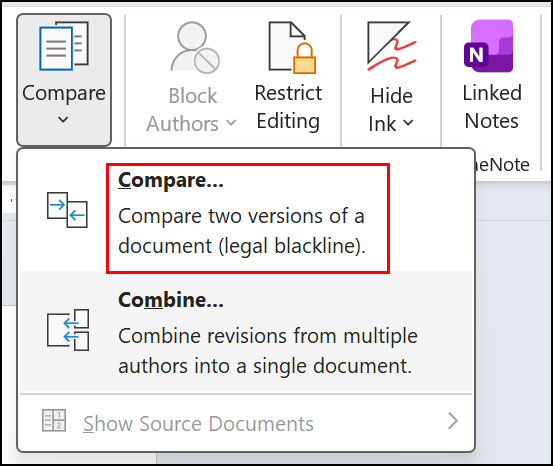
The Microsoft Word Compare feature works by opening 2 documents at the same time side by side and highlighting the differences between them. To start the process simply go to the Review tab and then click on the Compare button and then on Compare once again.
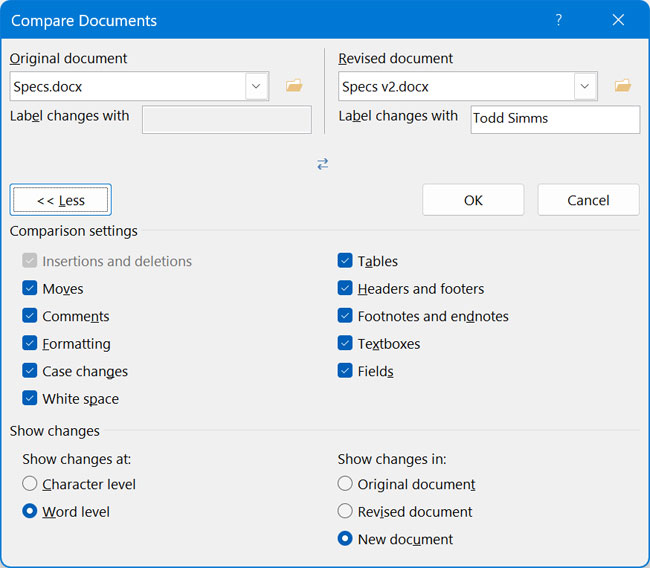
Next, you can open the original and revised document by selecting them from the dropdown list if they are there. Otherwise, you can click the folder icon to browse to the location of each file.
You can then click the More button to uncheck any of the comparison settings you do not want to use. They will all be selected by default.
Configuring Word Comparison Settings
The Show changes at setting determines how finely Word highlights your edits. Selecting Word level replaces entire words whenever an edit is made, keeping the layout clean and easy to read for general text.
Selecting Character level pinpoints exact individual letters, numbers, or symbols like changing a single digit in a part number, making it ideal for technical specs or detailed code review.
The Show changes in setting controls where your comparison results are placed. By default, New document creates a separate temporary file so both of your original source files remain completely untouched and safe.
Alternatively, choosing Original document or Revised document will apply all the tracked markup directly into one of those existing files instead.
Reviewing Differences Side by Side
Now that both documents are open, you can see the original document at the upper right and the revised document at the lower right. Technically, either document can be the original or revised document.
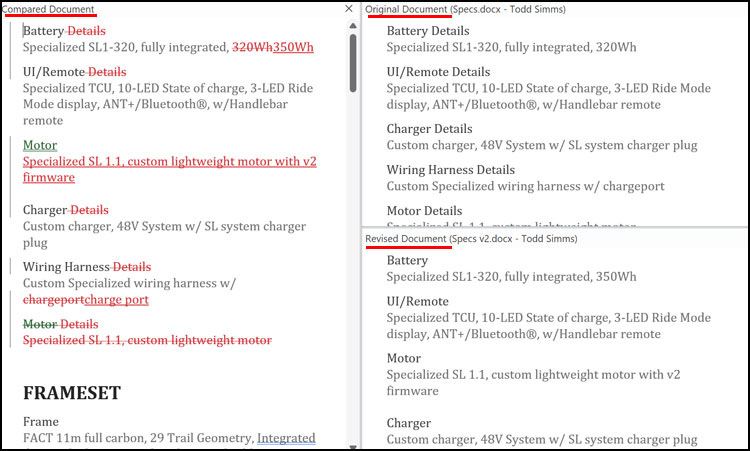
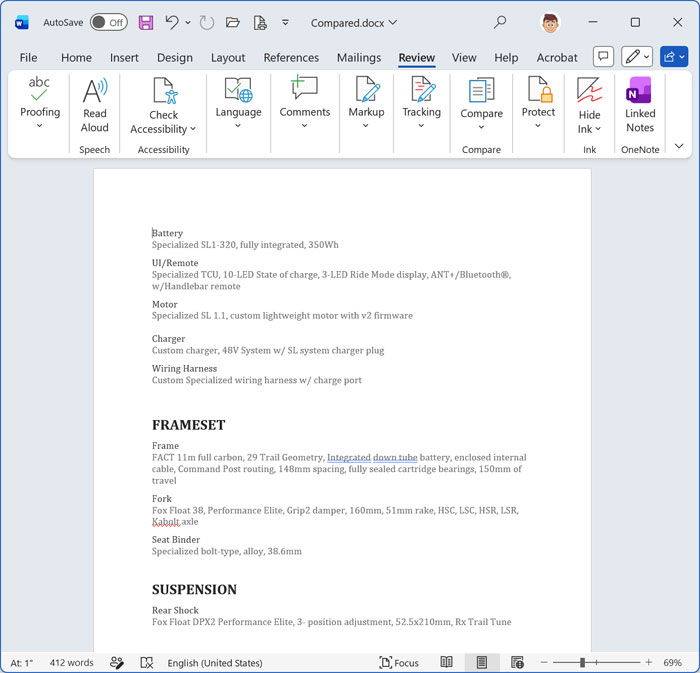
The compared document in the left pane is a comparison of both documents and shows the differences or changes between them.
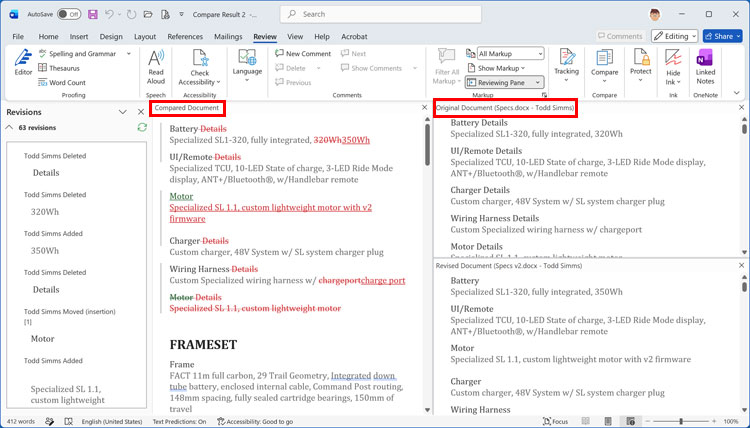
If we zoom in, we can see the word Details was removed after the word Battery on the first line and you can see it was there in the original document but is not there in the revised document. We can also see that 320wh was changed to 350wh indicated by the strikethrough over 320wh and the underline applied to 350wh.
Saving and Clearing Tracked Changes
If you want to make changes to the version of the document that contains the comparison information, you can simply make your edits from the left pane or do a Save As and then save this combined document as a new Word file. Then you can open the document to continue editing it without affecting your original or revised version.
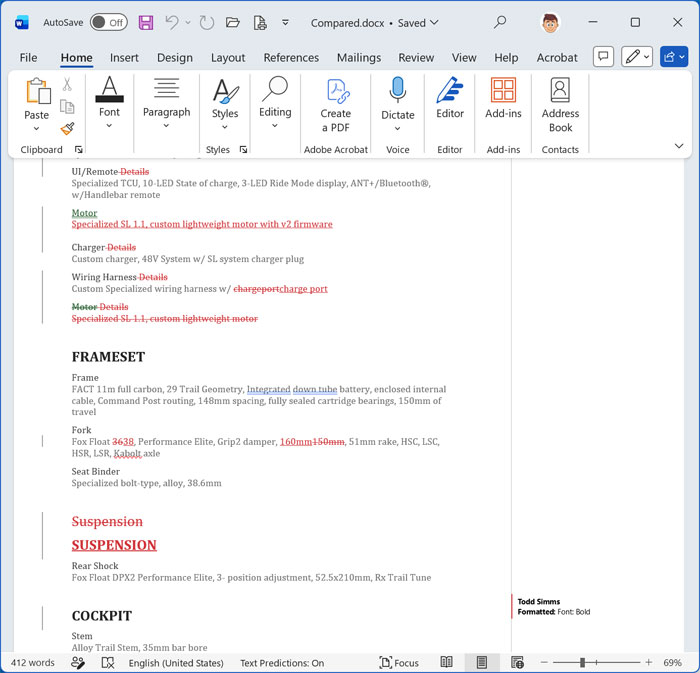
If you do save it as its own document, you may notice that it will still contain the changes and show them in red. It might also show the document authors name in the right margin.
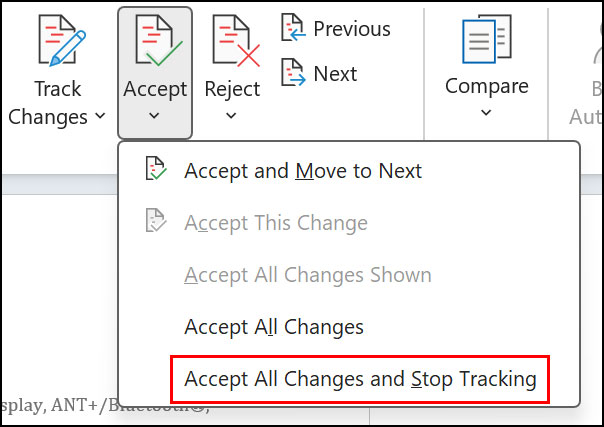
To remove this markup, you can go to the Review tab and then click on the Accept button and choose Accept All Changes and Stop Tracking.
Then your document will be free of markups, and you can continue working on it as needed.
For additional training resources, check out our online IT training courses.
Check out our extensive IT book series.