If you’ve ever booted up your computer and noticed two entries for Windows 11 and need to choose one to continue, you’re not alone. This situation can be puzzling, especially if you only have one operating system installed. Duplicate boot entries often appear after major updates, recovery operations, dual booting with another OS or certain system changes, and while they don’t usually indicate a serious problem, they can raise questions about what’s happening behind the scenes during startup. Understanding why these extra entries show up can help you feel more confident about your system’s configuration and what it means for your PC.

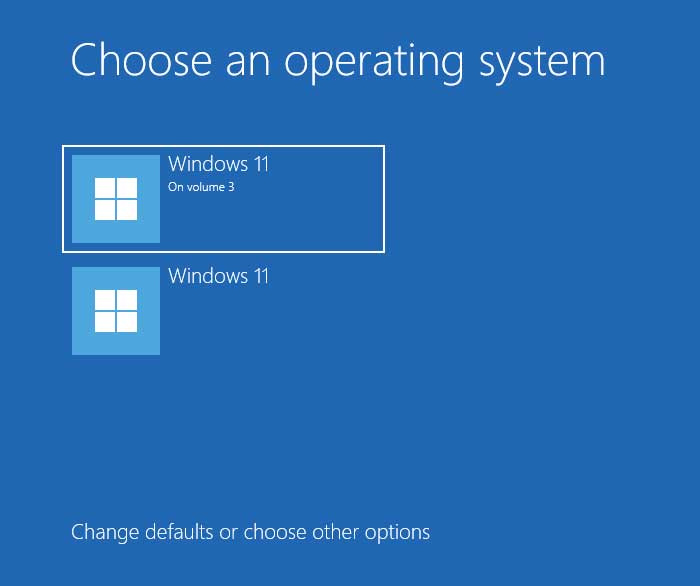
The image below shows what you might see when you boot up your computer and see two entries for Windows 11. One of them might say something like Windows 11 on volume 3 or something similar. Then you will need to be sure to choose the right one in order to start your computer correctly. So, if your Windows boot menu shows two OS entries, we will be showing you how to fix it.
There are two methods you can use to fix the issue of the Windows boot menu showing two OS entries, one is via the System Configuration tool and the other is via the command line.
Removing the Extra Windows Boot Menu OS Entry Using the System Configuration Utility
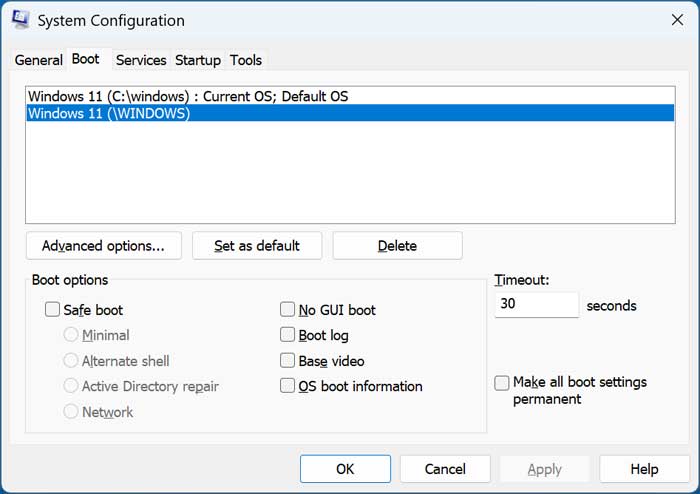
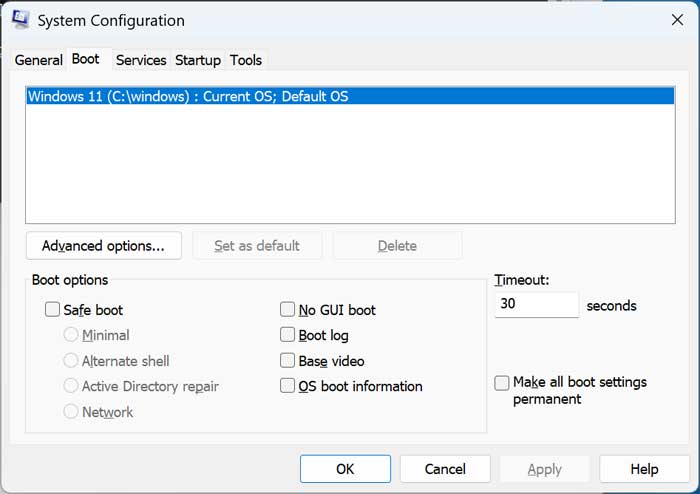
If you type msconfig in the Windows taskbar search box, you should see an option for the System Configuration utility. Once you have the tool open, click on the Boot tab and you will see the same two OS entries as you did when booting your computer. You should be able to click on both, and one should have the Delete button grayed out when selected. This tells you that this is the OS version that you are booted to right how. Then if you click on the other entry, you should be able to click on the Delete button and have it removed from your boot menu choices.
One thing you need to consider when deleting the OS entry using this method is that if you are using BitLocker or Device Encryption is that when they detect this change, it will likely trigger BitLocker or Device Encryption recovery mode on the next reboot. If this does happen then you should be ok just entering your decryption key when prompted.
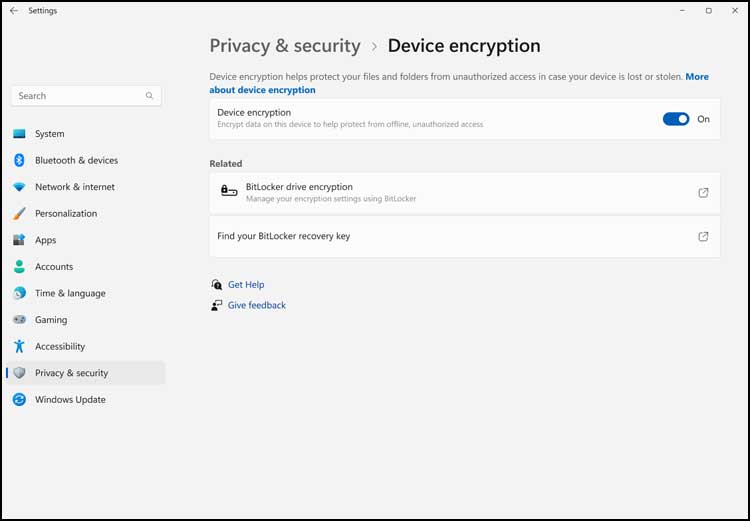
To disable Device Encryption you can do so from the Windows settings under Privacy & security > Device encryption.
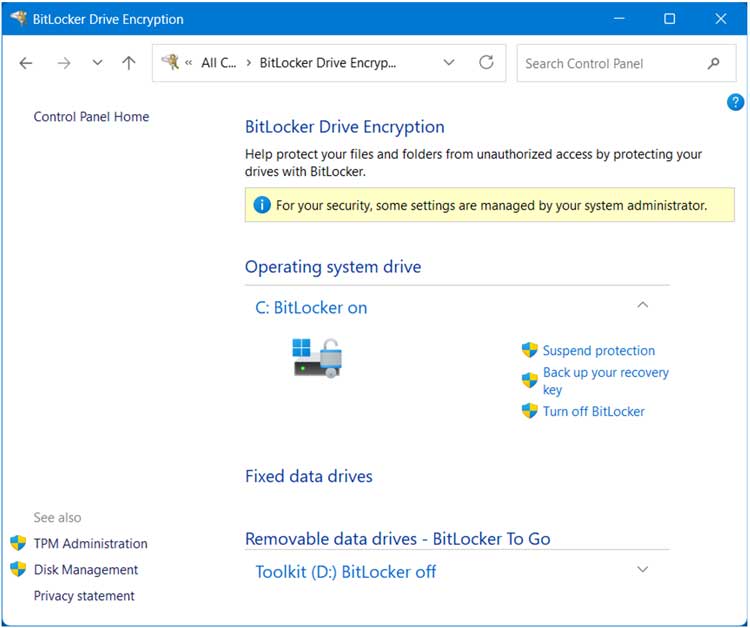
To temporarily suspend BitLocker in Windows 11 Pro, you can find it in Control Panel under BitLocker Drive Encryption and there should be a link you can click on that says Suspend protection.
If you plan on using the command line method to remove the extra Windows boot menu entry, you can disable BitLocker from there as well.
Checking BitLocker Status and Suspending it if Needed Via the Command Line
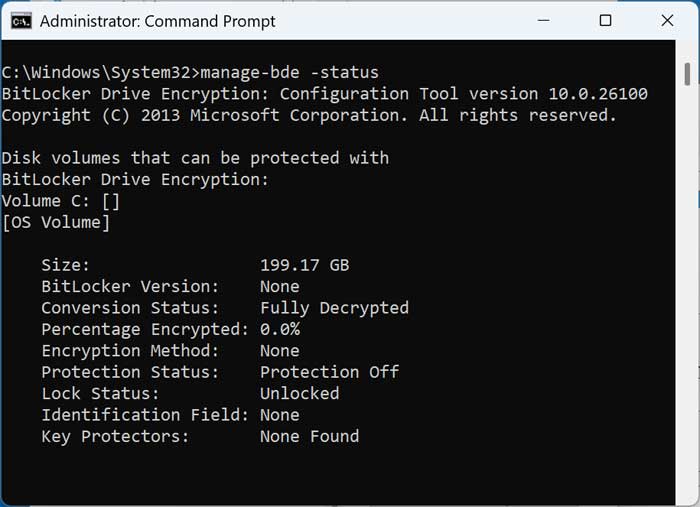
To check to see if BitLocker is enabled via the command line, you can open an administrative command line and type the following command.
manage-bde -status
If the conversion status says fully decrypted and the percentage encrypted says 0.0% then you know that BitLocker is not enabled on your computer.
To disable BitLocker temporarily if enabled you can use the following commands.
manage-bde -protectors -disable C: – Suspends BitLocker
manage-bde -protectors -enable C: – Reenables BitLocker
Removing the Extra Windows Boot Menu OS Entry Using the Command Line
If you prefer to remove the extra Windows boot menu entry via the command line, you can do that fairly easily.
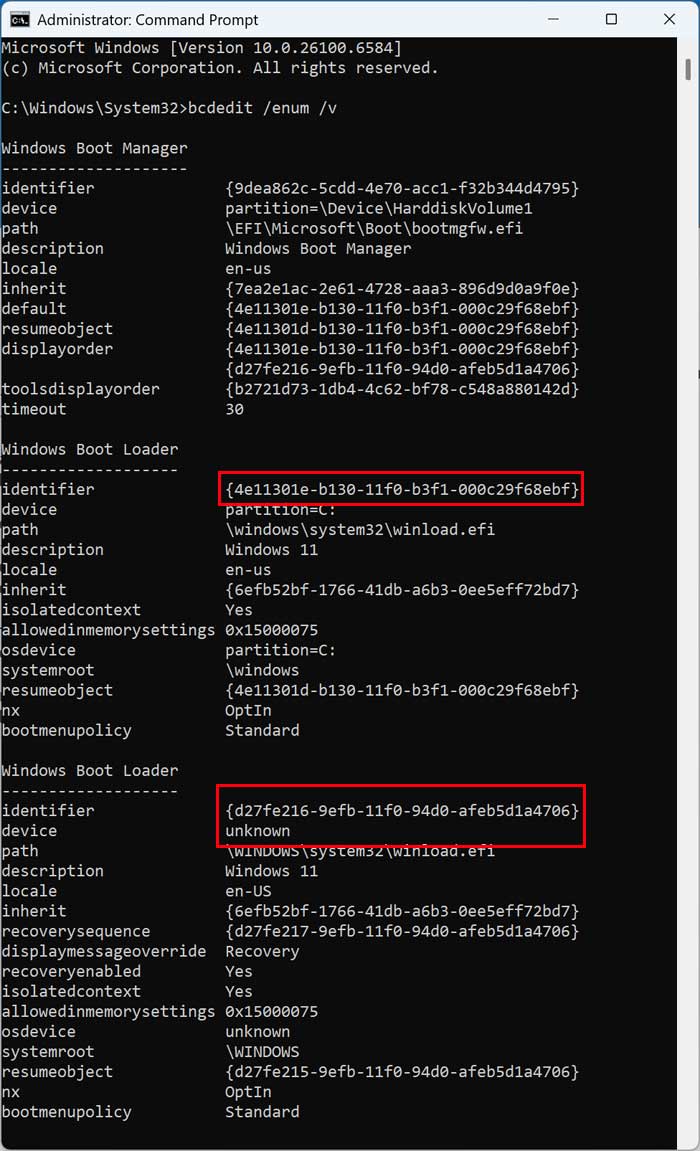
From an administrative command prompt, type the following command to list all the boot entries on your computer.
bcdedit /enum /v
Then you will need to look for two entries labeled Windows 11 under Boot Loader and note their identifiers. In our example, we have these two identifiers listed.
{4e11301e-b130-11f0-b3f1-000c29f68ebf}
{d27fe216-9efb-11f0-94d0-afeb5d1a4706}
As you can see in the image below, the second one has a status of unknown in the device section. This tells us that this is the one we no longer need.
If you want to take an extra step to make sure you are covered before deleting this identifier, then you can back up the BCD (Boot Configuration Data) first.
To do so, run this command.
bcdedit /export C:\bcdbackup
It will be saved to the root of your C: drive as a file named bcdbackup.
If something goes wrong, you can restore the backup in recovery mode using this command:
bcdedit /import C:\bcdbackup

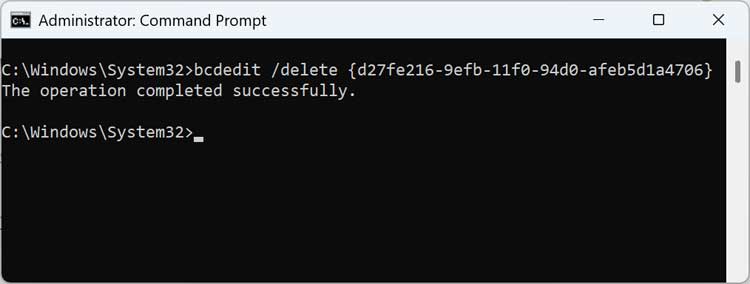
To delete the duplicate entry, we will use the following command.
bcdedit /delete {identifier}
You will need to replace {identifier} with the identifier you found in the previous command. So, in our case, the command we will use will be as follows:
bcdedit /delete {d27fe216-9efb-11f0-94d0-afeb5d1a4706}
Now when we go back to the System Configuration tool, we will find that we only have one entry for the Windows boot menu and will no longer see two OS entries when we boot our computer.
For additional training resources, check out our online IT training courses.
Check out our extensive IT book series.