
Last Updated on March 13, 2026
For those of us who still have music CDs and MP3 players, the Windows 11 Media Player app still has the ability to rip music CDs and convert them to various file formats such as MP3, AAC, WMA, FLAC and ALAC. This way you can ditch your old CDs before there are no such thing as CD players and you can then have digital copies of your music on your hard drive.
Converting your music CDs to audio files also allows you the option to use your songs in things such as movies or videos that you create, YouTube videos, slideshows and so on.

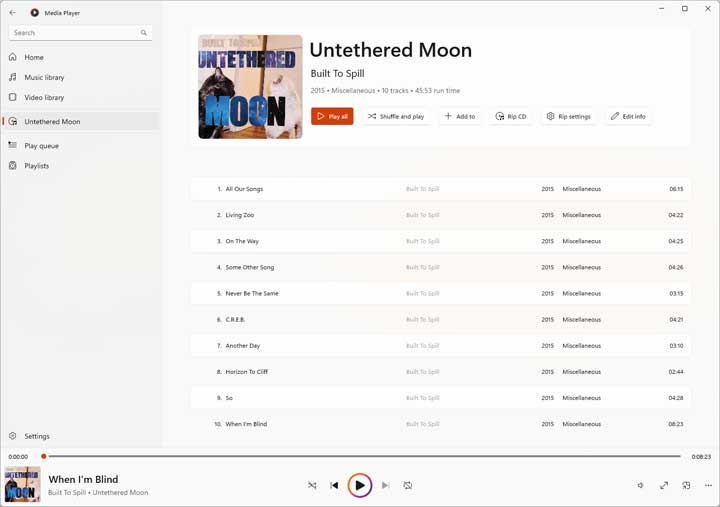
The process for ripping a music CD with the Windows 11 Media Player app is fairly simple. Once you have your CD in the CDROM drive, simply click on the album title name over at the left side of the app. If Windows Media Player cannot read the title of the album from your CD, it will most likely just say Audio CD instead.
Configuring Your CD Ripping Preferences
1. View the Album Metadata
You should then see the album and its songs listed on the main screen. The information you see here will vary depending on the metadata stored with the music on your CD. You should be able to see the song titles, artist, album name, date and song duration. If you see the word Miscellaneous listed here, this is because it did not find a genre associated with your CD.
2. Access the Ripping Settings
At the top of the Windows Media Player app, you will have several buttons that you can use to adjust settings. These buttons allow you to change metadata information for the audio files that will be created during the ripping process.

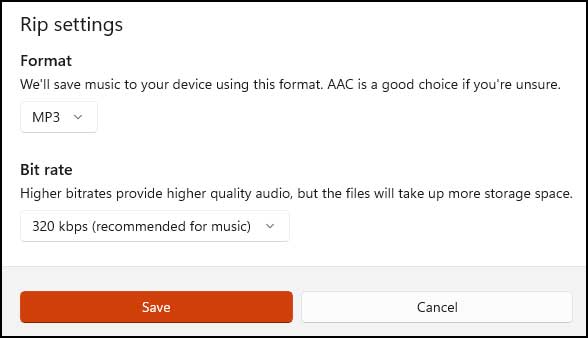
3. Choose the Output Format
If you click on the Rip settings button, you will be able to choose the exact audio file format that your CD will be converted to. Some of these file types will have additional options for quality settings such as bit rate for MP3 files. Setting the MP3 bit rate to 320 kbps offers the highest possible audio quality.
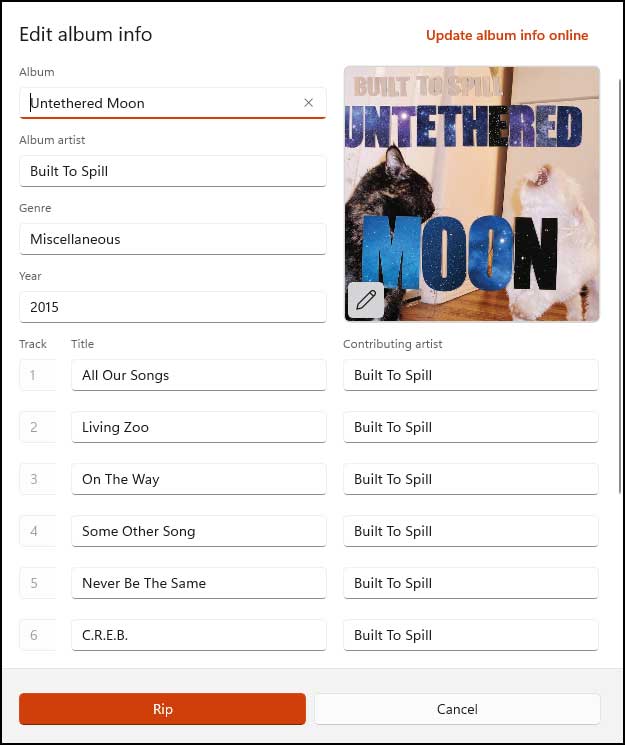
4. Edit the Album Information
If you click on the Edit info button, you can change things such as the album name, artist, genre, year, song title and contributing artist. This ensures your digital files are perfectly organized before you even start the copy process.
Ripping the CD and Finding Your Files
1. Start the Ripping Process
Once you have everything set the way you like, you can then click on the Rip CD button to start the process. The software will begin pulling the audio data off the physical disk and encoding it into your chosen format.
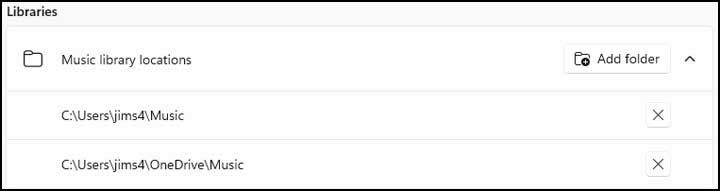
2. Locate the Default Music Folder
You will most likely find the ripped CD audio files in the default Windows Music folder. If you click on the settings gear icon within Windows Media Player, you can see exactly which folders are configured within your music library and add more as needed.
3. Change the Default Save Location
Unfortunately, you will not be able to simply change which folder the music CD will be ripped into from the main screen. You may be able to remove the default path and then add your own custom folder. You can then see if the software uses this new folder instead for future rips.
4. Verify the Folder Structure
Once the CD ripping process is complete, you can then go to your Music folder and find your audio files. Windows Media Player should have made a new folder with the name of the artist and then a subfolder with the name of the album. Then within that folder, you will find the actual audio files that have been ripped from the CD.
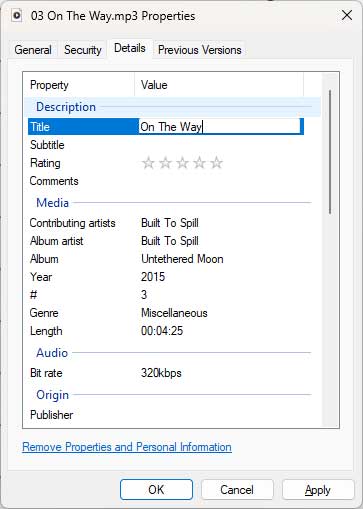
5. Edit File Metadata Manually
If you want to edit the metadata for a specific file after it is ripped, you can right click on it and choose Properties. Click the Details tab at the top of the window. Then you can adjust whichever fields you need to. Just keep in mind that not all of the sections can be changed manually.
For additional training resources, check out our online IT training courses.
Check out our extensive IT book series.


