
Last Updated on May 8, 2026
**Check out our updated video here.**
If you are a Microsoft OneDrive user and happen to use the OneDrive desktop client software on your computer, then you might have noticed that OneDrive will change the default folder locations for things such as Documents, Pictures and Desktop to a different location on your computer.
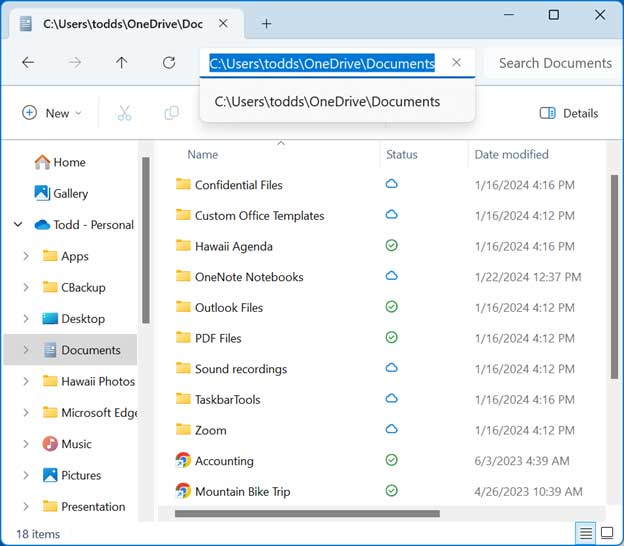
If you do not want to use the new location for your files, you may find it hard to switch things back to the default folder locations while using OneDrive. The image below shows the folder path that OneDrive uses to store your documents when you are using the OneDrive desktop client to sync your files and folders.

Attempting to Restore the Default Folder Location
1. The Incorrect Way to Redirect Folders
You may think you can simply redirect your folder path back to the default location by going directly to the properties of the folder itself. Many users navigate to the Location tab and try either typing in the original path manually or browsing to it using the Find Target button. Unfortunately, this straightforward approach usually results in a frustrating system error rather than a successful folder transfer.
2. Checking the Current OneDrive Path
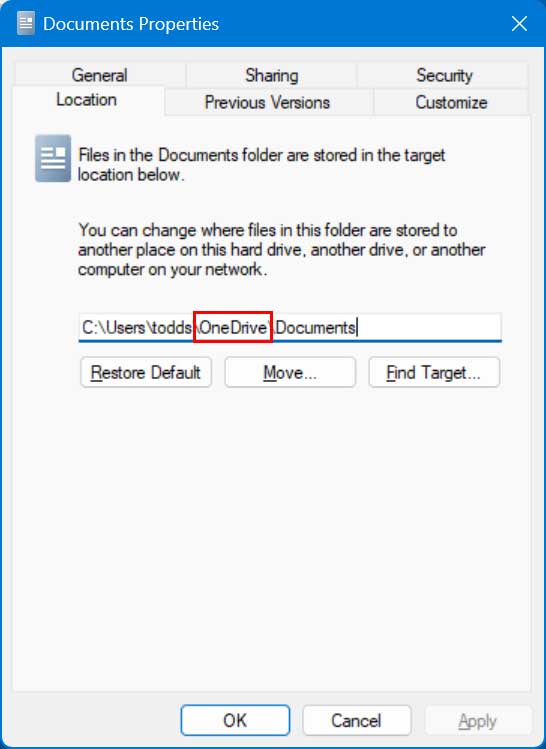
The image below shows the typical OneDrive folder location for the Windows Documents folder when the sync client is active. As you can clearly see, the path for the Documents folder is automatically set to C:\Users\username\OneDrive\Documents rather than the standard local default of C:\Users\username\Documents.
3. Setting the Original Folder Target
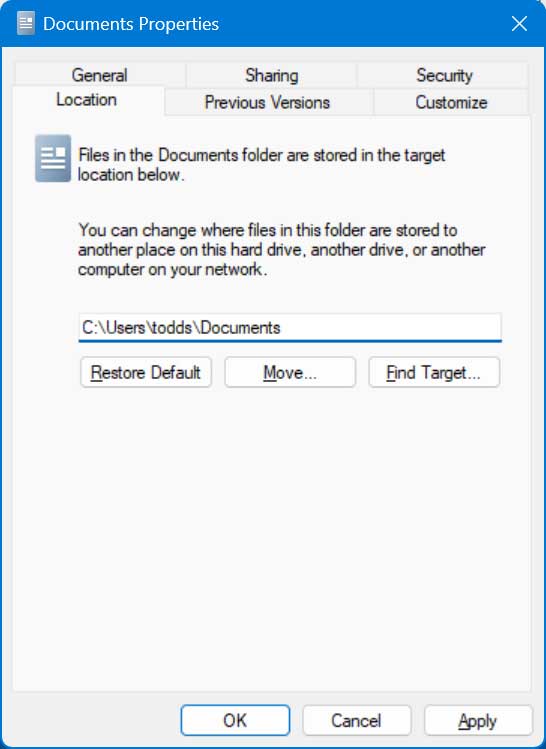
If you type in the correct path to the local Documents folder or browse to it using the Find Target button, the system will attempt to prepare the move. You will end up with your Documents properties section in the Location tab looking very similar to the reference image provided below.
4. Encountering the Access Denied Error
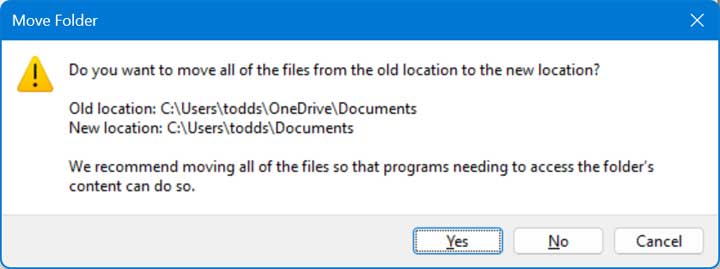
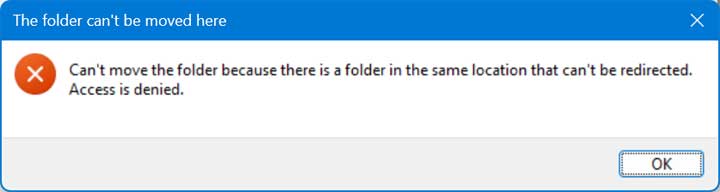
Then, when you click on OK or Apply, you will be prompted to move all of the files from the old location to the new location. You would naturally think everything would be moved flawlessly once you clicked the Yes button to confirm the action. What will most likely happen instead is you will receive a harsh error message that says “Can’t move the folder because there is a folder in the same location that can’t be redirected. Access is denied.”
5. Checking the Empty Default Folder
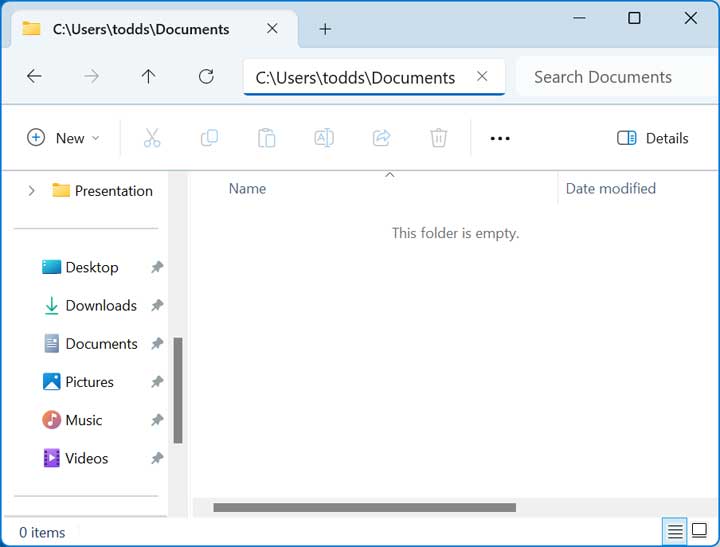
After dismissing the access denied error message, you might want to check the status of your local hard drive to see what happened. And when you go to the default Documents location on your C: drive, you will quickly see that it is still completely empty. Nothing has been successfully moved over from the OneDrive folder, meaning the standard Windows redirection method has completely failed
Changing Your Windows Folder Locations Back to Their Defaults
6. Open the OneDrive Application Settings
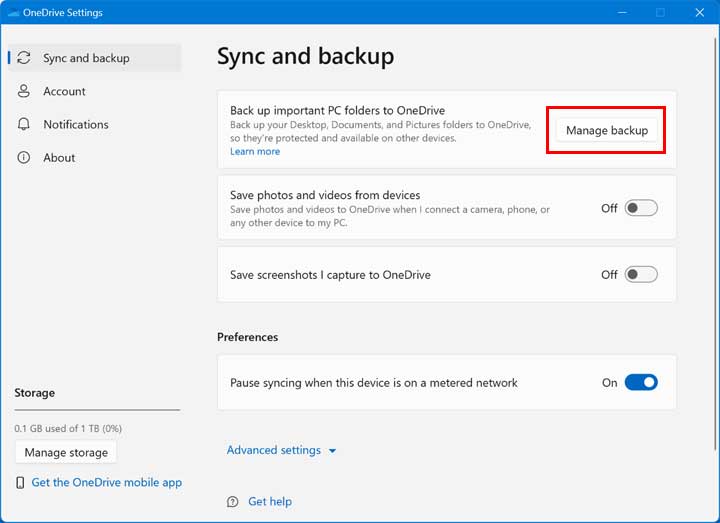
In order to permanently remedy this situation, you will need to bypass the Windows folder properties and open the OneDrive app directly from your system tray. You can also easily find it by doing a quick search for OneDrive in your Windows start menu. Once the application is open, you will need to click on the gear icon and select the “Manage backup” button to get into the main backup settings menu
7. Disable the Specific Folder Backups
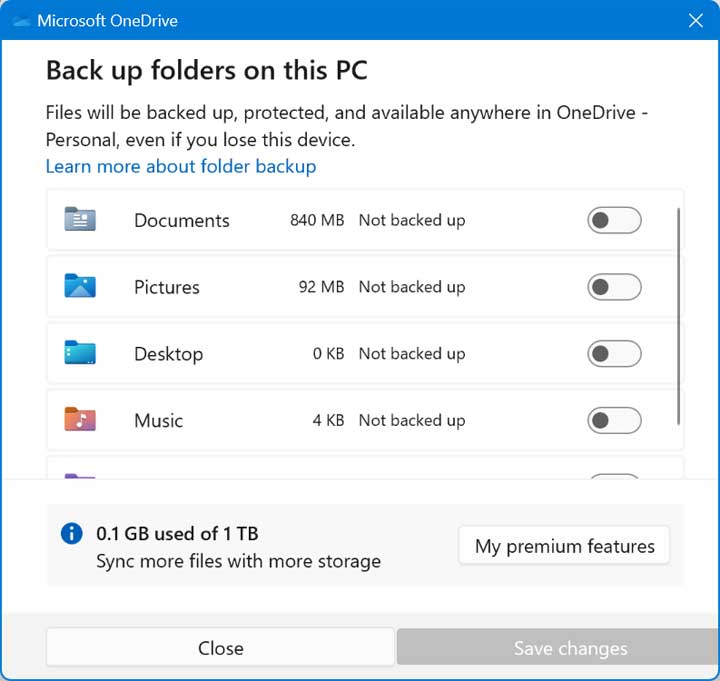
From this specific menu, you can finally disable the aggressive backup process for the Windows folders that you no longer want to synchronize with the cloud. You can do this by moving the toggle slider to the left for each specific folder you want to disable, such as your Desktop, Documents, or Pictures. Turning these toggles off tells OneDrive to immediately stop hijacking your default system paths.
8. Confirm the Stop Backup Prompt
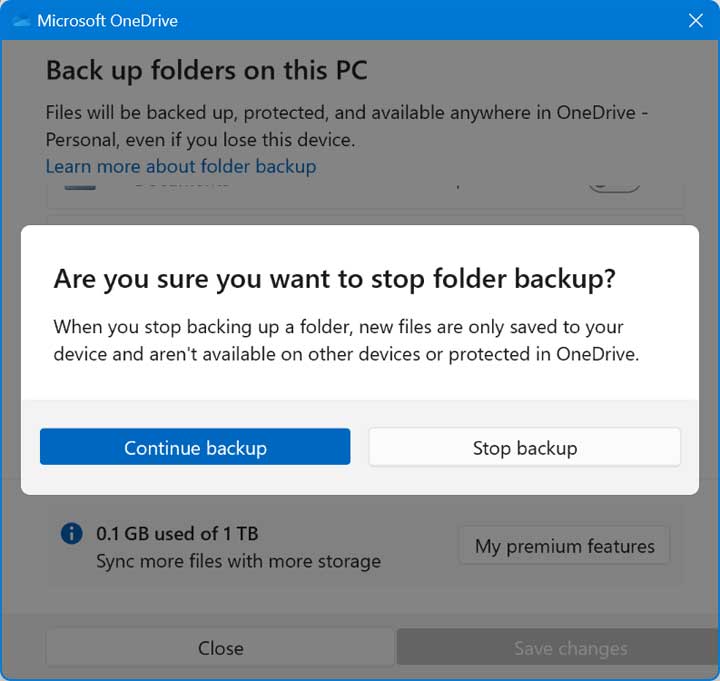
After toggling the switch, you may receive a warning message from OneDrive asking if you are absolutely sure that you want to stop the folder backup. It will warn you that new files are only saved to your local device and aren’t available on other devices or protected in the OneDrive cloud. This simply means that if you want to backup your files to your OneDrive account in the future, you will need to do so manually via the OneDrive website, so click the “Stop backup” button if you agree.
9. Move Your Files Back Manually
Now that the automated OneDrive backups have been officially stopped, you can safely move your files from the OneDrive folder on your computer back to the default folder location. You probably don’t want to copy them, otherwise, you will have unnecessary duplicate files taking up valuable space on your computer’s hard drive. Physically moving them by cutting and pasting is most likely the much better option to keep your local system perfectly organized.
10. Accept the Deletion Warning Message
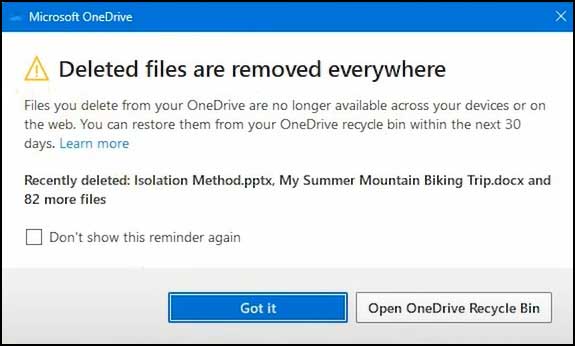
When you highlight and move your files and folders out of the designated OneDrive folder, you may get a sudden alert message saying “Deleted files are removed everywhere.” You do not need to panic, as this is simply telling you that your files will not be synced to the C:\Users\username\OneDrive folder any longer. This is most likely exactly what you want to happen anyway, so you can safely acknowledge the prompt and proceed with the file transfer.
11. Unlink Your Account from the PC (Optional)
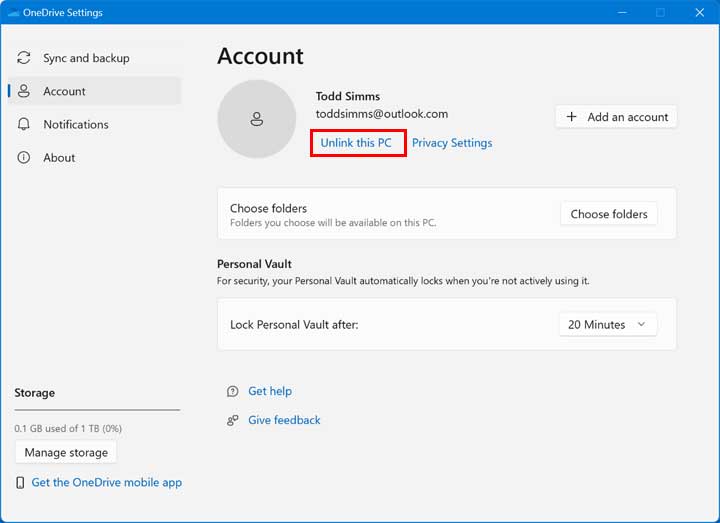
If you don’t plan on using the OneDrive client with your computer any longer now that your folders are restored, you can take things a step further. Go back to the main OneDrive settings window and then navigate over to the Account section on the left-hand menu. From there, you can click on the “Unlink this PC” text link to have your Microsoft account securely removed from the local OneDrive client entirely.
12. Confirm the Unlink Account Process
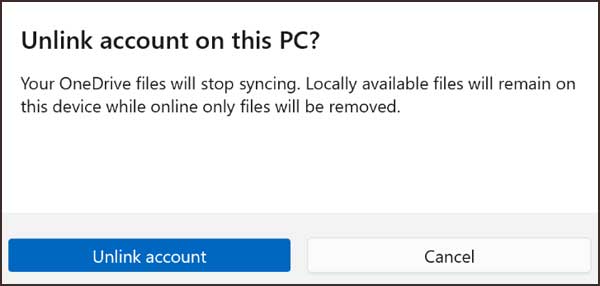
After clicking the text link, you will then get yet another confirmation message telling you that your OneDrive files will completely stop syncing to the cloud servers. It will also explicitly remind you that only locally available files will remain on this specific device once the connection is severed. If you fully agree with this and want to finalize the disconnection, you can go ahead and click the blue “Unlink account” button.
13. Verify the OneDrive Icon Removal
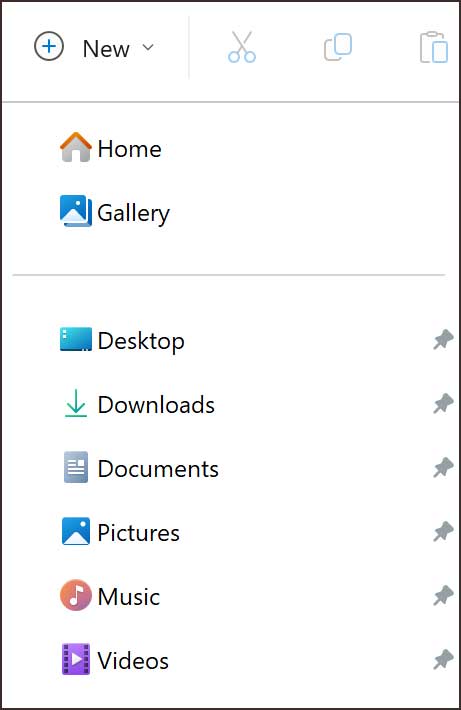
You will then immediately notice that the familiar cloud-shaped OneDrive icon has been entirely removed from the navigation pane in File Explorer. Along with the master icon, its corresponding cloud sync folders will also vanish from the quick access menu. Your computer is now relying entirely on the default local folders just like it did before OneDrive was ever configured.
14. Re-enabling OneDrive in the Future
If you ever change your mind and wish to start using the OneDrive client on your computer again, the process to reverse this is very straightforward. You can simply open the OneDrive app back up, log back in securely with your Microsoft credentials, and manually enable the backups for whichever Windows folders you wish to have synced. If you follow these exact steps, you should have absolutely no problem changing your Windows folder locations back to their defaults from Microsoft OneDrive whenever needed.
If you are missing the Location tab when you go to a folder’s properties, you can try this fix.
For additional training resources, check out our online IT training courses.
Check out our extensive IT book series.






