
Last Updated on May 5, 2026
We all store files of various types on our computers such as pictures, documents, music files and so on. Plus the software and apps we have installed on our computers have their own files that are placed on your hard drive. And just like you often run out of space on your smartphone, you can easily do so on your computer as well.
Especially if you don’t have a large hard drive and are maybe using a smaller SSD (flash) hard drive. And if you are the type of computer user who is not into managing your files and folders, then things can get out of hand rather quickly. In this article, we will be discussing managing and freeing up hard drive space in Windows 11.

Managing your storage is an important skill to have to help keep your computer healthy and to prevent your hard drive from getting full. This can have a serious impact on your computer’s performance, especially when it’s the system drive where Windows 11 is installed.
Accessing the Windows 11 Storage Settings
1. Open the Windows Settings App
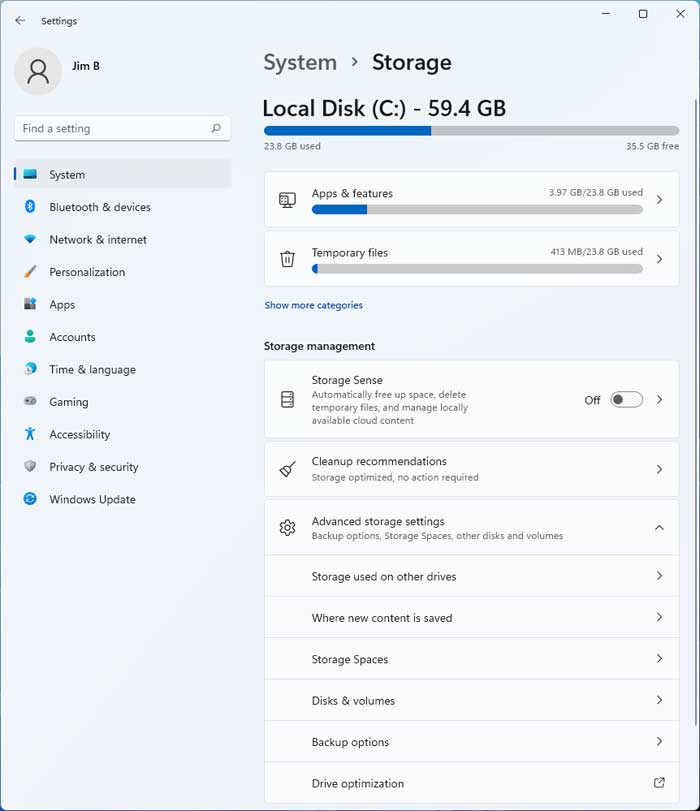
To get to the Windows storage options you will need to open the Windows settings app. Navigate to the System section and finally click on Storage. This brings up the main disk management dashboard.
2. Review Your Total Hard Drive Space
From there you will be shown the total size of your hard drive. You will see what percentage of your hard drive space your apps and features are currently taking up. You will also be shown how much space temporary files are taking up on your drive.
3. Expand the Storage Categories
You can also click on the Show more categories link to get a more detailed view. This breaks down exactly what is using space on your drive. It categorizes everything from desktop files to background system reserves.
Managing Installed Apps and Features
1. View Your Installed Applications
If you were to click on Apps & features you would be shown a complete list. This details exactly what apps you have installed on your computer. It also shows exactly how much space they are taking up on your local disk.
2. Uninstall Unwanted Software
If you were to click on the three vertical dots next to a particular app, you would open a sub-menu. You would then have the option to uninstall or modify the app if you needed to remove it or make changes to it. Keep in mind that not all core Windows apps will allow you to modify or remove them.

Clearing Out Temporary Files
1. Identify Junk Files
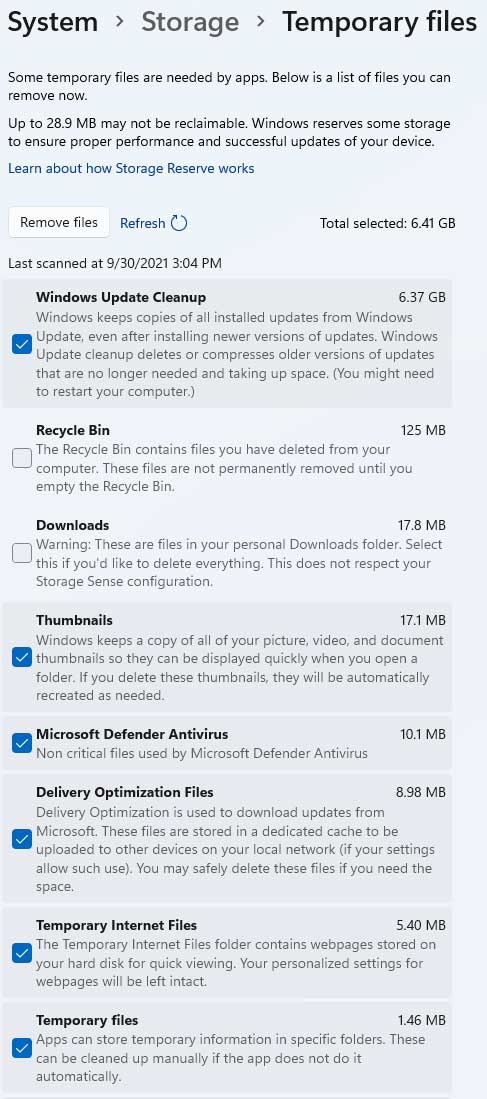
Clicking on Temporary files will show you what type of temp files are currently sitting on your computer. It will also show you exactly how much space they are consuming. This includes old Windows update files and internet cache data.
2. Remove Temporary Data
You can then check the box next to each one. Click the Remove files button at the top of the screen to have those temporary files removed from your hard drive. This is the fastest way to get your storage space back.
3. Research Unknown File Types
Each choice will have a short description of what type of files they are. If you are unsure about what they are referring to, you should either leave the box unchecked or do a little research before deleting the files. Deleting the wrong system files can cause application errors.
Using Windows Cleanup Recommendations
1. Access the Recommendations Menu
Going back to the main storage screen, you will also see an option that says Cleanup recommendations. Click on this section to see personalized suggestions. Windows will actively scan your drive for bloatware.
2. Review the Suggested Deletions
This section will show you recommendations made by Windows as to what it thinks you should do to clean up your hard drive. It will target large unused files and old downloads. Review the list carefully before approving the mass deletion.

Automating Cleanup with Storage Sense
1. Enable the Storage Sense Feature
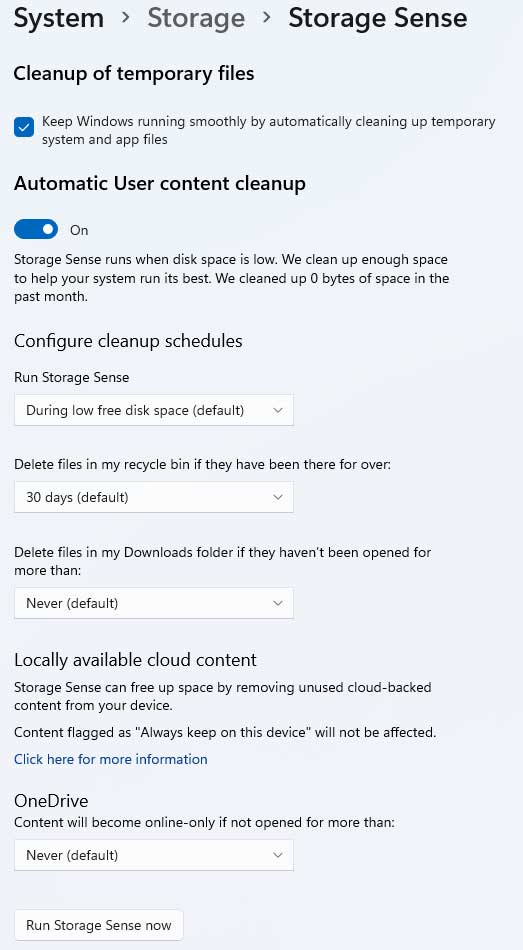
Finally, you can enable Storage Sense to have Windows automatically remove unneeded files. You will not need to come here and do it yourself manually every time you want to free up space on your computer. Toggle the switch to the On position.
2. Configure the Recycle Bin Settings
If you are the type that never cleans out your Recycle Bin then you can have Storage Sense do it for you. It will permanently delete files that have been sitting there for a certain amount of time. You can choose from 1, 14, 30, or 60 day intervals.
3. Automate the Downloads Folder
Many people download files from the internet to the default Downloads folder and never do anything with them. You can have Storage Sense delete these files automatically. Just like the Recycle Bin, you can set the deletion timer for 1, 14, 30, or 60 days.
4. Manage Your OneDrive Cloud Storage
If you use OneDrive for your online cloud storage platform then you can also have your older files removed from your local hard drive. This ensures they are only kept remotely in “the cloud” rather than synchronized with both your computer and your online storage repository. This uses the exact same 1, 14, 30, or 60 day time periods.
5. Run the Storage Sense Tool Manually
After you configure your Storage Sense settings, you can force the utility to run immediately. You can run the service manually by clicking on the Run Storage Sense Now button at the very bottom of the screen to begin the process.
For additional training resources, check out our online IT training courses.
Check out our extensive IT book series.


