
Last Updated on April 7, 2024
One of the best things about virtualization software such as VMware, Hyper-V, VirtualBox, Parallels etc. is that you can create virtual machines to test out new operating systems and software without needing to worry about affecting your main computer. And if something goes wrong, you can simply delete the VM and start over or revert back to a snapshot assuming you are using this backup method.
When hypervisors first came out, they were reserved for the business sector and ran in datacenters on expensive servers that nobody could afford to have in their house. These days, you can run virtualization software on your home PC and some operating systems such as Windows Professional versions have the software built in (Hyper-V).

For the most part, you are stuck with creating Windows or Linux virtual machines with this software but it is possible to install the Apple macOS with just a few changes to your software’s configuration. In this article we will be discussing how to install macOS as a VM within VMware Workstation which is the version of VMware that you can run on your desktop PC.
Changing the VMware Workstation Configuration
1. Download the VMware Unlocker Utility
The first thing you will need to do is run a utility called the VMware Unlocker. This specific tool will permanently allow you to have a macOS option for the virtual machine type when creating a new VM. You can download the VMware Unlocker files directly from their repository. You can watch a video on how to use this tool below.

You can then download the VMware Unlocker files here.
2. Extract the Unlocker Files
To summarize the process, you just need to download the zip file and extract the files to a local folder. Place this folder directly on the hard drive of the computer currently running VMware Workstation. Keeping the files on the local C: drive prevents any permission errors during execution.
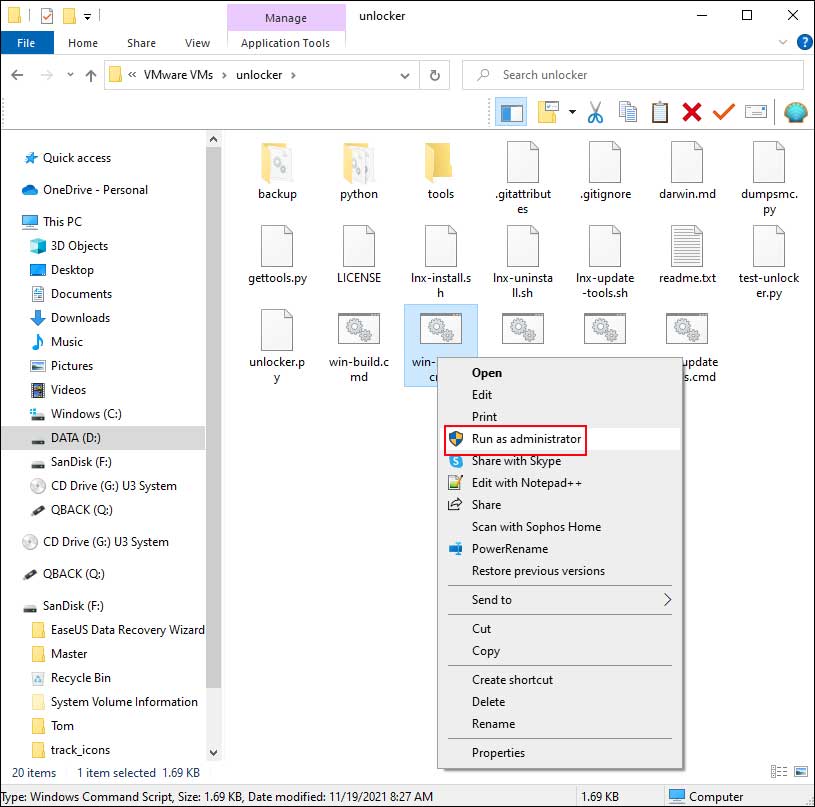
3. Run the Command Script as Administrator
Then you will need to find the specific file called win-install.cmd inside your extracted folder. Right click it and choose Run as Administrator to execute the code. Say yes to the Windows UAC prompt to grant the script elevated system privileges.
4. Wait for the Services to Restart
It will run its script in a black command box and then automatically exit when it finishes unpacking the patches. It will immediately stop and restart the core VMware background services. Make absolutely sure that Workstation is closed entirely before running this command file.
Creating the macOS Virtual Machine
Next, we will configure a new VM that will run macOS after we install the operating system software. To do this you will follow the same process that you do for any other virtual machine.
1. Launch the New Virtual Machine Wizard
First you will go to the top File menu and choose New Virtual Machine. Choose the Typical setting on the initial setup screen and click on the Next button. Then you will choose the radio button for I will install the operating system later and click on Next again.

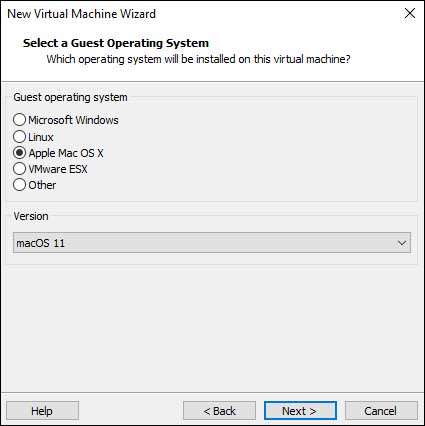
2. Select the Apple Mac OS X Guest Option
Now you should have an Apple Mac OS X option visible for the guest operating system type. This only appears after successfully completing the procedure with the VM Unlocker tool. You can then choose the exact version of the operating system from the dropdown that matches what you plan on installing on your virtual machine.
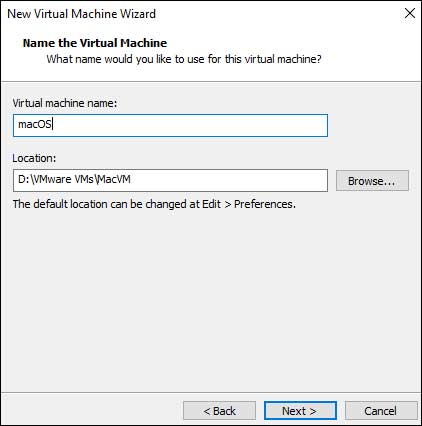
3. Name Your Virtual Machine
Next you will give your new Mac VM a recognizable name. You must also verify the location of where the heavy VM files will be saved. Change this target directory if you do not want to use the default VMware Workstation location on your C: drive.
4. Specify the Virtual Disk Size
Now you will create the virtual hard disk for the VM. VMware will automatically suggest a disk size based on the macOS version you chose during the previous step. You can change this number if you think you need more or less space. Just be sure not to go too low because you need enough room to install the core operating system and any large apps you add after that.
5. Choose Single or Multiple Disk Files
You can also choose if you want your virtual machine disk file split up into multiple chunks or kept as a single large file. I like using single files for the sake of strict simplicity. If you are backing up your VMs and need to make sure that the disk files will fit on older FAT32 backup media, you might want to choose the multiple files option.

6. Review the Virtual Hardware Configuration
If you are ok with the virtual hardware that VMware assigned to this new VM you can click on the Finish button. If not then you can click on the Customize Hardware button to manually adjust or add additional hardware. You need to balance the VM needs with your host machine capabilities.
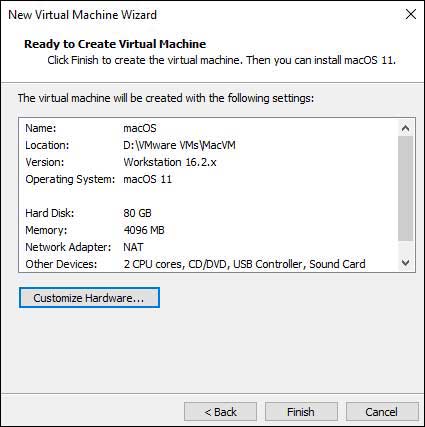
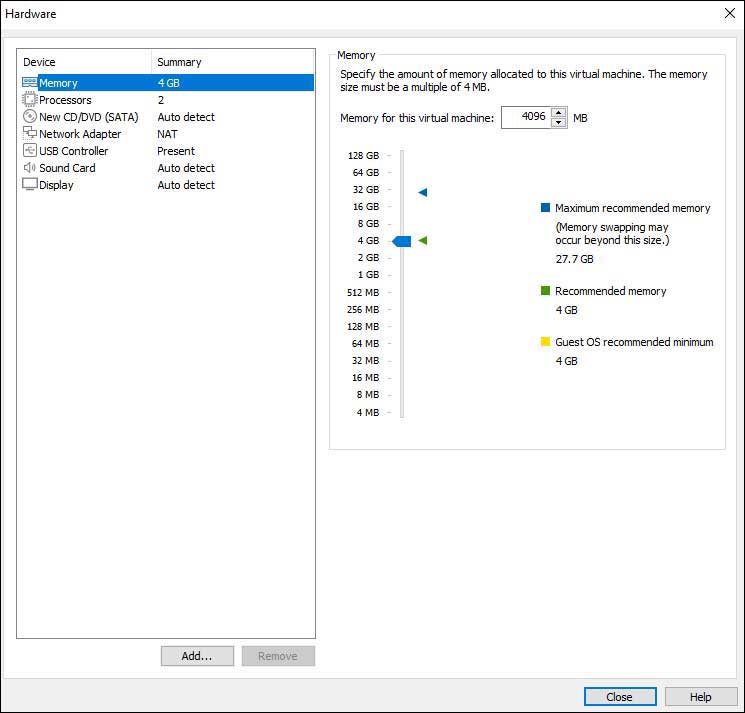
7. Allocate Host Resources Carefully
As you can see in the image below, you can increase the amount of RAM for the VM. You can also add additional processors or processor cores assuming your host computer has the raw resources to give to the virtual machine. You don’t want to give the VM most of your host’s physical RAM because that will cause everything on your main PC to run slowly or crash entirely. You can also click on the Add button to add additional hardware such as a secondary hard drive, network printer, or a trusted platform module (TPM).
Installing macOS
1. Mount the macOS ISO File
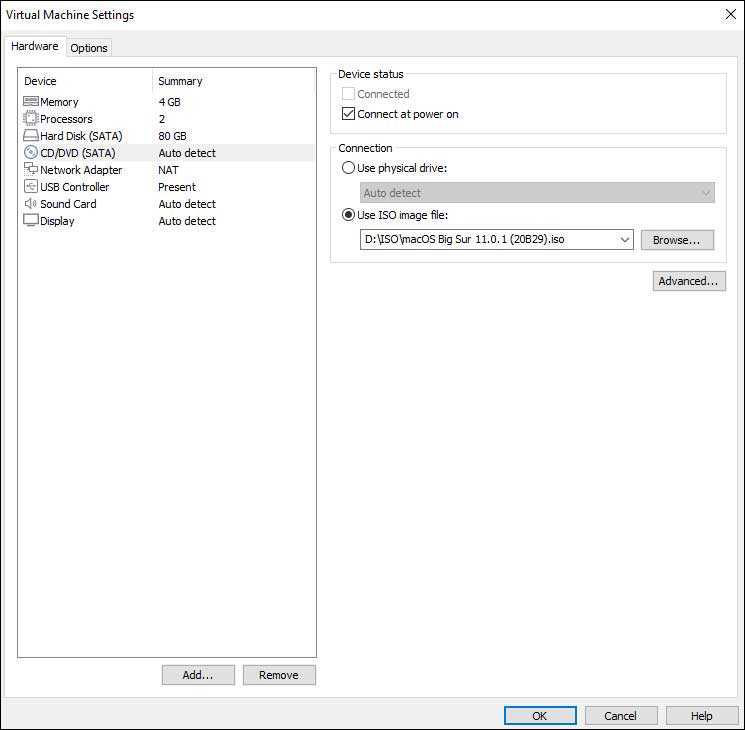
Now from the left side of the VMware Workstation console, you will need to click on the CD\DVD icon located under Devices. Click the radio button next to Use ISO image file. Then you will need to browse to the exact file location of your macOS ISO image file and then click OK. Just make sure it is a fully bootable image so your VM will start the operating system installation when you restart the VM.
2. Source a Reputable Installation Image
Getting a working copy of a macOS ISO file is up to you. There are many websites and forums that host these files that you can download directly to your host machine. Just make sure it is a highly reputable website so you don’t download something that might harm your local computer.
3. Power On the Virtual Machine
Next you will click on the green Power on this virtual machine button/link. This forces the hypervisor to start the new VM to begin the macOS installation process. You will then see the classic Apple logo with a status bar start loading. You will quickly be prompted to select your primary language.

4. Launch the Disk Utility
Before actually installing the macOS files, you will need to prepare your raw virtual disk so it will be recognized by the operating system. An unformatted drive cannot hold the system files. To do so, click on Disk Utility from the recovery menu and then hit the Continue button.

5. Erase the VMware Virtual Hard Drive
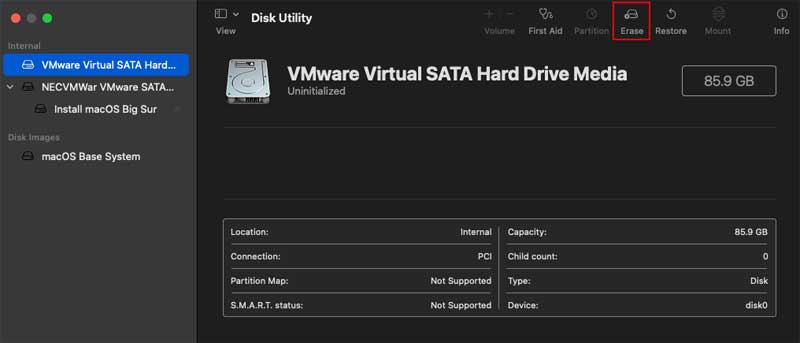
Now you will select the VMware virtual hard drive from the top left corner of the hardware list. Ensure you have the top-level drive highlighted. Click on the Erase button located at the top center of the application window.
6. Name and Format the New Volume
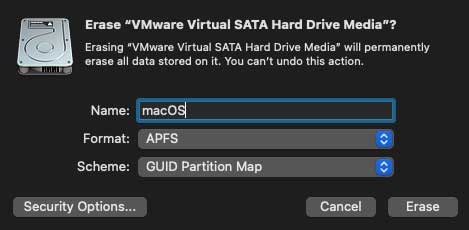
You can then give your new volume a name and then click on the Erase button again to confirm. Yes it sounds strange that you are giving it a name and then actively erasing it. This custom name will be permanently applied to the new clean volume that is created for your VM structure.
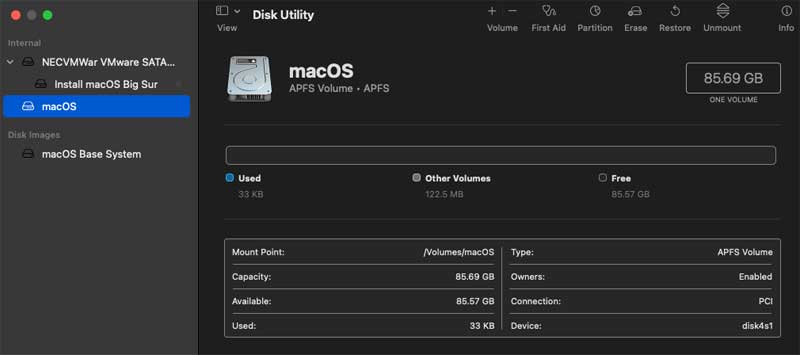
7. Verify the Formatted Disk Size
You will then see your newly named volume and its exact storage size listed right in the center of the disk utility window. Ensure the capacity reflects the virtual drive limits you set previously. Now you can safely exit the disk utility program by clicking the red dot in the corner.
8. Run the Main macOS Installer
Exiting the disk utility brings you right back to the main recovery menu. Click on the Install macOS option from the central list and then click the Continue button. The setup wizard takes over completely from this point forward.
9. Complete the Setup Wizard
The process from here will vary slightly depending on exactly what version of the operating system you are installing. It is just a matter of choosing the standard configuration options you wish to use for your new Mac VM. You will create a user account and wait a bit of time for the automated installation process to finish copying files. When everything is done, hopefully you will have your new macOS virtual machine ready to start using as if you bought yourself an expensive Mac from the store!


