Last Updated on October 18, 2026
If you are a Microsoft Office user and use the common apps such as Word, Excel and PowerPoint, you might have noticed that when you save your files, they will be saved to your OneDrive online storage account without you realizing it.
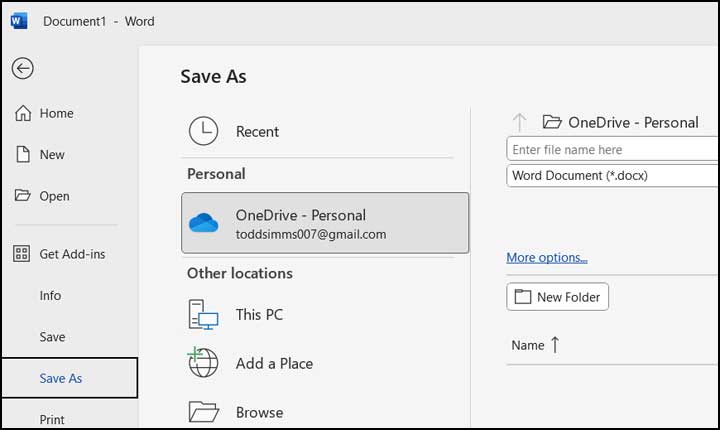
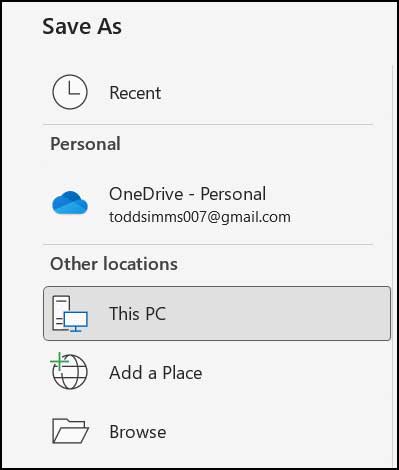
When you go to the Save section in Word for example, you will see that the default choice is your OneDrive account, and you have the option to choose This PC if you want to save your file on your local hard drive.

So if you don’t purposely change the save location, your files will be saved to your OneDrive account and then when you go to look for them on your computer, you will not find them. They are hidden safely in the cloud instead of your local documents folder. Let us fix this default behavior right now.
Changing the Default Save Location
1. Access the Save Options Menu
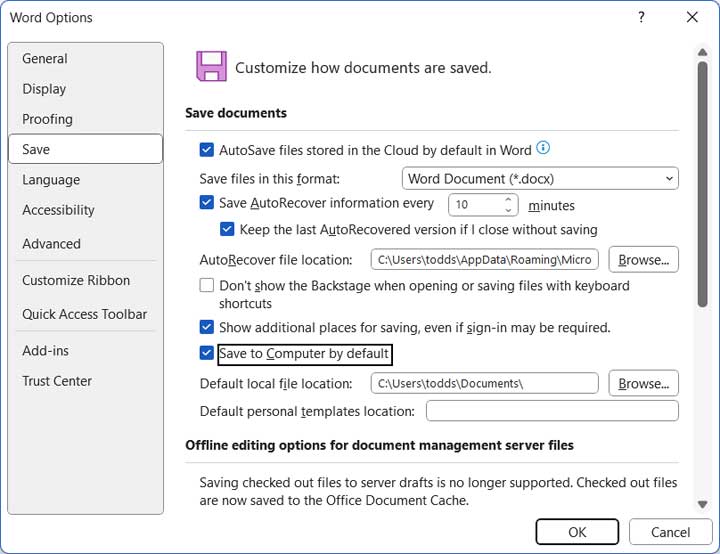
One thing you can do to help is to go to the options for each Office app and then go to the Save section. You will find these settings deep within the main configuration panel. It requires digging past the standard interface.
2. Force Local Computer Saves
Once inside the menu, check the box that says Save to Computer by default. This tells the software you prefer your local hard drive. Click OK to save the changes immediately.
3. Review the New Save Dialog
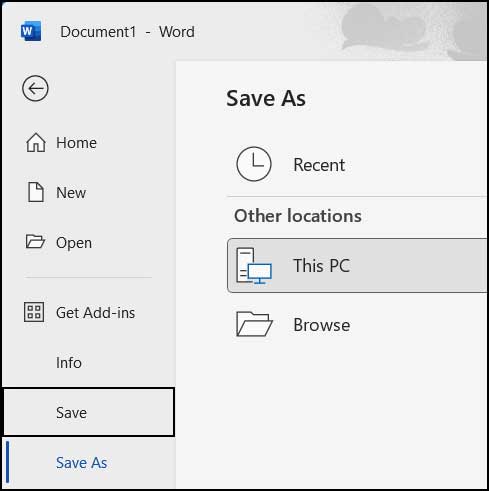
Now when you save your documents, spreadsheets or presentations, the option for This PC will be the default. But you will notice that the OneDrive option is still visibly there. It still clutters up the menu interface.
Removing OneDrive Completely
1. Open the Account Privacy Settings
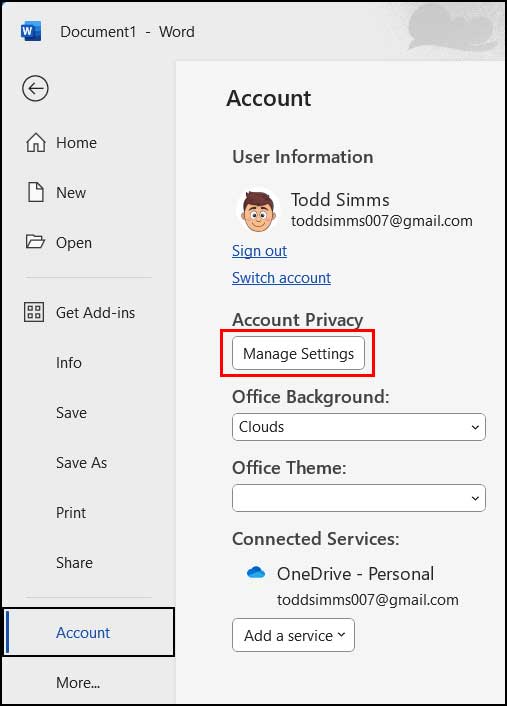
To remove the OneDrive option from all of the Office apps, you can open Word and then go to the File tab and then the Account section. From there you will need to click on the Manage Settings button under Account Privacy. This opens a new window with advanced security controls.
2. Disable Connected Experiences
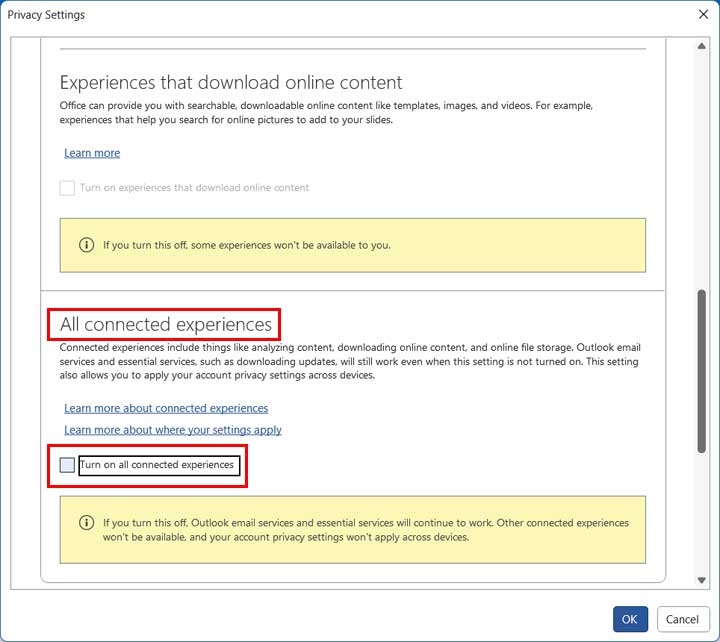
Now you will need to find the section that says All connected experiences and uncheck the box that says Turn on all connected experiences. When you do this, you will see that the interface changes and you are warned that if you turn this off, some experiences will not be available to you. It blocks the program from reaching out to external Microsoft servers.
3. Understand the Trade-Offs
It does not tell you exactly what will not work. But if you find that a certain feature that requires online access such as downloading icons or images does not work, then you can come back here and check the box again. You sacrifice some modern features for a cleaner save menu.
4. Restart the Office Application
After you click the OK button, you will then be told that you need to restart Office for the changes to take effect. Close Word completely and then reopen it. The software must reload its core configuration files to apply the block.
5. Verify the Clean Save Menu
Now when you save your documents, spreadsheets or presentations, you will notice that the OneDrive option is no longer there. The interface looks much cleaner and faster to navigate. If you need to put your Office files into your OneDrive account later, you can still do so by going directly to the OneDrive website.
For additional training resources, check out our online IT training courses.
Check out our extensive IT book series.