Last Updated on May 17, 2026
Get your right click > New choice for Word back where it belongs!
If you are a power Windows user, you most likely know how you can right click on your desktop or in a folder and choose the New menu option and then choose from one of the many choices from there.
This makes it easy to create a specific type of file right in that folder without needing to open the program, create a file and then save it in that location manually. When you create the new file or folder, you can name it whatever you wish right on the spot.
In addition to the default options, the contents of the New menu can change over time based on the programs you install, since many applications add their own file types for quick creation. This can be helpful when you frequently work with specific document formats, but it can also make the menu longer and more cluttered than necessary. Understanding how this menu is generated, and how it can be customized gives you more control over your workflow and helps keep the right‑click experience fast, clean, and tailored to the way you use Windows.

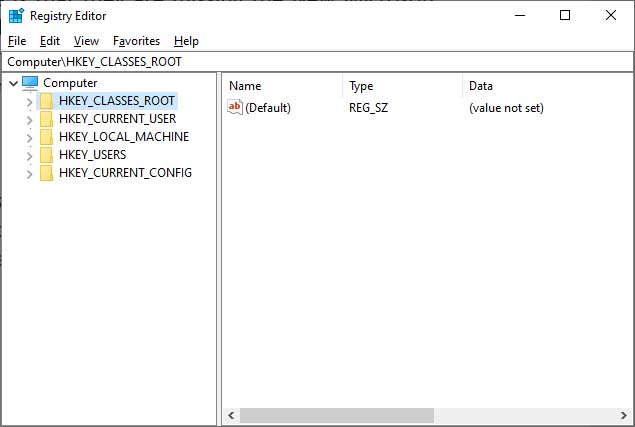
The image below shows a typical right click New menu with a variety of choices. The options that you will see will vary depending on what software you have installed on your computer. You should at least have the default choices like Folder, Shortcut, Bitmap image, Rich Text Format, Text Document, and Compressed (zipped) Folder.
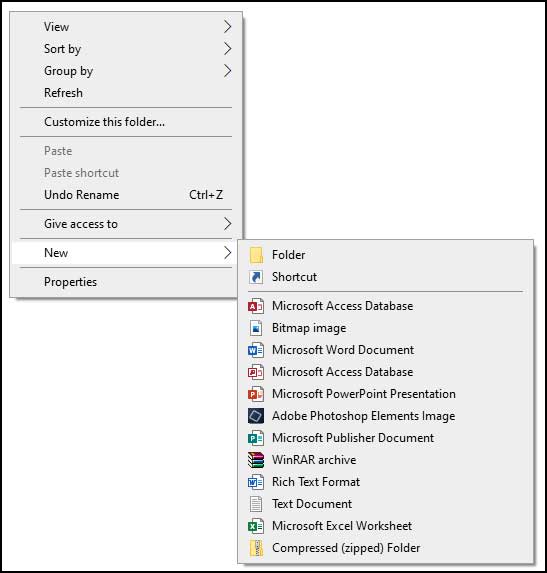
One common issue that many Microsoft Office users have is that they are missing the New Microsoft Word Document choice from this menu. The typical methods that people try to fix the problem simply do not work. For example, sometimes you can do a repair of your Office installation to restore defaults. You might try running Word by pressing and holding the Windows key + r on the keyboard at the same time, typing in WinWord /r in the Run box, and clicking Ok.
Many times, you can check your Windows Registry to make sure that all of the proper keys and values are listed and fix anything that is missing. The problem with this is that there are a lot of settings that need to be in there. If just one of them is missing, you won’t have this Word right click menu item. You can even try a free program called ShellNewHandler that you can use to edit what is listed in this New menu as seen in this video. Rather than show you a basic step by step method to fix this problem, we will instead show you exactly what keys and values need to be in place so you can check your registry and make sure everything is perfect.
1. Verify the Blank WORD.DOCX File
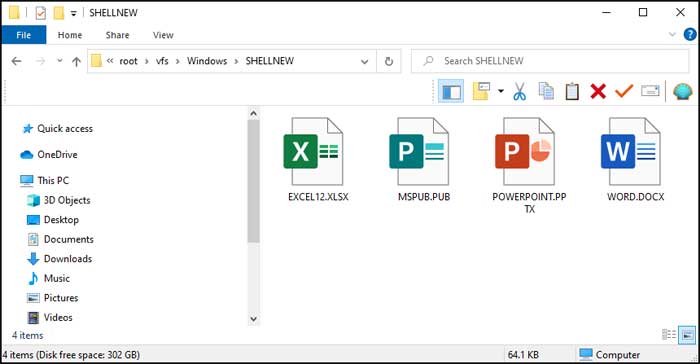
The first thing you should do before going into the registry is browse to the physical template directory. Open File Explorer and paste C:\Program Files\Microsoft Office\root\vfs\Windows\SHELLNEW directly into your address bar. Check to see if there is a file called WORD.DOCX sitting in that exact folder. You can create a new blank Word file named WORD.DOCX on your desktop and copy it into the folder if it is missing. You will most likely not be able to create a new file directly in that restricted system directory.
2. Open the Windows Registry Editor
Once you have made sure you have that file there, you can open the registry to start checking your keys and values. Type regedit from the Run/Search box to launch the tool. Grant the application administrative privileges when the security prompt appears. Once you are there you will see 5 main folders, and each one will have subfolders and other keys and values within them.
3. Expand the Root Classes Folder
You need to locate the specific extension handler for Word documents. Expand the HKEY_CLASSES_ROOT folder at the top of the left pane. Scroll very far down this massive alphabetical list until you find the .docx folder. Click directly on this folder to view its active contents on the right side of the screen.
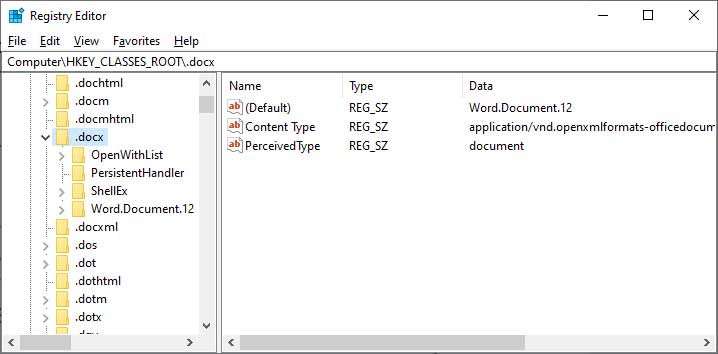
4. Check the Default Value Data
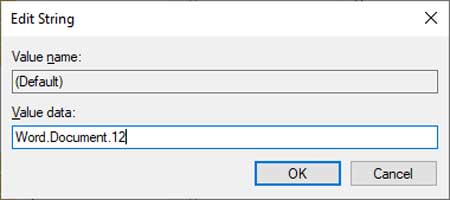
You will see 3 keys within this specific folder. One thing you need to check for is to make sure that the one that says (Default) has a value data that says Word.Document.12 exactly as shown. It might say something incorrect like Word.docx. You can change this value by simply double clicking it and typing in the correct value in the Value data box.
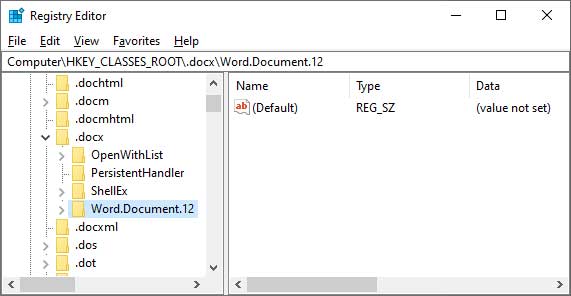
Next, you can click to expand the .docx folder on the left side of the screen. Make sure there is a subfolder named Word.Document.12 listed there. If not, you can right click on the .docx folder and choose New followed by Key. Type in Word.Document.12 for the specific value name.
6. Build the ShellNew Subfolder
If you do have the Word.Document.12 folder already there, then you most likely will have a folder called ShellNew within that folder. If not, then you will need to right click on the Word.Document.12 folder and choose New followed by Key to create the new folder. Name it ShellNew and press enter. Other than that, you SHOULD have the other folders there with the correct values, and the ones mentioned above should be all you need to check and adjust.
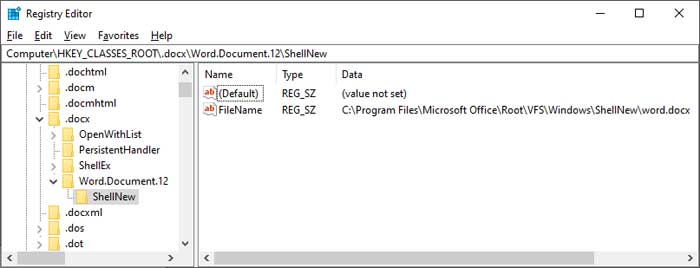
7. Configure the String Values
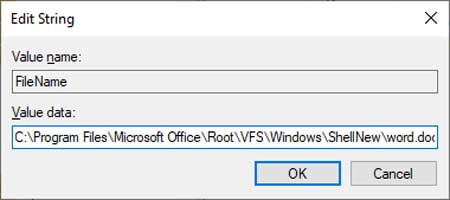
Within that ShellNew folder you will need to have a couple of string values as seen in the image above. Right click in a blank area on the right pane and choose New followed by String Value to build these. Make one of the entries say (Default) for the name and leave it completely blank for the data. Create a second string and make the name FileName. Double click it and paste C:\Program Files\Microsoft Office\Root\VFS\Windows\ShellNew\word.docx as the value.
Here is how you can fix the missing right click New Excel Worksheet issue.
For additional training resources, check out our online IT training courses.
Check out our extensive IT book series.