Last Updated on March 23, 2026
USB flash drives are still used by many of us to copy files to in order to use these files on a different computer or even for backups. We also use them to boot things such as operating system installations or recovery software for troubleshooting purposes. When configuring a flash drive with this type of software, it might create special partitions on the drive that you might not be able to remove or delete. If that is the case, there is hope because you can use some free software to remove an extra volume or partition that can’t be deleted from a flash drive.
Before assuming the drive is damaged or unusable, it’s important to understand how USB flash drives are structured and why these extra volumes appear in the first place. Bootable media and backup tools often modify the drive layout by creating hidden or protected partitions that Windows doesn’t handle like normal storage space. These changes can be confusing if you’re expecting a single, clean USB drive for everyday file transfers. Knowing how Windows detects and displays removable storage can help you quickly identify partition issues and decide the best way to restore your flash drive to a standard, usable format.

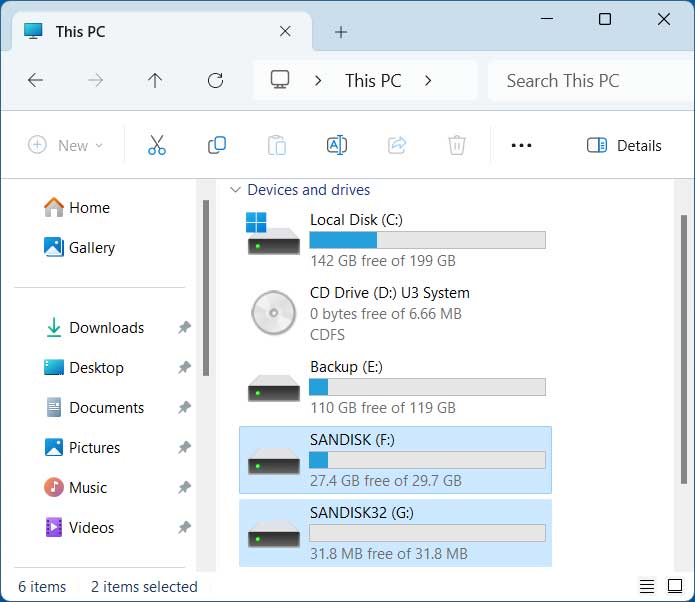
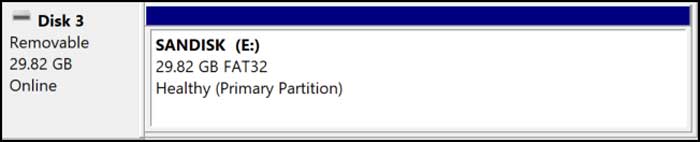
When you open File Explorer after inserting your flash drive, you might notice that there is more than one drive letter assigned to your flash drive. This is an indication that you have an extra partition on your drive and this may not be the way you want your drive to be configured.
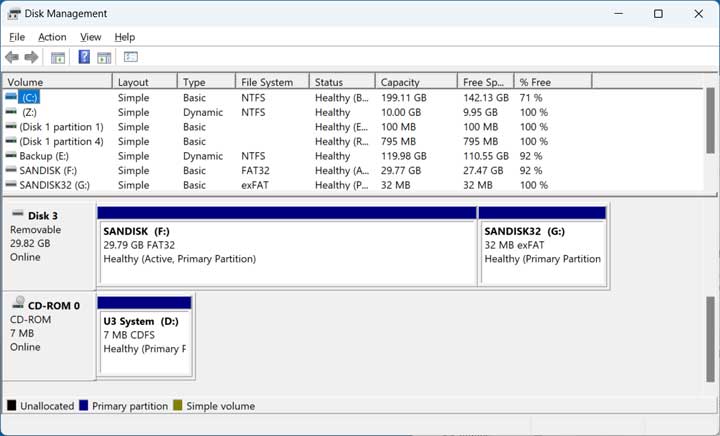
If you then go into Disk Management to view the partitions on your flash drive, you may see that you have more than one and each one has its own drive letter. You might think that you can simply extend the first volume\partition to use the space on the second partition but that most likely will not work. Even if you right click on the extra partition, the delete option will be greyed out, so that is not an option. Then if you delete the first partition and make a new volume, you will still not be able to do anything with the extra partition.
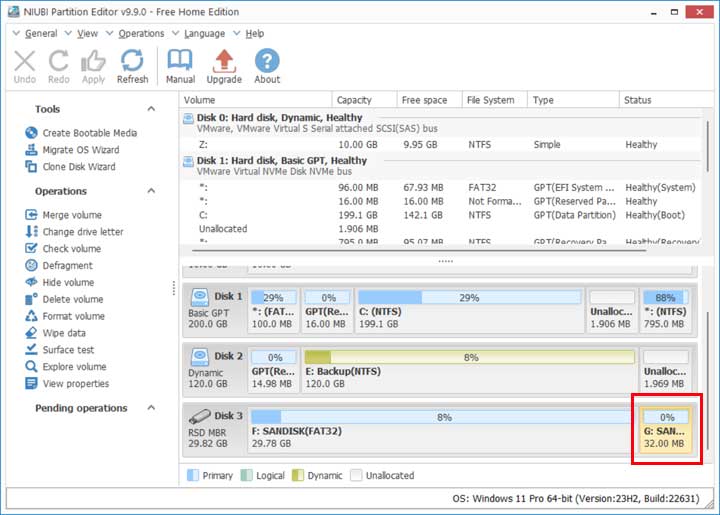
One way to remedy this problem is to use a third party program such as NIUBI Partition Editor. They have a free version that will allow you to perform a large variety of disk management tasks. After you install the software, open it to view your computer’s disk information. You will notice that the interface looks similar to the Windows Disk Management tool. To remove the extra volume, you can right on it and choose Delete Volume and say Yes to the confirmation prompt.
To complete the process, you will need to click the Apply button and then click the OK button on the execute now confirmation box that will appear nex.

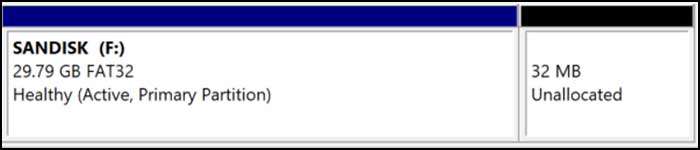
Now if you were to go back to Disk Management, you would see that the extra volume shows as unallocated space, but you still can’t extend the other partition to use the space and you cannot delete the unallocated space left over.
What you will need to do is delete the main\active partition so you can then create one new partition using all the space. Just be sure to backup any important data on this drive first because it will be lost. You can simply right click on the main partition\volume and choose Delete Volume and say Yes to the confirmation prompt.
Then you can right click on the unallocated space and choose New Simple Volume. Then you can decide if you want to use some or all of the space, give the drive a letter and also a volume label if desired. You can also create this new volume within the NIUBI Partition Editor software itself if you would rather do everything from one location.
You can download the NIUBI Partition Editor software here.
For additional training resources, check out our online IT training courses.
Check out our extensive IT book series.