Last Updated on May 18, 2026
Wireless printers have been around for some time now and since many people prefer using Wi-Fi for their devices, it makes sense that you would want to be able to print to your wireless printer from all of your devices.
If you have an HP printer that has built in Wi-Fi, you can enable the Wi-Fi direct printing as well as find your wireless printer name and password so you can connect to it from any computer, tablet or smartphone that is within range.

To use the HP Wi-Fi direct feature for printing, you will need first make sure it is enabled and once you are there, you can find the printer name assigned to the connection and also view or change its password.
1. Access the HP Web Configuration Page
To begin configuring your device you will need to connect to the HP internal web page for your printer. You can simply type the exact network address into your web browser to connect if your printer has a static IP address. This instantly pulls up the hidden control panel right on your desktop screen.
2. Find the IP Address in Windows Settings
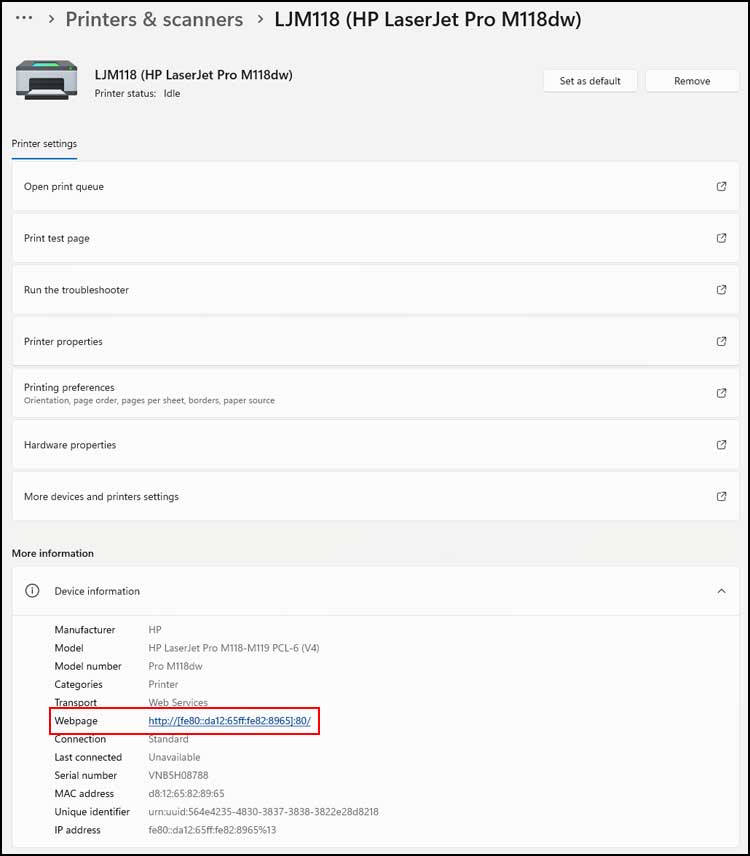
If you do not have a static IP address assigned to your printer you must pull it from your local system. Go to the Windows settings menu and then navigate to Printers and scanners to find your connected device. Scroll down to the bottom of the page and expand the Device information section to locate your HP printer web configuration link.
3. Check Legacy Control Panel Settings
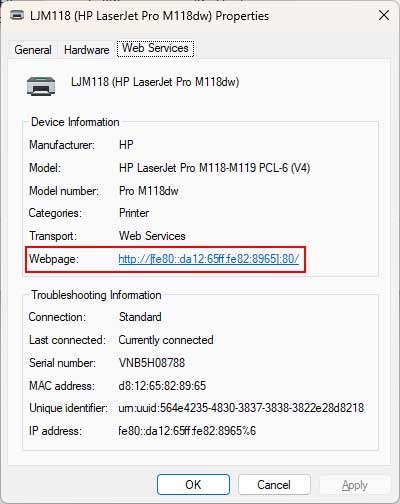
You can also find this exact same URL using the legacy control panel interface. Click on More devices and printers settings to open the classic tool commonly used in Windows 10 installations. Right click on your specific printer hardware and choose Properties to locate a dedicated Web Services tab containing the correct configuration address.
4. Enable the Wi-Fi Direct Feature
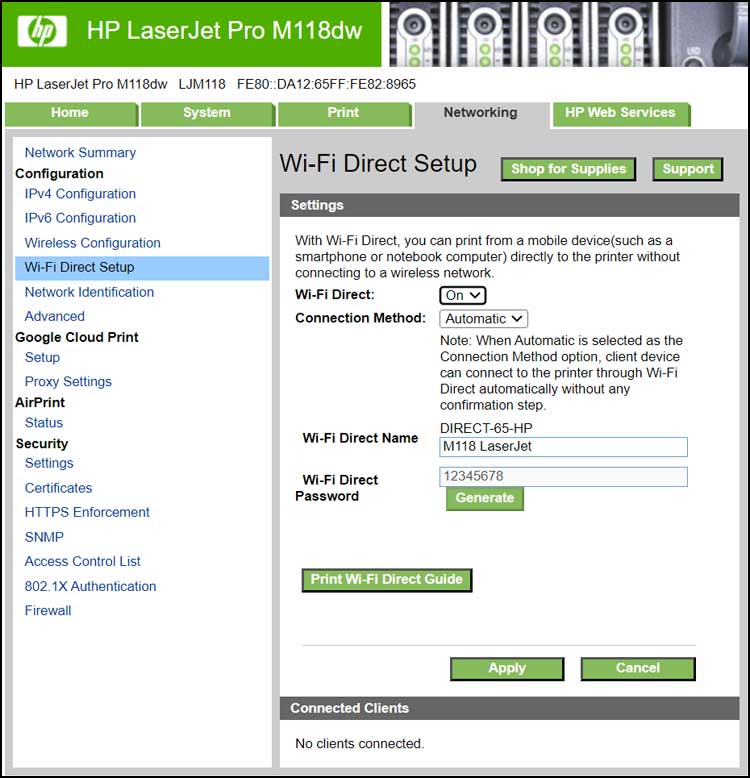
Clicking on the web services link instantly opens your default browser and takes you directly to the internal printer settings panel. Look at the left side navigation menu and click strictly on the Wi-Fi Direct Setup link. Check the top toggle switch to see if the Wi-Fi direct option is currently enabled or disabled. Turn it on immediately.
5. Set the Connection Method
Look for the dropdown menu labeled Connection Method in the center of your screen. Set this option to Automatic rather than Manual so your devices can establish a connection without constant configuration prompts. You will then see the assigned display name for your printer inside the text box right next to the Wi-Fi Direct Name field. Change this name to something recognizable to avoid confusing it with your neighbor’s hardware.
6. Update Your Default Password
The default HP Wi-Fi Direct password usually ships set as 12345678 from the factory. Erase this predictable string of numbers and type in your own secure phrase to block unauthorized users from wasting your ink. You can also just click the Generate button to force the system to create a randomized alphanumeric code for you. Check the Connected Clients box at the bottom of this page later to verify exactly what devices are actively using your printer.
7. Apply Your New Settings
Review all the text fields one final time to ensure you did not make any spelling errors. Click the Apply button at the bottom of the screen to lock in your custom preferences. The printer will quickly restart its internal network adapter to broadcast the new secure connection.
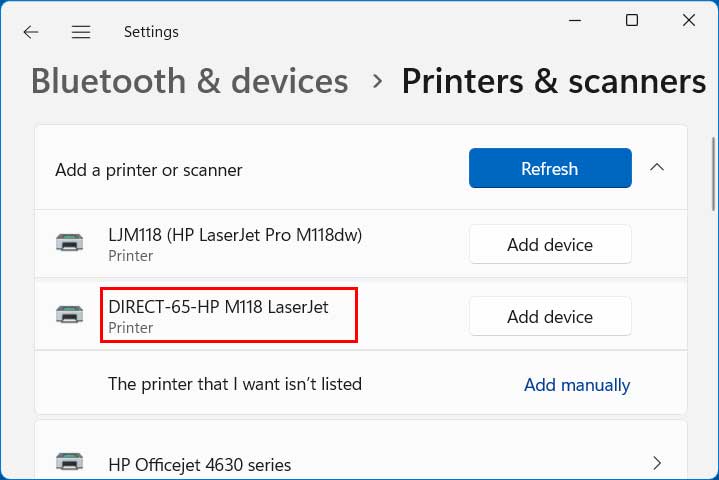
8. Verify the Wireless Broadcast
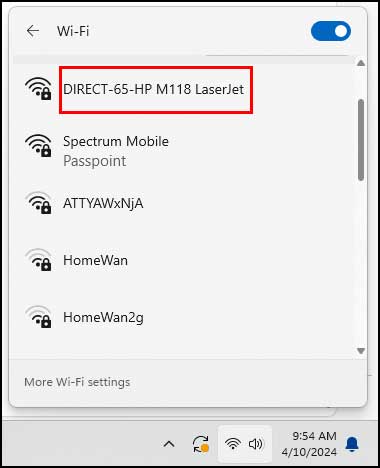
You need to test your new Wi-Fi Direct connection to ensure the broadcast reaches your computer. Open your standard Windows wireless settings menu and scan the local area for available networks. Look for a brand new entry that starts with the word DIRECT in capital letters. It should prominently feature the exact printer name you typed into the configuration page moments ago.
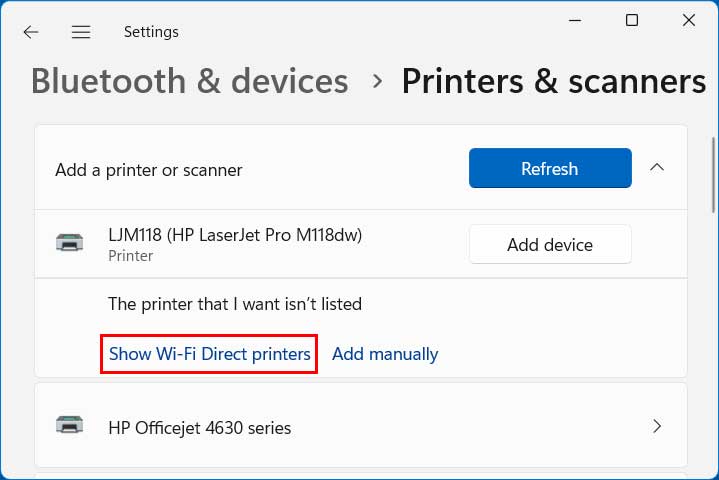
9. Add the Direct Printer in Windows
Go back to the main Windows printer settings menu and click the button to add a new printer or scanner. Let the operating system scan the local network for a few seconds. A specific link that says Show Wi-Fi Direct printers will appear right below the search bar. Click this link to force Windows to display the new localized hardware connection.
10. Complete the Hardware Installation
Once you see your new Wi-Fi Direct hardware pop up in the list you can add it just like any other standard printer. Click the device name and type in your newly created secure password. You do not need to use this direct connection if you already communicate with the printer through your standard home wireless router. Setting this up just verifies the direct broadcast functionality actually works.
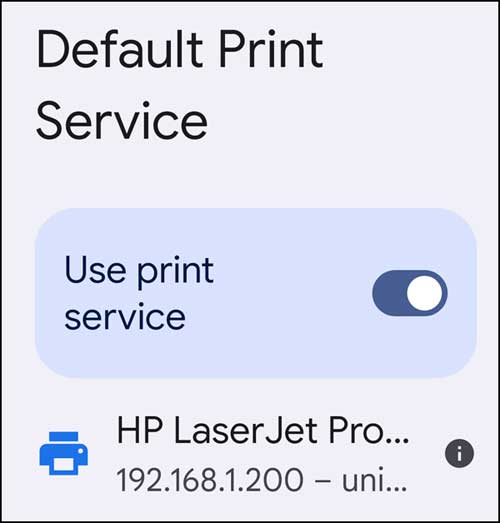
11. Connect Mobile Smartphones and Tablets
Now that you have fully enabled HP Wi-Fi Direct printing you can connect mobile devices directly to the hardware. Grab your smartphone or tablet and navigate to its local networking preferences. The exact method used to connect a mobile device varies wildly depending on the specific phone model and operating system version. Enable the default print service inside your Android settings app to force the phone to locate the HP hardware.
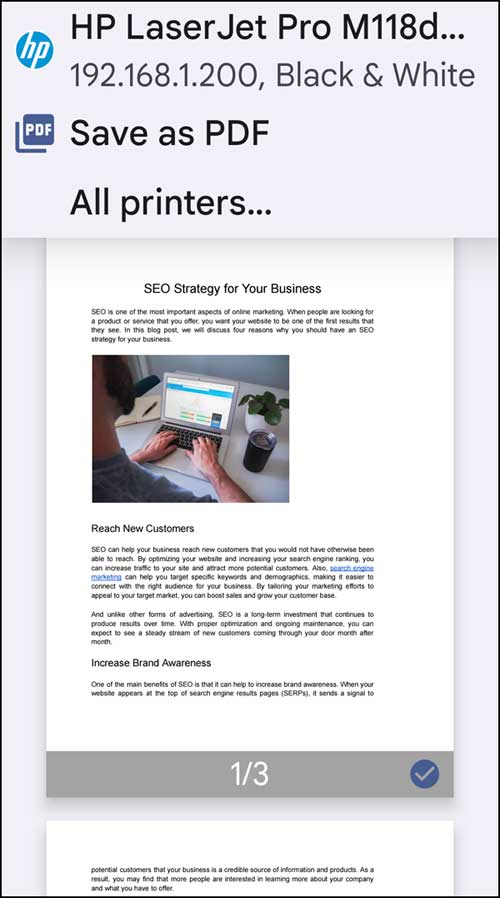
12. Print Documents from Mobile Apps
Your phone now maintains a direct wireless link straight to the HP printer hardware. Open a document or photograph inside any supported mobile application and hit the share button. You will now be able to choose your specific HP printer right from the local output options. Hit print to send the job over the air without routing it through your main home router.
For additional training resources, check out our online IT training courses.
Check out our extensive IT book series.