Last Updated on June 27, 2026
Upgrading your Linux rig with a massive new NVMe drive or a faster SSD is an exciting project, but the thought of reinstalling your entire operating system is completely dreadful. Nobody wants to spend their weekend setting up environments, re-downloading packages, and tweaking configurations from scratch.
Fortunately, you don’t have to. You can easily clone your entire Linux OS hard drive and move it directly to a new disk or a completely different computer.
In this guide, we are walking through the exact process of migrating your Linux installation using Clonezilla. It is a completely free, open-source tool that perfectly copies every single bit of data from your old drive to your new one. Let’s dive into the setup.

Identifying Your Source and Destination Drives
Before we even touch the cloning software, both your old hard drive and your brand-new empty drive need to be plugged into the computer. You must know exactly how your system identifies these two drives. Getting this wrong later means accidentally wiping your entire operating system. You have two easy ways to check this.
1. Use the GUI Disk Tool
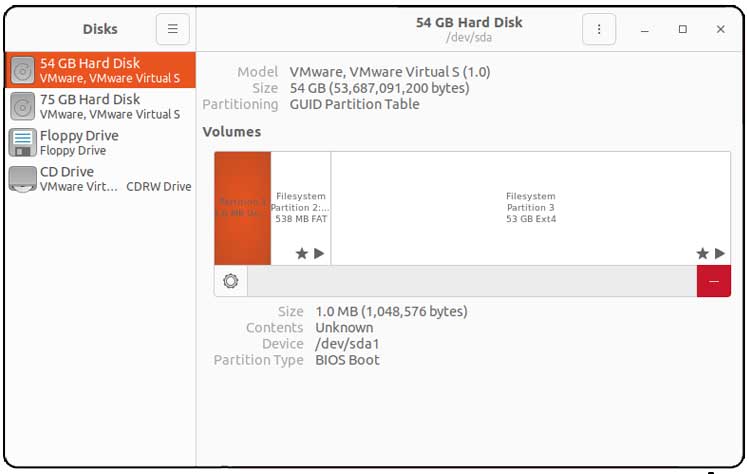
Open your application menu and search for “Disks” to launch the built-in drive manager. You will see a visual layout of your drives. Pay close attention to the device path like /dev/sda and the total capacity. This size difference usually makes it very easy to spot your new drive.
2. Use the Terminal
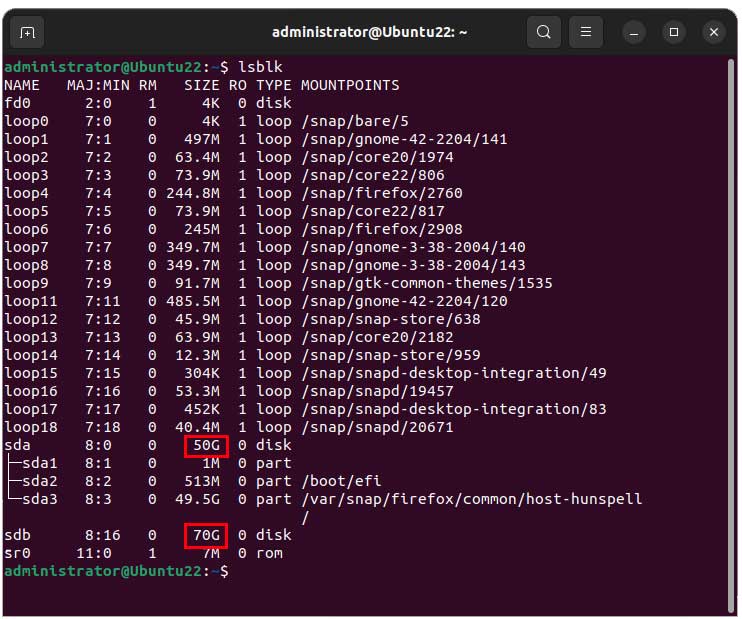
Open your console and type the command lsblk. This prints a clean tree of all connected storage devices. Note which label belongs to your current OS drive which is usually sda. Then note which label belongs to your new blank drive which is usually sdb.
Booting Up and Configuring Clonezilla
We will be using Clonezilla to handle the heavy lifting. Head over to their official site, download the ISO file, and burn it to a bootable USB flash drive using a tool like Rufus or BalenaEtcher. Restart your computer, enter your BIOS/UEFI boot menu, and select your USB drive to boot into the Clonezilla environment. Clonezilla runs entirely on text menus. You navigate using your keyboard arrow keys and press Enter to confirm your choices. Just follow this quick setup sequence to get to the main cloning screen.
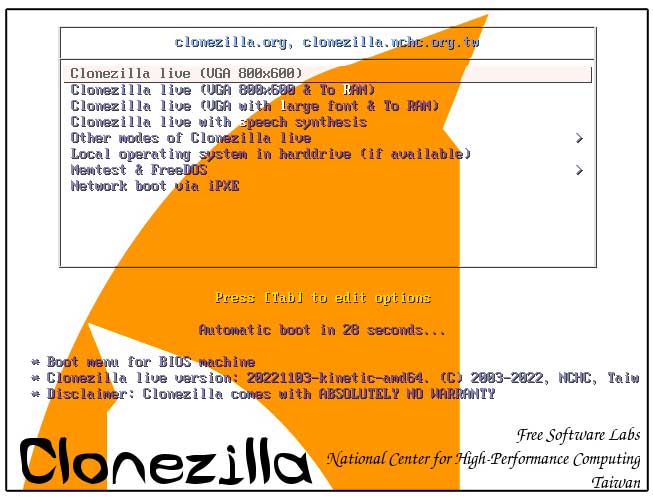
1. Choose Clonezilla Live
Choose Clonezilla Live at the very first boot screen. This loads the cloning operating system directly into your system memory. It runs completely separate from your actual Linux installation.
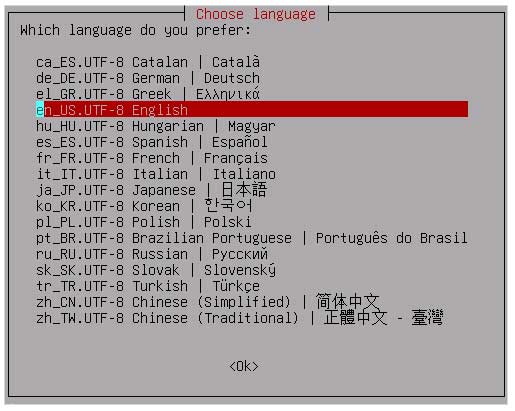
2. Select Your Language
Select your preferred language from the list. English is the default option highlighted at the top. Use your arrow keys to select your native language and press Enter.
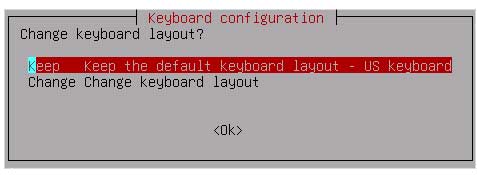
3. Set the Keyboard Layout
Keep the default keyboard layout when prompted. The standard keyboard map works perfectly for navigating these basic text menus. Press Enter to proceed to the next screen.
4. Start the Application
Select Start Clonezilla to launch the main wizard. You are now inside the core application. You can begin configuring your specific disk parameters.
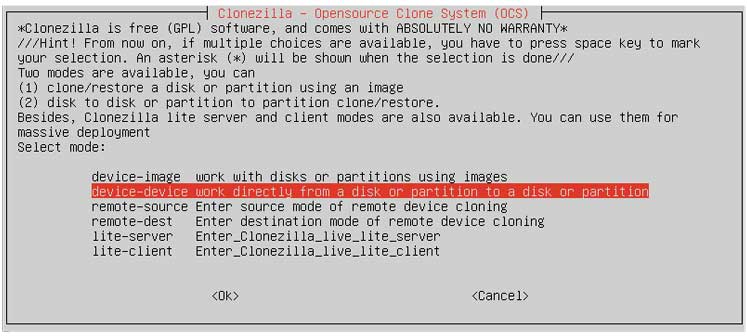
5. Pick the Device to Device Mode
Now you will choose the device-device option. This tells the software to work directly from a disk partition to a disk or partition. We use this selection since we will be doing a direct disk to disk clone.
Setting Up the Disk-to-Disk Clone
Now we are at the main interface. Because both hard drives are currently plugged directly into the motherboard, select the device-device option again if prompted. This tells the software we are working locally, rather than pulling an image file over a network.
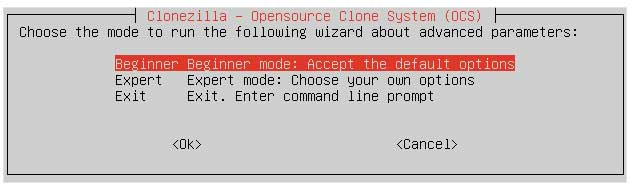
1. Select Beginner Mode
Next, select Beginner mode. This hides the overly complex parameters and keeps the process perfectly safe for a standard OS migration. You do not need the advanced sector tools for a basic drive swap.
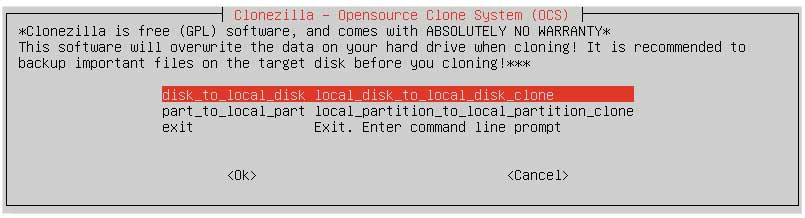
2. Choose the Local Disk Option
Finally, select disk_to_local_disk. This confirms we are taking the entire contents of drive A and dumping them onto drive B. Press Enter to load the drive selection menu.
The Critical Step: Selecting Source and Destination
Stop and double-check your screen right now. This is the only part of the process where a mistake can cost you your data. Selecting the wrong target drive will destroy your files permanently.
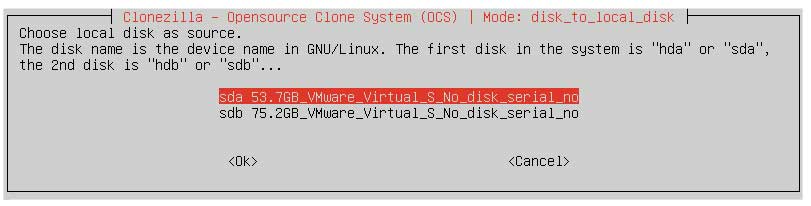
1. Pick Your Source Disk
First, Clonezilla asks for the Source Disk. This is your old drive. Look closely at the sizes listed on the screen to verify you are picking the drive holding your actual Linux OS.
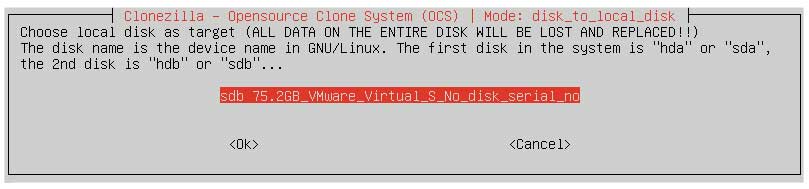
2. Pick Your Destination Disk
Next, it asks for the Destination Disk. Select your brand new, blank drive. Anything currently sitting on this destination drive is about to be permanently destroyed and overwritten.
Final Parameters
1. Skip File System Repairs
When asked about repairing file systems, you can safely select Skip checking/repairing. You only need to run this check if you suspect your old hard drive is actively failing. Skipping this saves a massive amount of time.

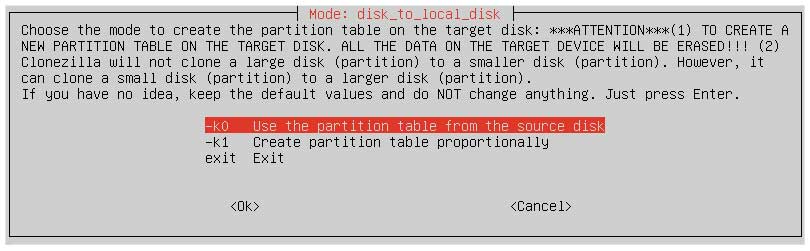
2. Replicate the Partition Table
When asked about partition tables, select Use the partition table from the source disk. This perfectly replicates your original partition sizes. We will expand the partition later to claim the rest of your new drive.
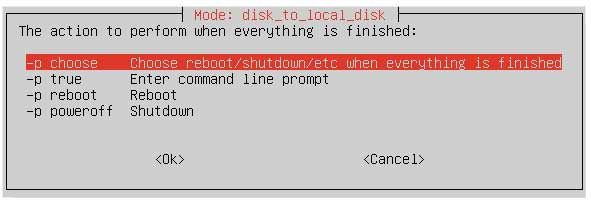
3. Choose Post-Clone Actions
Finally, choose what you want the computer to do when the cloning finishes. Selecting “Choose” will just prompt you when it is done. This allows you to power off the machine manually and safely unplug the old drive.
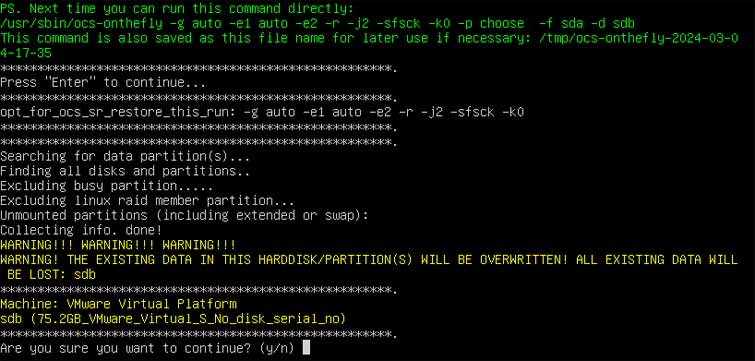
4. Confirm the Final Warning
Clonezilla will give you one last giant warning prompt in yellow text. It will ask “Are you sure you want to continue?” Type Y and press Enter to commit the changes.
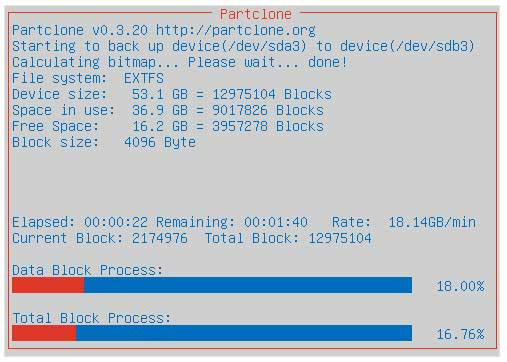
5. Monitor the Cloning Progress
The software will take over and begin displaying progress bars as it copies data block by block. Depending on the size of your drive and the speed of your hardware, this can take anywhere from ten minutes to over an hour. Let the machine run without interruption.
6. Acknowledge the Completion
When the cloning process is complete, you will be notified on the screen. You can then press enter to continue to the next step. This triggers the action you chose to perform when completed.
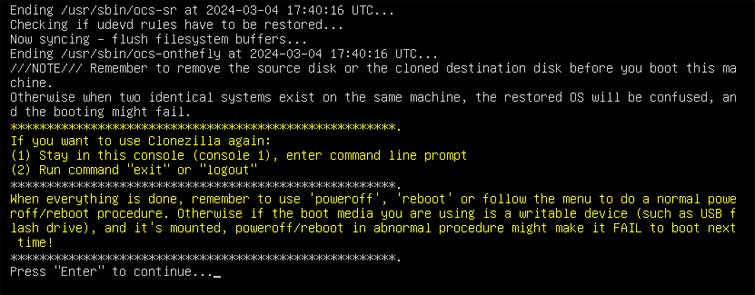
7. Power Off the Machine
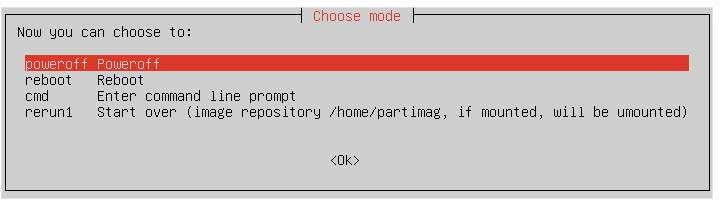
If you chose the first option, you will then be prompted to select one of the following options. Choose power off to shut down the machine. Unplug your old drive before you boot the system back up.
Post-Cloning: How to Use Your New Space
Once the cloning process is completely finished, shut down the computer. Unplug your old hard drive entirely and turn the machine back on. Your computer should immediately boot into your Linux desktop, looking exactly the way you left it.
However, there is one common catch. If you cloned a 50GB drive onto a brand new 500GB drive, your Linux OS will still think you only have 50GB of space available. Because we copied the exact partition table, the extra 450GB is currently sitting there as “unallocated space.” Here is how to claim your missing storage.
1. Boot Your New Drive
Boot into your newly cloned Linux drive. Ensure your desktop loads correctly and all your files are present. Your system is now running entirely off the new hardware.
2. Launch GParted
Open an application like GParted. You may need to install it via your package manager if it is not already on your system. This tool lets you safely expand live partitions.
3. Locate the OS Partition
Locate your primary OS partition in the visual layout. It will be positioned right next to a large block of gray unallocated space.
4. Resize the Storage Volume
Right-click the partition and select Resize/Move. Drag the slider all the way to the right to fill the empty unallocated space. Click the green checkmark to apply the operations. You now have a perfectly cloned operating system with full access to your brand-new storage capacity!
For additional training resources, check out our online IT training courses.
Check out our extensive IT book series.