With hard drives getting faster and larger on a regular basis, it makes sense that you might want to upgrade your computer with a new hard drive such as an NVMe drive for example. Or you may have a situation where your hard drive is failing, and you want to clone your operating system, apps and data to a new drive before it fails. Or maybe you are even building a new computer and want to migrate your Windows installation to the new one.
There are many hard drive cloning tools you can use to clone your Windows drive to a new drive. Most of them are free and some work from within Windows while others require you to create and boot to a USB flash drive to be able to clone your drive. In this article, we will be showing you how to clone your Windows drive to a new, larger or faster drive for free with MultiDrive.

To begin, you will need to download the MultiDrive software from their website. They have an installable version as well as a portable version that doesn’t need to be installed.
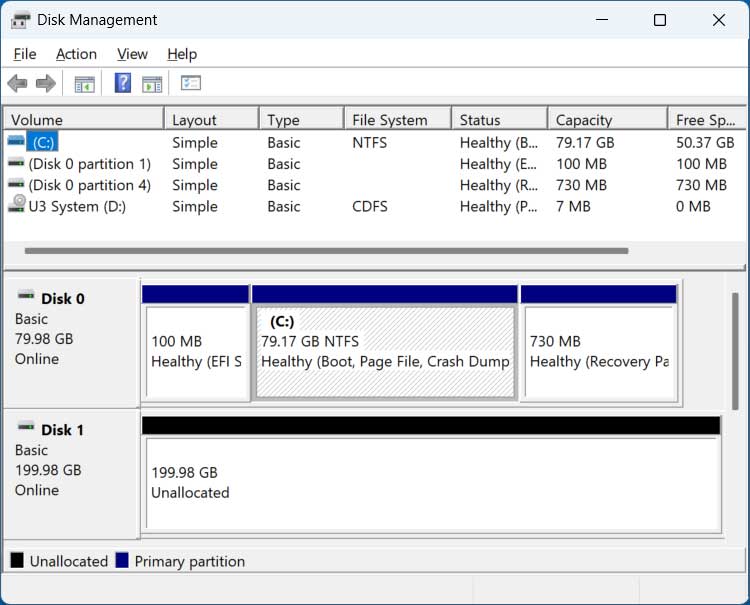
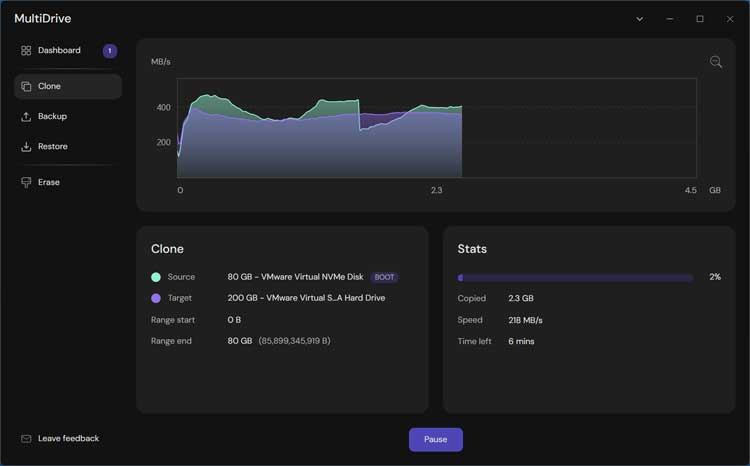
For our example, we will be cloning an 80GB hard drive to a larger 200GB drive. The image below shows how the drives look in the Windows Disk Management tool. As you can see, the 200GB drive has unallocated space with no volumes or partitions created.
Once we run the MultiTool software, we will go to the Clone section and choose our source (80GB) and destination (200GB) drives.
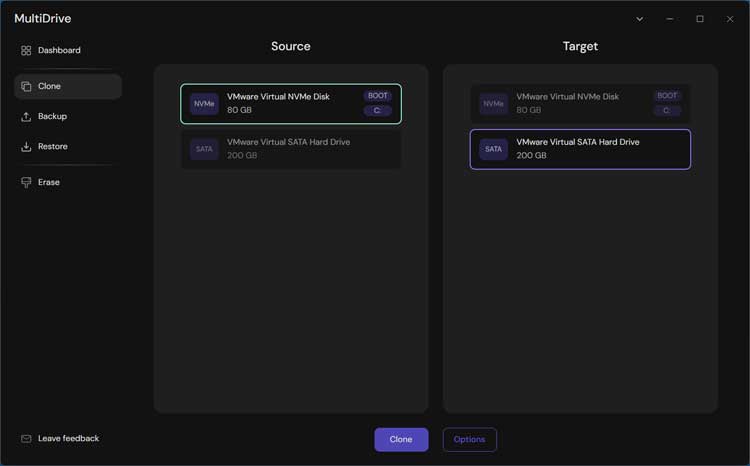
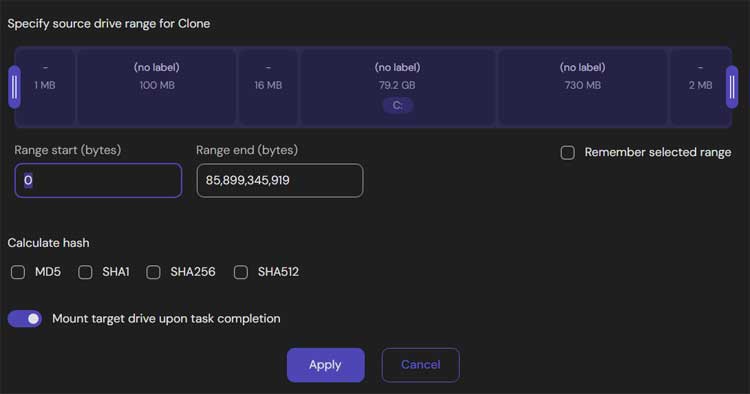
You can click on the Options button to change any options. You may not want to use the Mount target drive upon task completion setting if you plan on removing the old drive and booting from the new one.
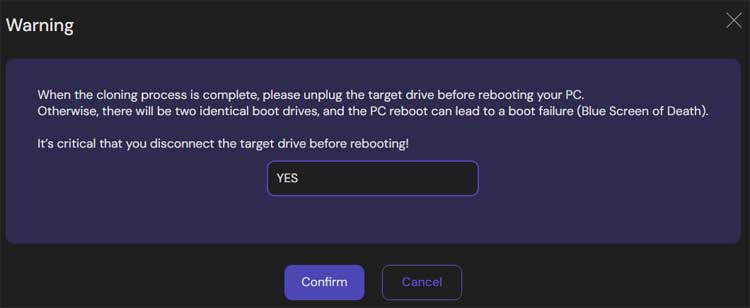
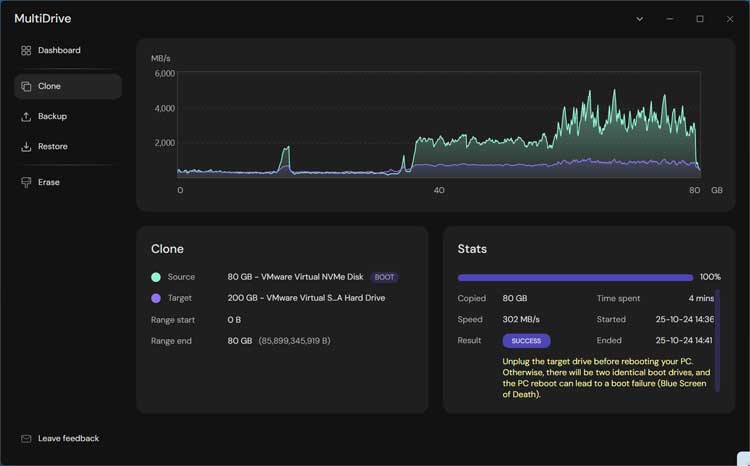
Once you click the Clone button, you will need to type in YES for the warning about disconnecting the target drive before rebooting.
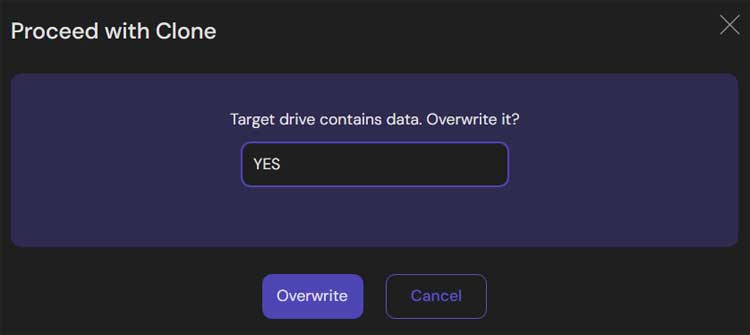
You will also need to type in YES to the prompt telling you that the target drive will be overwritten.
Then the cloning process will begin and will take several minutes depending on the size and speed of your drives as well as how much data the source drive contains.
Once the cloning process is complete, you will see a success message and another warning telling you to unplug the target drive if you plan on leaving the source drive connected.
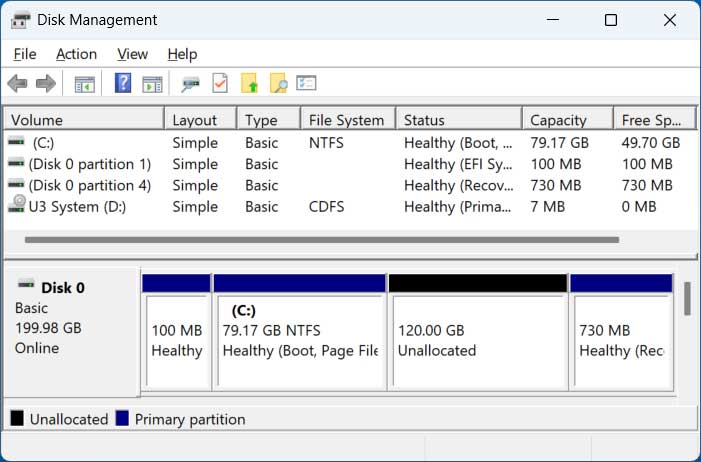
If you do leave both drives connected, you should be ok and as you can see in the image below, we have our old and new drives listed in Disk Management. You can also see that there is 120GB of unallocated space on the new drive. This is because the old drive was only 80GB and MultiDrive left the extra space unallocated.
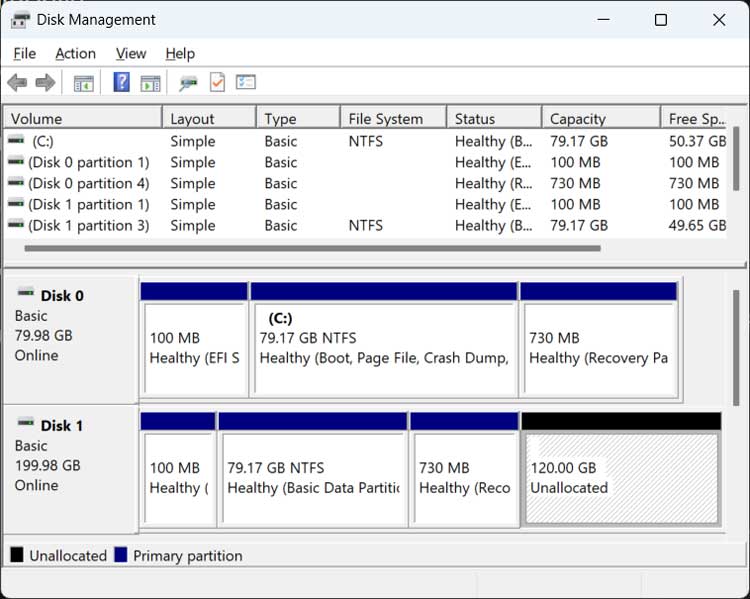
You can either extend your C drive to use the extra space or create a separate volume for another drive if desired. We will now shut down the computer and remove the 80GB drive and boot from the 200GB drive.
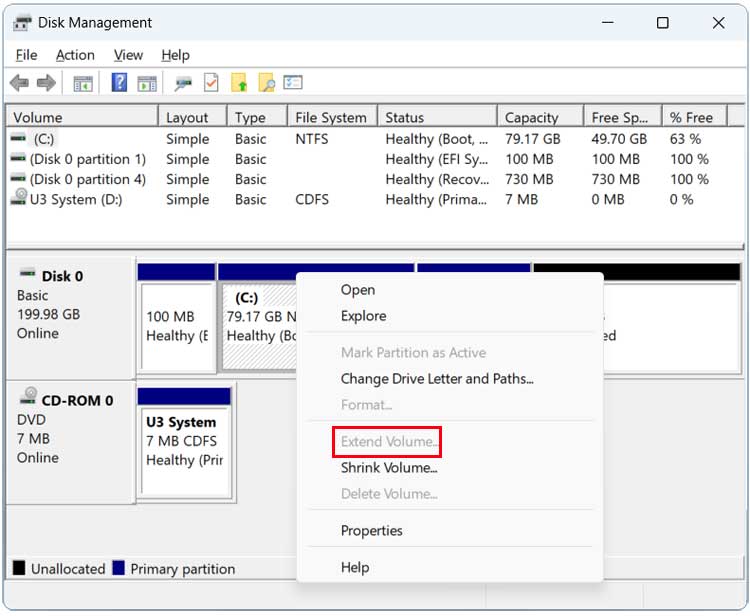
If you try to extend the drive, you might find that you have another partition in the way such as the recovery partition which prevents you from extending the C drive to use the unallocated space. This is indicated by the Extend Volume option being greyed out.
To get around this problem, we will be using the free NIUBI Partition Editor app to move the recovery partition out of the way so we can extend our C drive. You can check out our writeup on how to use NIUBI Partition Editor to move partitions if you want a more detailed explanation of how it works and can also check out the video demonstration.
NIUBI Partition Editor also comes in an installable or portable version so you are probably fine with the portable version unless you think you might want to use the software for other disk management tasks.
Once you have NIUBI open, simply right click on the partition you want to move and choose Resize/Move volume.
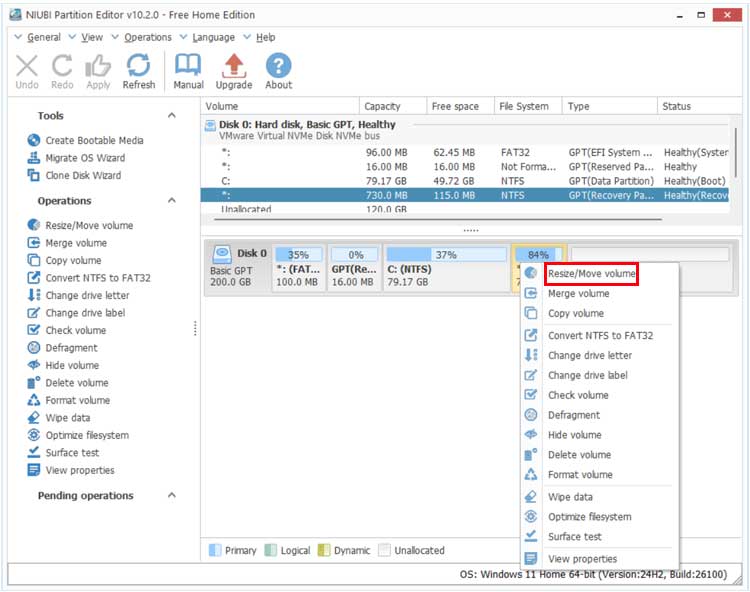
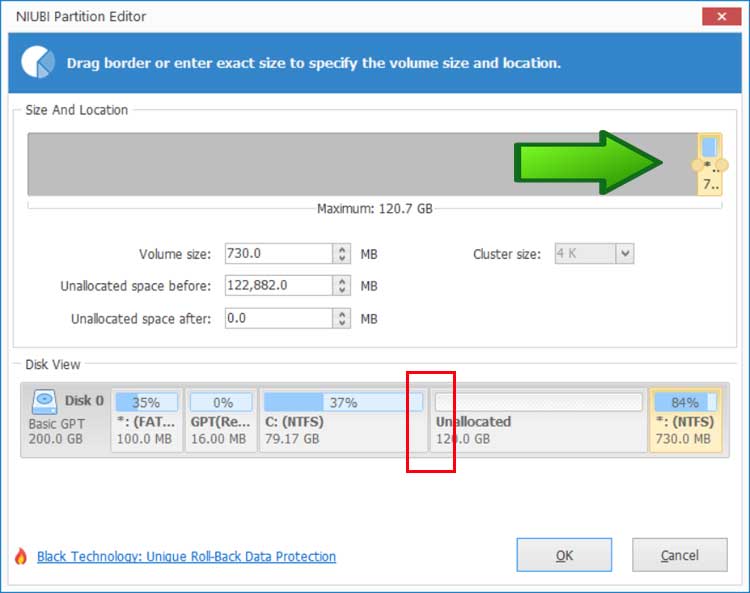
Then drag the volume over to the right side and it will be placed to the right of the unallocated space. Your configuration might look a little different so the process may vary for you.
To apply the changes, you will need to click on the Apply button at the upper left of the app.

Now you can see our C drive and 120GB of unallocated space are side by side (contiguous) .
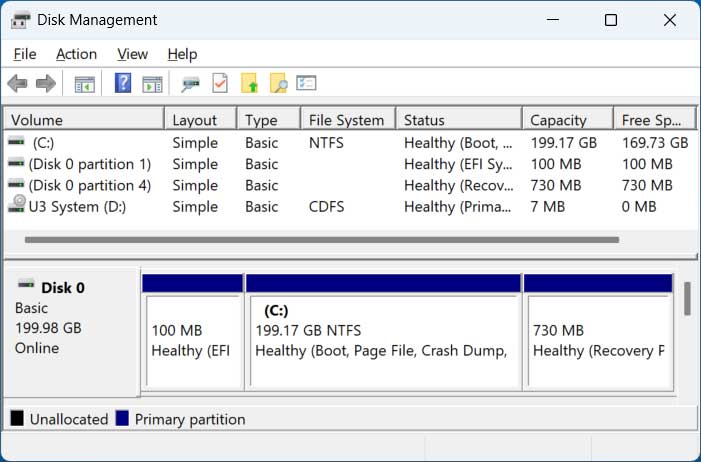
Now we can right click on the C drive and use the Extend Volume option to allocate the 120GB to our Windows drive.
For additional training resources, check out our online IT training courses.
Check out our extensive IT book series.