
Last Updated on May 21, 2026
Managing Windows servers usually means bouncing around between different remote connections all day. Instead of opening multiple Remote Desktop sessions, you can install the Remote Server Administration Tools (RSAT) directly on your Windows 11 computer to manage your network from a single dashboard.
This native integration completely changes how helpdesk technicians handle daily administrative tasks. Here is the absolute fastest way to get the core management modules configured on your local workstation.

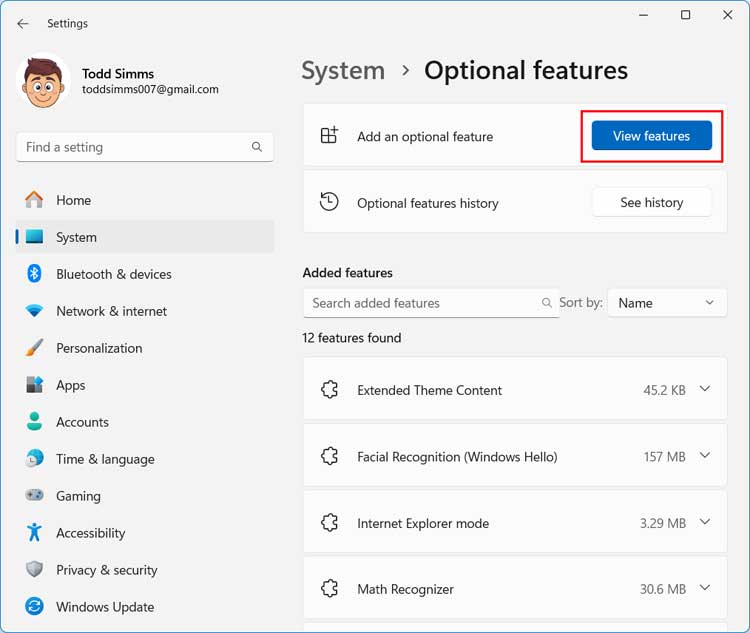
1. Open the Optional Features Menu
To see this process in more detail, start by heading into your main Windows Settings app. Under the System tab, you will find the Optional Features section. This is exactly where Microsoft hides extra administrative tools that regular home users do not need. Click the View features button to get started.
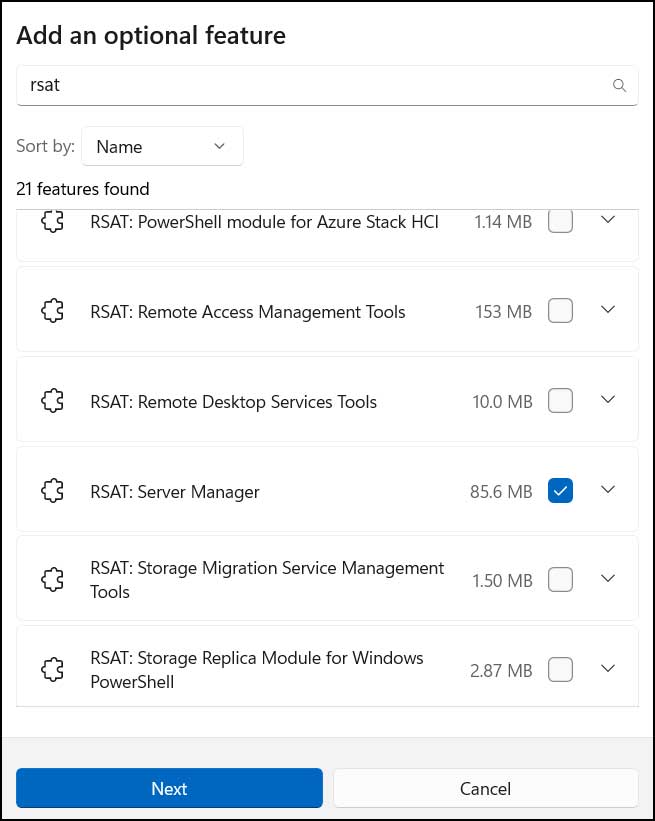
2. Search for RSAT Packages
Once the optional features window opens, simply type rsat directly into the search bar at the top. This instantly filters out the rest of the list and shows you only the remote administration packages. Locate RSAT: Server Manager, check the box next to it, and click Next.
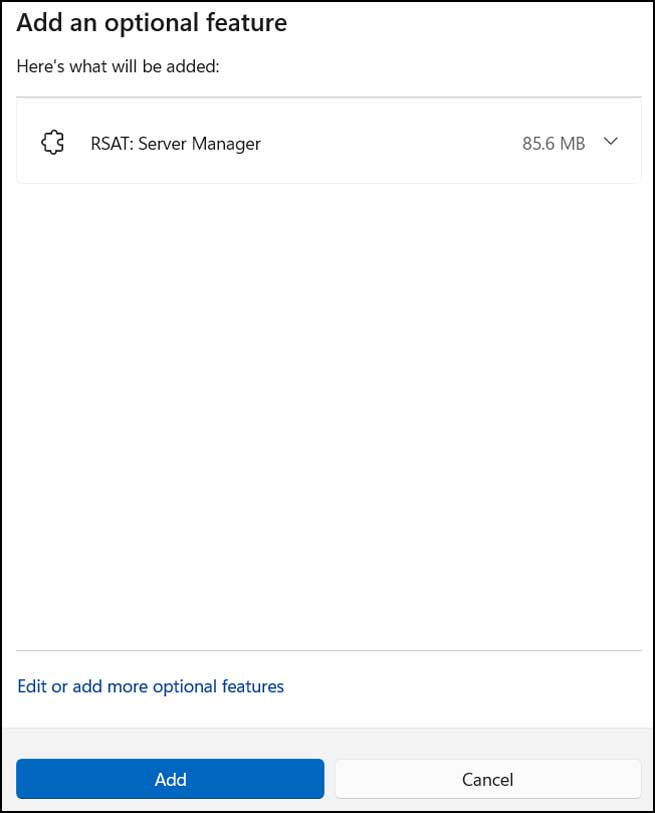
3. Confirm Your Feature Selection
On the confirmation screen, review exactly what is going to be installed on your local drive. Click the Add button at the bottom of the window to trigger the active download. You can expect the installation process to take a few minutes depending on your current internet connection speed.
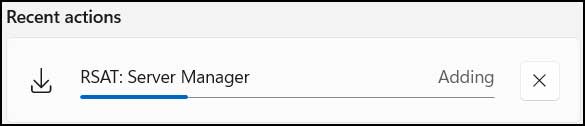
4. Monitor the Installation Progress
The settings menu drops you back to the previous screen where you can watch the active progress bar. Do not close your settings app until this specific download completes entirely. Windows must install several background dependencies during this step to ensure the management console functions properly.
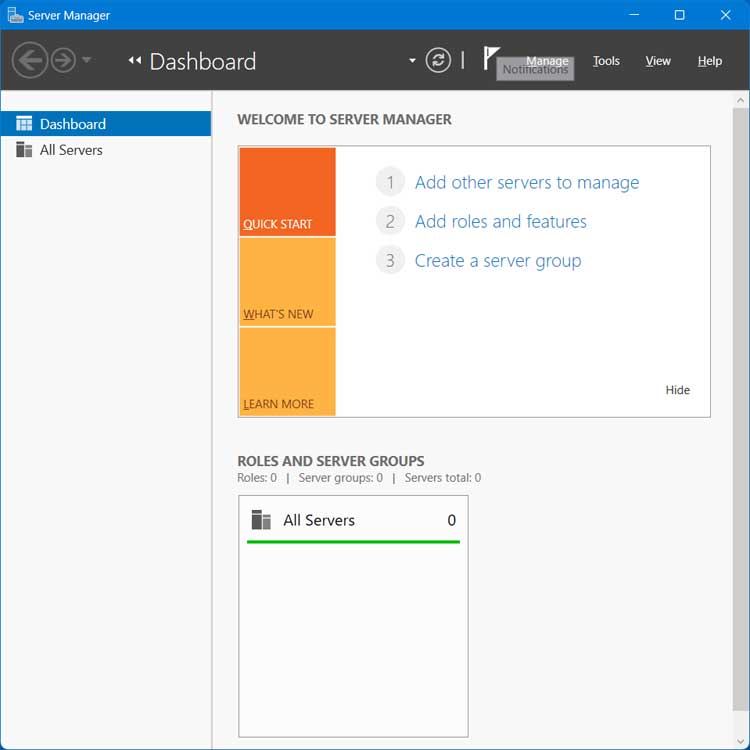
5. Launch the Server Manager App
Once the installation progress bar finishes, the tools are ready to use. You can easily find them by opening your Start Menu and typing Server Manager in the search box. Pin this shortcut directly to your taskbar for rapid access during your daily workflow.
6. Connect to Remote Servers
When you open the Server Manager application, you can immediately begin connecting to your remote servers. The interface allows you to add multiple domain controllers directly to your main dashboard. Just keep in mind you will need the appropriate administrative access rights for your user account to actually manage those remote machines.
7. Identify Installation Failures
Sometimes Windows 11 gets incredibly stubborn when trying to install optional features. The most common issue IT admins run into is an installation that hangs at the halfway mark or throws an error code like 0x800f0954. This almost always happens if your computer is connected to a corporate network that uses a WSUS server for Windows updates.
8. Bypass Your Local WSUS Server
The WSUS server blocks the download because it tries to pull the files locally instead of from Microsoft directly. To get around this, you have to temporarily bypass your local update server. Open your Registry Editor and navigate to your WindowsUpdate policy folder. Look for a key named UseWUServer and change its value from a one to a zero.
9. Restart the Windows Update Service
After editing the registry, you must restart the Windows Update service to apply the change. Go back into your settings and try installing RSAT again. It should download perfectly this time. Remember to change that registry key back to a one when you are done so your PC gets its normal security patches.
10. Avoid Installing Unnecessary Modules
The Server Manager acts as the core dashboard, but you might notice a lot of other RSAT options in that Optional Features list. You do not need to install all of them. Adding everything just wastes local hard drive space and clutters your start menu with useless shortcuts.
11. Add Active Directory Domain Services
Most system administrators only need a handful of specific modules to do their jobs. Active Directory Domain Services is the big one. You need this package to unlock the Active Directory Users and Computers console. This tool lets you reset passwords and manage user groups instantly.
12. Install Group Policy Management
Group Policy Management Tools is the second most important package for daily administrative work. This specific console allows you to edit and deploy security policies right from your desk. Add those two tools alongside your Server Manager and you will have everything you need for daily helpdesk tickets.
For additional training resources, check out our online IT training courses.
Check out our extensive IT book series.


