
Last Updated on June 4, 2026
Virtualization is the process of creating virtual versions of computers that run within software on a physical host computer. This allows you to run multiple virtual machines (VMs) with their own operating system and applications on the host computer. And if your host has enough hardware resources, you can run these VMs at the same time.
Hyper-V is Microsoft’s virtualization platform that comes with their server operating systems as well as the professional version of their Windows desktop operating systems. You can configure Hyper-V on Windows Home editions by following the steps from this article.

When using virtual machines, you will eventually have the absolute need to share files and folders between the VM and the host computer running Hyper-V. You can accomplish this by configuring shared folders and transferring files over the local network assuming you have everything configured correctly. Another option requires you to connect to your VM using a Remote Desktop session and attach the host computer to your virtual machine drives that way. Both of these traditional methods require the virtual machine to be fully powered on and running.
One incredibly easy way to connect to the drive of a virtual machine is to mount it directly on your host computer. This specific trick makes the virtual drive act exactly as if it were an actual physical hard drive attached to your computer. You will then be able to access all the files stored on that virtual machine to copy or manage them as needed.
Mounting a Virtual Disk File to Your Host Computer
1. Locate the Virtual Disk File Path
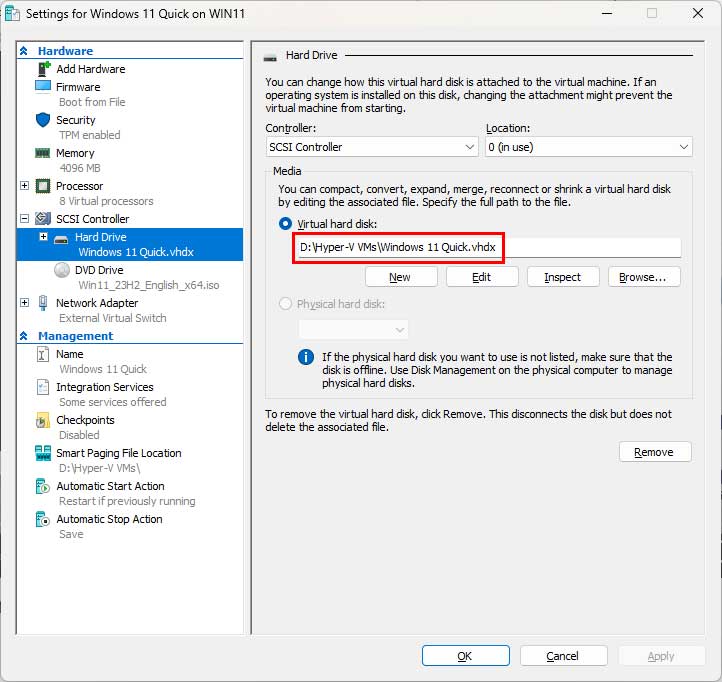
The very first thing you need to do before you can mount your virtual disk (.vhdx) file to your host computer is find the location of the virtual disk file itself. If you do not know exactly where this specific disk file is stored, you can simply go to the settings for the virtual machine you want to mount the disk from. You will then choose the Hard Drive section on the left side of the screen.
2. Copy the Hard Drive Path
This menu will show you the exact file path to the virtual disk file as well as its specific file name. You can either copy the path from here and paste it directly into File Explorer without the disk file name included. You also have the option to just browse to the location manually using your standard directory structure.
3. Mount the Disk File in Windows
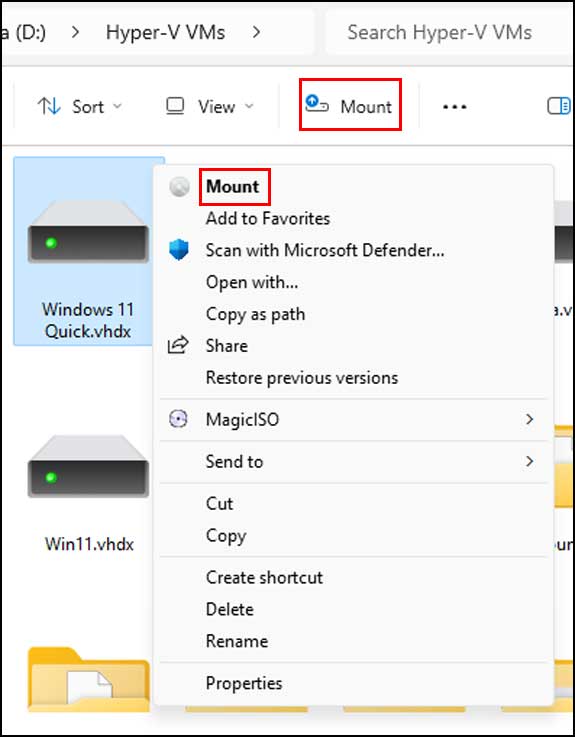
Once you find the virtual disk file, you can select it and then click on the Mount button in the top toolbar. You can also right click the file and choose the Mount option from the context menu. You will absolutely need to have the virtual machine powered off before mounting the drive. Attempting this with a running VM will immediately throw an error.
4. Access Your VM Files Locally
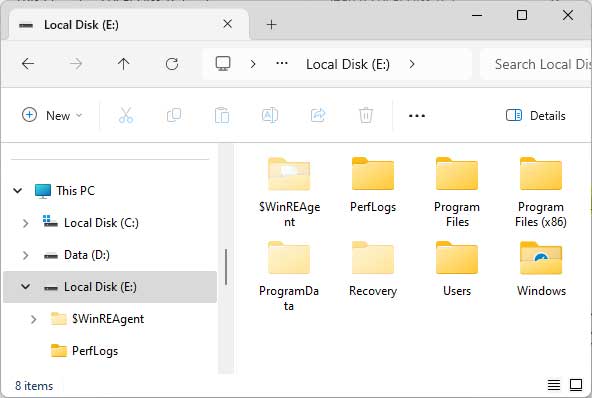
Windows will mount the vhdx file on your computer and immediately assign it a standard drive letter. You can then click on this new drive letter to view all the files and folders contained within the virtual hard disk. You can do things such as copy, delete, and move files as well as create entirely new files and folders on the virtual hard disk. When you power up the VM later, these file changes will be instantly reflected on the virtual machine operating system.
5. Unmount the Virtual Drive
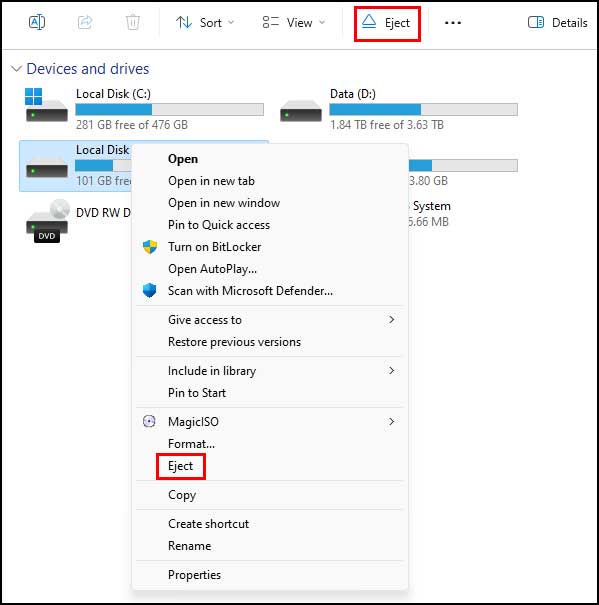
When you are completely finished working with the virtual hard disk, you will need to unmount it before powering on the associated virtual machine. You can do this by selecting the new drive letter assigned to the virtual disk and clicking on the Eject button in the File Explorer toolbar. You can also simply right click on the drive letter itself and choose Eject from the menu.
As you can see, managing files and folders on a Hyper-V VM virtual disk is an easy process once you learn how to mount the virtual disk file on your host computer.
For additional training resources, check out our online IT training courses.
Check out our extensive IT book series.


