
Last Updated on May 15, 2026
When creating and modifying files and folders, Windows will use date and time stamps with these files and folders so you will know when they were made and also when they were changed. This makes it easier to keep track of your information and can also come in handy when searching for files and folders on your computer.
If you open a folder in File Explorer and view the files using the details view, you will be able to see the date modified folder by default. You can right click the column header and add the date created information if needed.

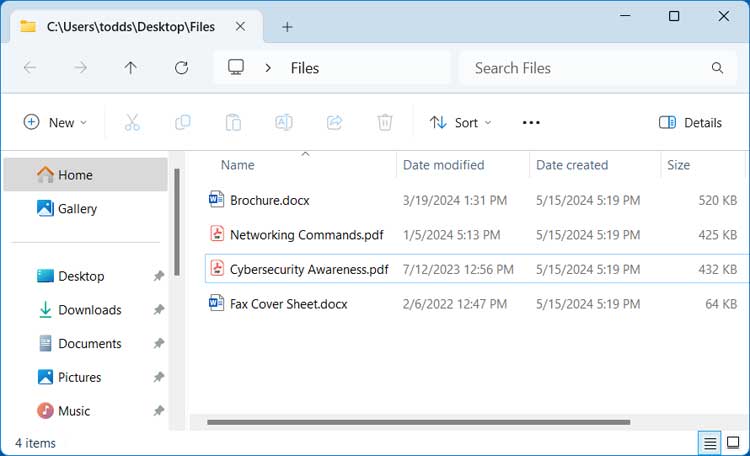
You can also right click on a file or folder, choose Properties and see similar information.
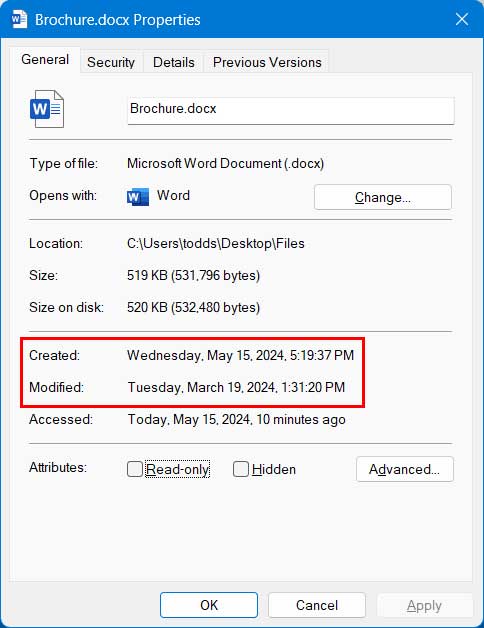
If you have any files or folders that you need to change the date and time attributes for, you can do so using the command line. The commands will vary depending on what you are trying to change.
In this article we will show you how to change the date created, date modified, and date accessed. We will also be showing you how to change date and time attributes for all the files in a specific folder.
1. Open PowerShell as Administrator
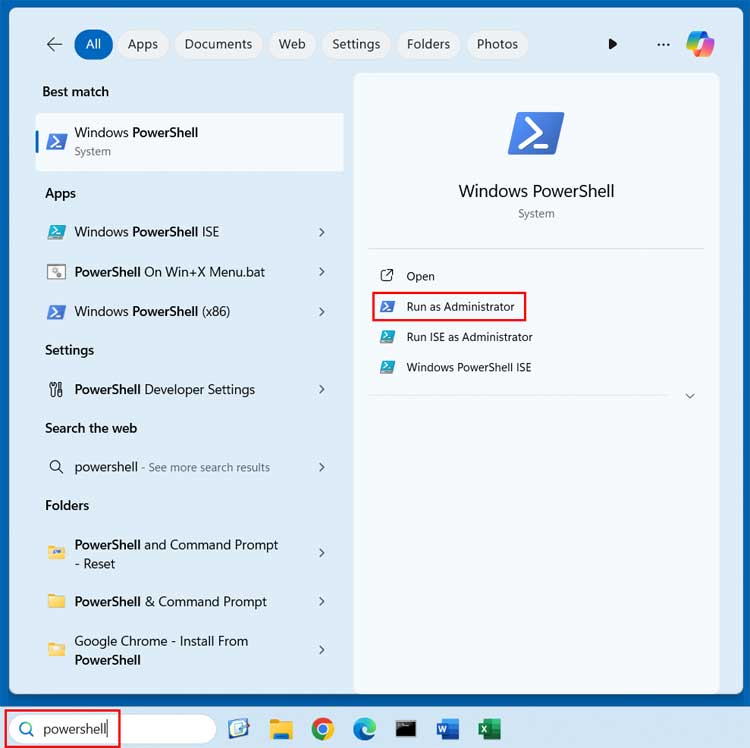
In order to change file and folder date and time attributes via the command line, you will need to open PowerShell as an administrator. Be sure your account has admin access, or you know the credentials of one that does. The easiest way to do this is to do a search for PowerShell and then choose the Run as Administrator option. Elevated privileges are an absolute requirement to modify these system-level metadata stamps.
2. Change the Date Created Attribute
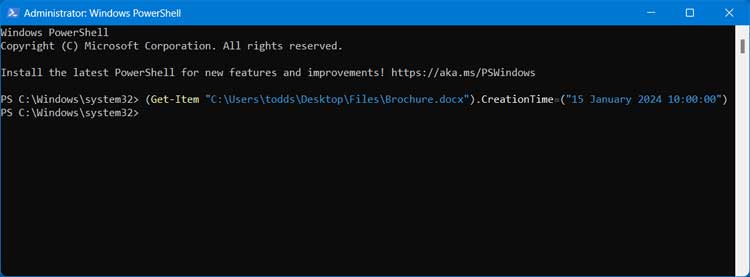
For our first example, we will change the date created for the file called Brochure.docx. To do so, we will run a specific PowerShell command that targets the creation time property. You must wrap the exact file path and the new desired timestamp in quotes so the system reads them correctly.
Syntax
(Get-Item “PathToItem”).CreationTime=(“15 January 2024 10:00:00”)
Command Example
(Get-Item “C:\Users\todds\Desktop\Files\Brochure.docx”).CreationTime=(“15 January 2024 10:00:00”)
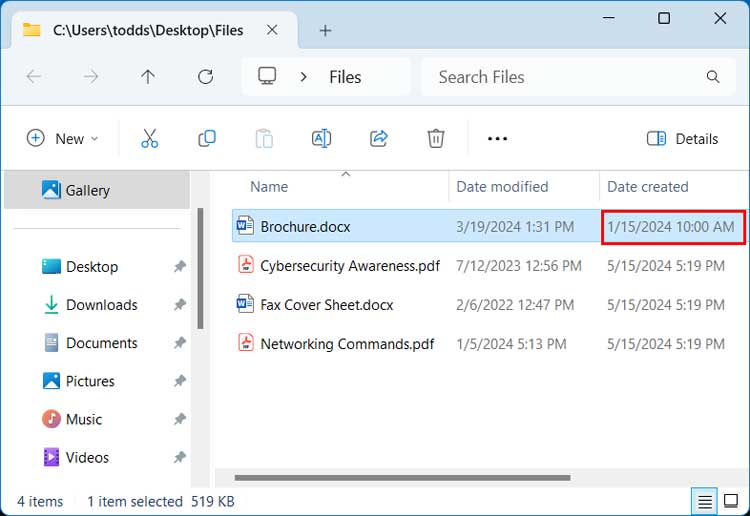
This will change the created date of the file to January 15th 2024 at 10:00 AM.
As you can see, you will not be shown any message indicating it was successful after running the command.
3. Verify the Date Created Change
Now when we go back to the folder and view the file, we can see that the date and time attributes have been changed to match what was in the command for the date created attribute. File Explorer updates this information instantly. You can manually refresh the folder view if the old date is somehow still showing up on your screen.
4. Change the Date Modified Attribute
For our next example, we will be changing the date modified attribute for the file called Cybersecurity Awareness.pdf. The syntax is nearly identical but targets the LastWriteTime property instead. Make sure you type out the correct file extension at the very end of your file path.
Syntax
(Get-Item “PathToItem”).LastWriteTime=(“16 January 2022 11:00:00”)
Command Example
(Get-Item “C:\Users\todds\Desktop\Files\Cybersecurity Awareness.pdf “).LastWriteTime=(“16 January 2024 11:00:00”)
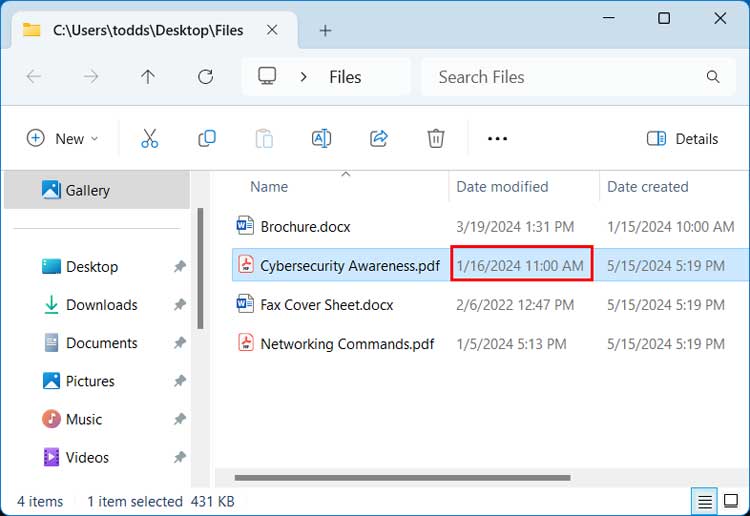
This will change the modified date of the file to January 16th 2024 at 11:00 AM as seen in the image below. This specific property is exactly what Windows uses to sort recent files in your Quick Access menu.
5. Change the Date Accessed Attribute
Next, we will change the date accessed time for the file named Fax Cover Sheet.docx. The operating system tracks this property whenever a user simply opens the file without making any actual edits. We use the LastAccessTime variable to seamlessly manipulate this specific stamp.
Syntax
(Get-Item “PathToItem”).LastAccessTime=(“17 January 2022 12:00:00”)
Command Example
(Get-Item “C:\Users\todds\Desktop\Files\Fax Cover Sheet.docx”).LastAccessTime=(“17 January 2024 12:00:00”)
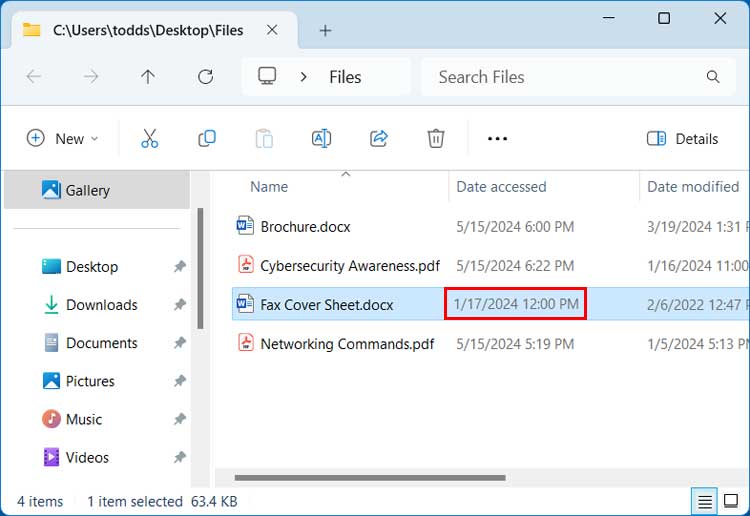
This will change the last accessed date of the file to January 17th 2024 at 12:00 PM as seen in the image below after enabling the Date accessed column. You might need to right click your column headers in File Explorer to manually enable that data view.
6. Fix Date Accessed Tracking Issues
If for some reason the date accessed does not change, you can try running an administrative file system utility command. Windows occasionally disables last access tracking by default to save system resources and improve mechanical hard drive performance. Run the following command and then retry the previous step.
fsutil behavior set disablelastaccess 0
7. Change Attributes for All Files in a Folder
For our final example, we will be changing the creation time for all of the files in a folder. Instead of targeting one specific document, we tell PowerShell to grab every child item inside the directory and apply the new timestamp globally. The text below shows the syntax commands used to change the creation time, modified time and accessed time in bulk.
Get-ChildItem -force PathToItem * | ForEach-Object{$_.CreationTime = (“15 January 2024 10:00:00”)}
Get-ChildItem -force PathToItem * | ForEach-Object{$_.LastWriteTime = (“15 January 2024 10:00:00”)}
Get-ChildItem -force PathToItem * | ForEach-Object{$_.LastAccessTime = (“15 January 2024 10:00:00”)}
Command Example
Get-ChildItem -force C:\Users\todds\Desktop\Files * | ForEach-Object{$_.CreationTime = (“30 March 2024 10:00:00” )}
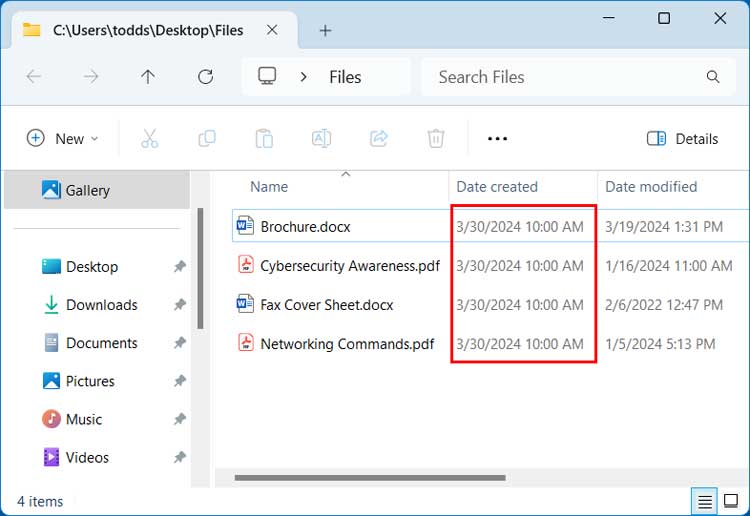
This will change the date created for all the files in the folder to March 30th, 2024 at 10:00 AM. A bulk command like this is perfect for organizing massive project folders where the timestamps have become messy over time.
As you can see, its not too difficult to change the file and folder date & time attributes via the command line once you get the proper syntax figured out.
For additional training resources, check out our online IT training courses.
Check out our extensive IT book series.






