
Last Updated on February 22, 2026
Windows comes with many new features that previous versions of Windows didn’t have. One of those features is the modern Windows Settings interface. You can perform all sorts of advanced system configurations to your computer directly from one centralized location.
When you go into these settings and play around, you will probably notice that many of them are just different ways to do familiar tasks. This includes uninstalling programs and changing display settings. Some of them will even take you to the older style interfaces that you were used to seeing back in Windows 7.
One cool feature that Windows offers is a built-in way to manage the storage on your computer. You can easily cleanup your hard drive to free up space and massively increase system performance. The old style Windows Disk Cleanup tool was average at best. Most of us relied heavily on third-party programs such as Ccleaner or BleachBit to get the job done properly.
Accessing Windows Storage Settings
1. Navigate to System Settings
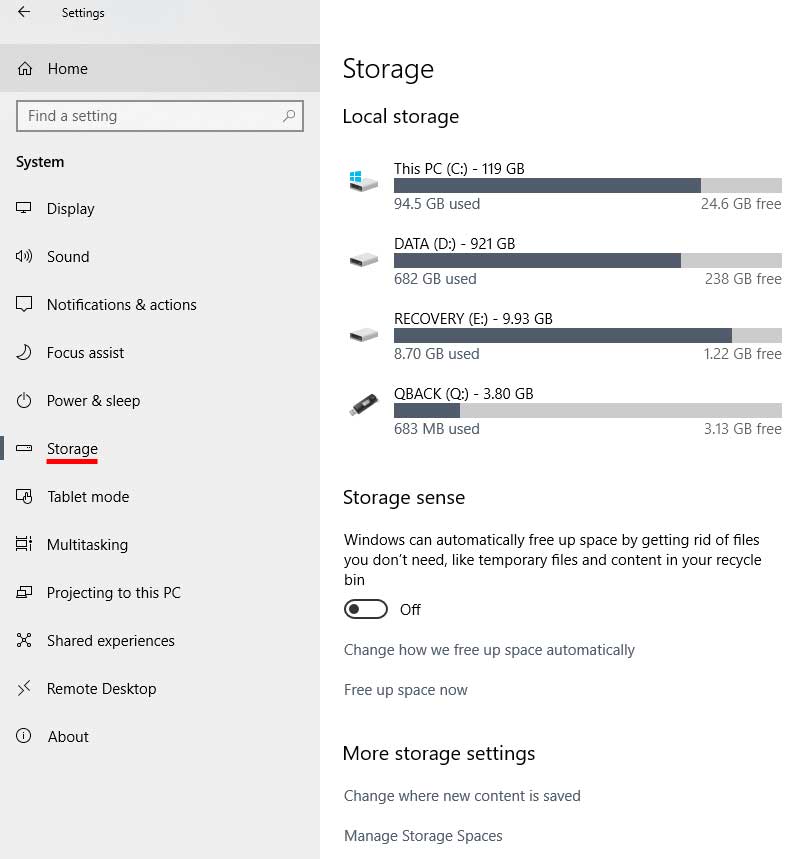
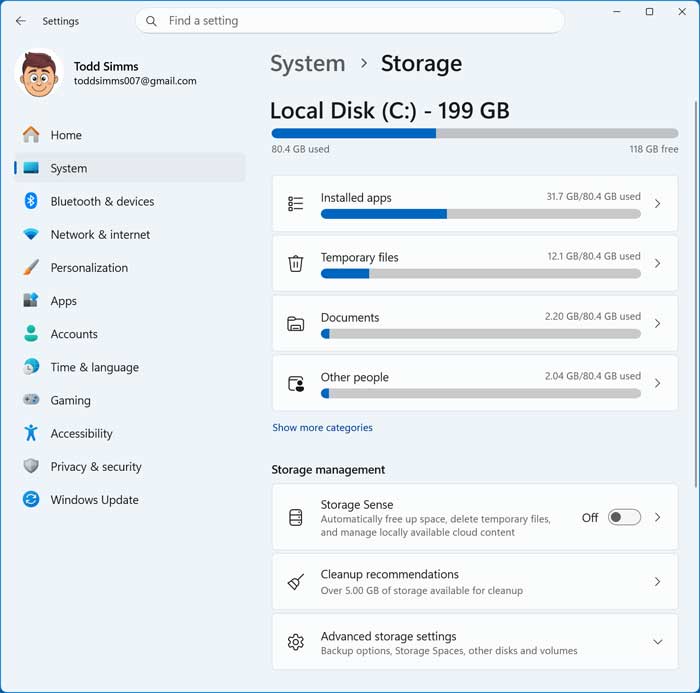
To get to these storage settings, navigate directly to your Windows Settings app. Click on System and then click on Storage on the left hand side of the screen. Windows 11 users will find this right in the main System menu list.
2. Review Your Drive Usage
After clicking on Storage you will see several options on the right side of the window. You will also see a detailed summary of all the locally installed drives on your computer. This includes connected USB drives and their exact physical space usage.
Automating Cleanup with Storage Sense
1. Understand Storage Sense
Storage sense is what Windows uses to automatically free up space on your hard drives. You do not have to remember to do it manually every single month. It does this by quietly deleting temporary files that your programs create that are not being used anymore.
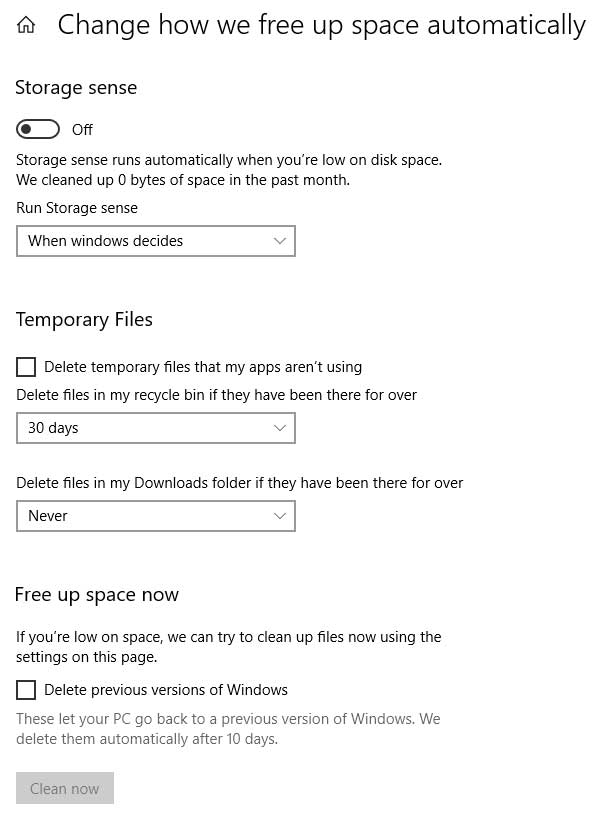
2. Configure Deletion Timers
This utility also targets files sitting in the Recycle Bin and your Downloads folder. It purges them if they have been there over a specific period of time that you define. The time periods you can choose from include never, 1 day, 14 days, 30 days, and 60 days.
3. Set the Run Schedule
Storage sense can run automatically when Windows thinks it needs to be ran due to low disk space. You can also force it to run every single day, week, or month. Choose the exact schedule that works best for your specific workflow.
4. Delete Previous Windows Installations
At the bottom of the Storage sense settings there is an option to free up space immediately. This runs the cleaning process manually based on the exact settings you selected above. If you have recently upgraded from Windows 10 to Windows 11, you can check the box to have Storage sense delete your previous version of Windows. This removes the massive Windows.old folder and frees up a ton of space.
Changing Default Save Locations
1. Find the Storage Location Menu
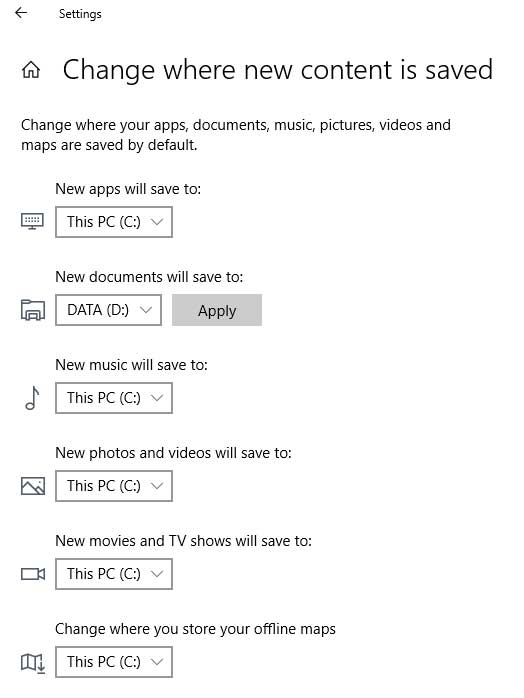
Under the Advanced storage settings menu there is a link that says Change where new content is saved. You might want large applications to be installed on a different secondary drive. You can also force all new music and video downloads to save to a massive external drive automatically.
2. Apply the New Drive Paths
You can make all of those default path changes right here in this menu. Just keep in mind that you actually need to have another physical drive installed on your computer. Otherwise you will not be able to change any of these dropdown settings. Simply choose the other drive from the menu and then click on Apply.
Removing Temporary Files Manually
1. Access the Temporary Files Menu
The absolute best feature in the modern storage settings is the manual temporary files removal tool. This comes in incredibly handy to free up space on your drive when needed. It serves as excellent general maintenance for keeping your operating system fast and responsive.
2. Scan for Removable Data
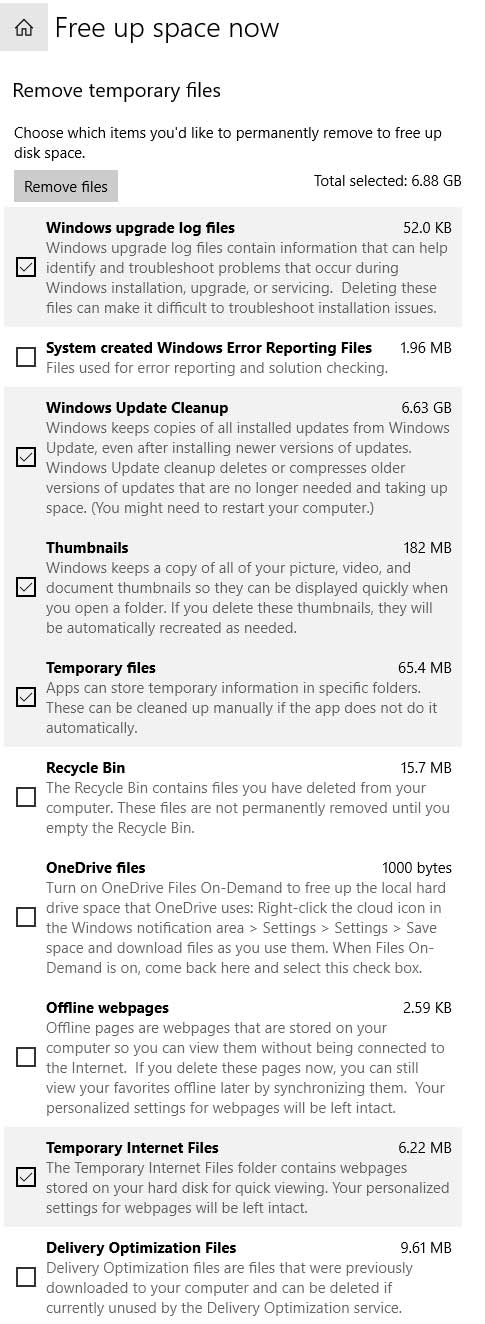
It will clean out hidden things such as temporary internet files, OneDrive caches, and old image thumbnails. Many of these types of files you would never think about removing manually. You probably would not even really know how to find them buried deep in the system folders.
3. Review the Scan Results
Windows will scan for the exact types of files it can safely remove from your drive. The results will vary heavily based on your computer configuration and when you last performed the removal process. Review the list carefully to see exactly where your storage space is going.
4. Execute the File Removal
You can simply check or uncheck the boxes next to the types of files you want to remove. Once you are satisfied with your selection, click the Remove files button at the top to start the process. Windows will handle the rest automatically in the background.
5. Wait for the Purge to Finish
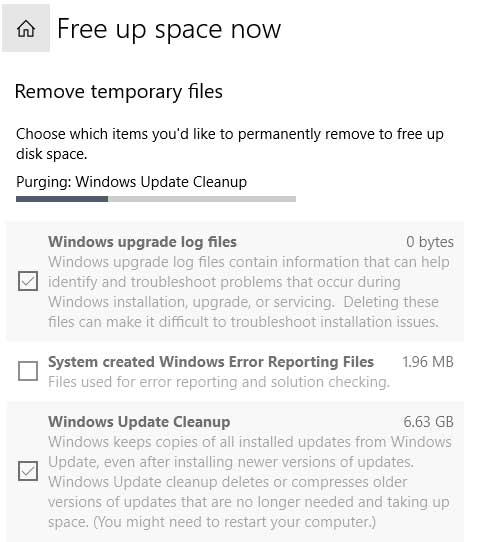
How long the process takes depends entirely on how many files are to be removed and their total size. It also depends heavily on what specific items you chose to have cleaned up. Keep in mind that this can take quite some time so be patient and let it run to completion.
For additional training resources, check out our online IT training courses.
Check out our extensive IT book series.






