
Last Updated on March 16, 2023
When you install Windows you are normally asked to give your computer a name usually about the same time you are choosing your login name. But if you buy a computer from a store with Windows already installed it will already be named for you most likely with some generic name such as DESKTOP-854217 which doesn’t do you much good if you have a home network and need to know which computer is which for shared resources such as files and printers.
Fortunately it’s really easy to rename your computer in Windows and there are several ways to do it and we will go over 3 of them in this article. These methods will vary a little depending on what version of Windows you have on your computer because the start menus change between Windows 10 and 11 but the concept is basically the same.

Renaming via Legacy System Properties
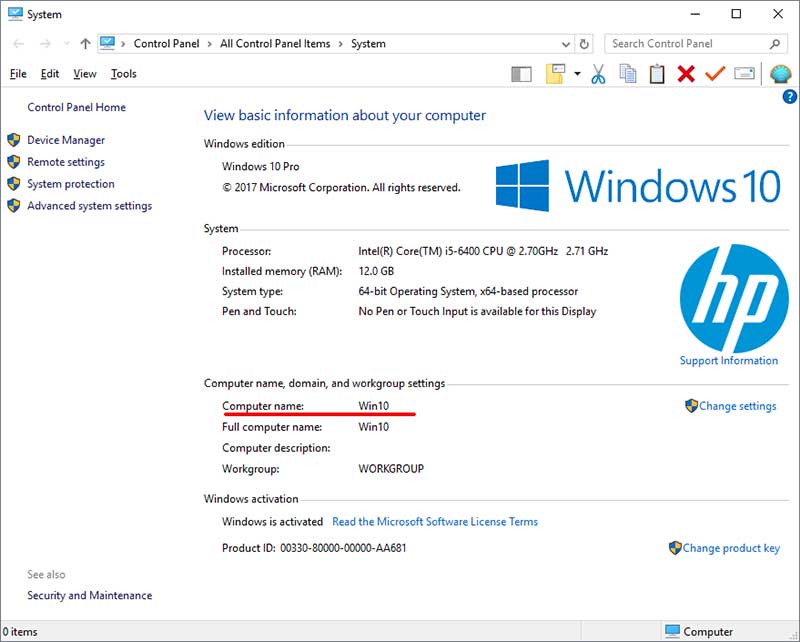
1. Open the System Properties Menu
The very first method is the absolute oldest method and involves utilizing the legacy control panel. Click directly on Start and then right click on Computer, My Computer, This PC, or whatever your specific version of Windows calls it. You then click directly on Properties from the context menu. This is the most common way for older systems. Windows 10 and Windows 11 users can simply search for “sysdm.cpl” to open this exact same menu.

2. Access the Change Settings Link
Once you are sitting inside the computer or system properties window, you will clearly see your current computer name listed. Look straight to the right side of that specific panel. To officially change the computer name, simply click on the blue link that says Change Settings.
3. Type the New Computer Name
A much smaller system properties box will immediately pop up on your screen. You will then click directly on the Change button located right next to the network ID options. Type your desired new computer name right into the text box. Click the OK button and then click OK one more time to confirm the edit.
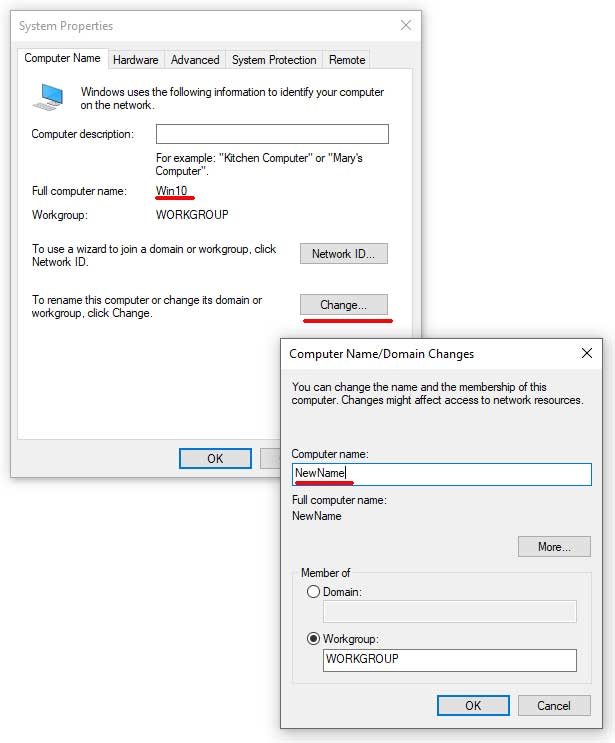
4. Reboot Your Machine
The operating system will instantly prompt you to reboot your computer for the system changes to take effect. You can safely say yes right now or opt to do it at a later time. Just keep in strict mind that the new name change will not be actively applied to the network until you completely reboot the hardware.
Renaming via the Modern Settings App
1. Open the Windows About Screen
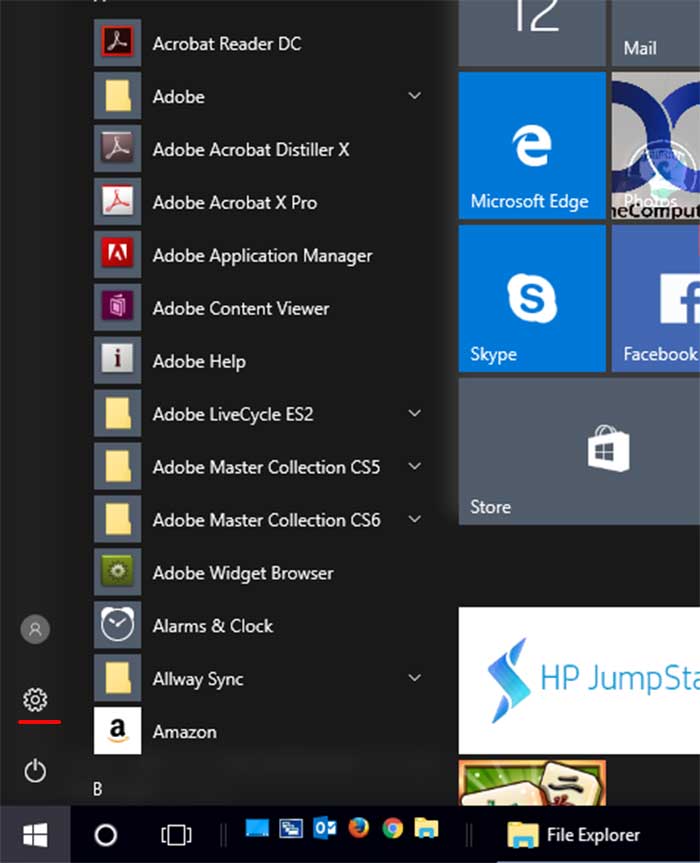
If you are currently running Windows 10 or Windows 11 using the default Start Menu, this method is significantly faster. You can click directly on the Settings gear icon from your main menu. Then go straight to the System tab on the left side of the interface. Scroll completely down to the absolute bottom and click on the About section.
2. Click the Rename Button
Look right near the top of the hardware specifications list. There you will clearly see a prominent button specifically called Rename this PC. When you explicitly click on that button, you will be immediately prompted with a brand new blue dialog box. It will actively ask you to type in the brand new name of your computer.
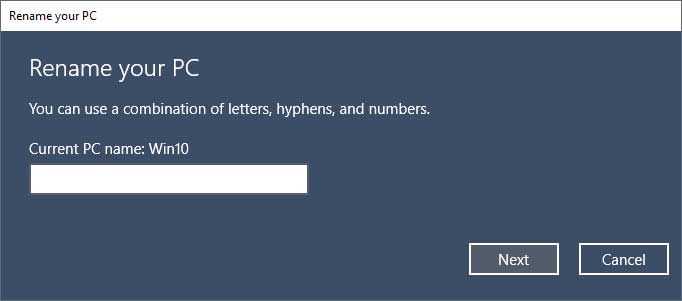
3. Confirm and Restart
After carefully typing in the new network name, click on the Next button to lock it in. You will be immediately prompted to reboot your computer just like with the older legacy method. You can again choose to do this vital reboot later if you are currently working on other things.
Renaming via the Command Prompt
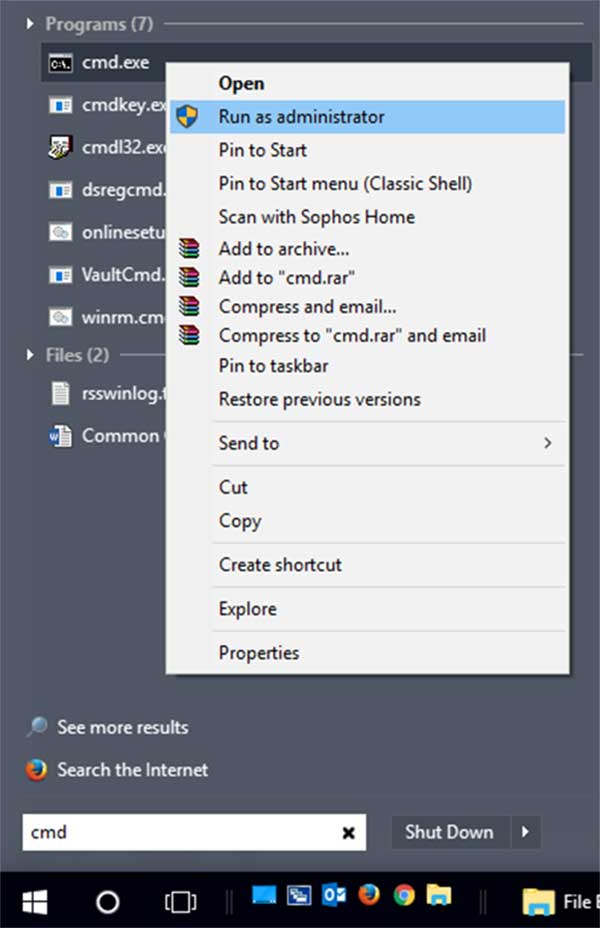
1. Launch an Elevated Command Prompt
The final way to change your computer name is directly from the command prompt terminal. This extremely powerful method should work exactly the same on any modern version of Windows. Click on Start and type the letters cmd right into the search box. When you clearly see the black cmd icon, right click on it and explicitly choose Run as Administrator. The entire rename procedure will completely fail if you do not launch it with elevated privileges.
2. Execute the WMIC Command
This is the exact string we will be using to change our computer name directly through the terminal. Type WMIC computersystem where caption=’current_pc_name’ rename new_pc_name and prepare to edit the syntax. All you explicitly need to do here is replace current_pc_name with the computer’s actual current name.
3. Customize Your Variables
In our specific case, the original computer name is Win10. You must replace the new_pc_name variable with the exact new name you want to give your machine. For example, we can type WMIC computersystem where caption=’Win10′ rename Desktop and press enter.
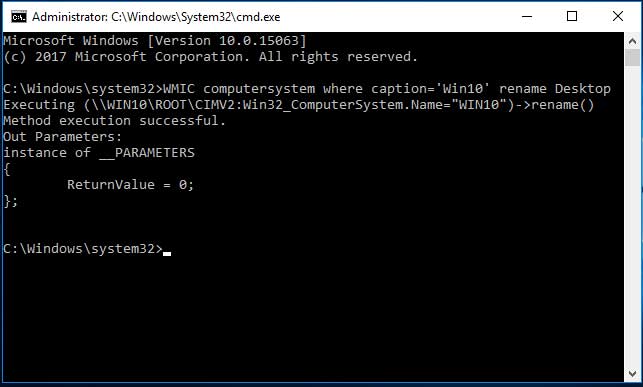
4. Verify the Return Value
As you can clearly see on the screen, the terminal outputs Method execution successful. It also explicitly displays a ReturnValue of exactly 0. If that specific number said 5 instead, it means you definitely did not open the command prompt as an administrator. It outputs 5 even though it weirdly still says successful.
5. Verify the New Hostname
Once again, you will absolutely need to reboot your machine. After that restart cycle finishes, your computer name will be permanently changed on the network. A very quick way to manually confirm this is to open the command prompt again. You do not have to be an administrator this time. Type in the word hostname and press enter to instantly print out the brand new name.
For additional training resources, check out our online IT training courses.
Check out our extensive IT book series.


