Last Updated on February 8, 2022
There are many types of spyware infections you can get on your computer. Some are far worse than others when it comes to how it affects your computer’s performance or how they try to steal your personal data. Many times you won’t even know you have a spyware infection because there won’t be any obvious signs telling you so.
Applying the Sexmaxx Registry Fix
1. Download the Registry File
Sexmaxx is a form of spyware and may be difficult to remove using standard antivirus tools. You must download a specific registry fix and run it to remove the malicious reference from the registry. Download the fixsexmaxx.zip file directly to your local hard drive.
2. Extract and Run the Fix
Unzip the downloaded archive directly to your desktop using your native file extraction utility. Double click on the extracted fixsexmaxx.reg file and allow it to enter the registry. Windows will display a security warning asking if you want to proceed. Accept the prompt to let the clean keys overwrite the corrupted context menu handlers.
Disabling System Restore in Newer Windows
1. Open the System Protection Menu
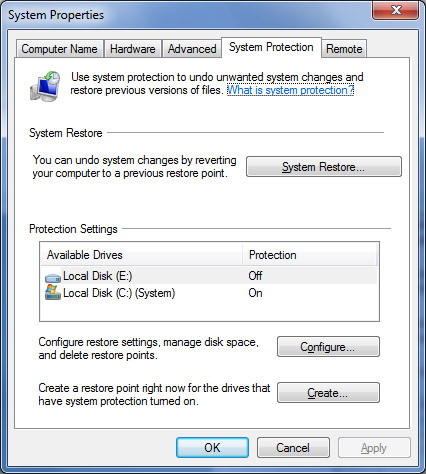
Next you should turn system restore off to flush out all previous system restore points. Malware often hides inside these hidden backup files to avoid detection. Do a search for system restore from the taskbar search box. Click the System Protection option on the left side of the results panel to launch the legacy control panel.
2. Configure the Primary Drive
Make sure your C drive is highlighted in the active protection list. This step is critical if you have more than one drive installed on your machine. Click the Configure button located near the bottom of the window to access the storage parameters.
3. Disable the Protection Feature
Check the box to Turn off System Protection completely. Click Apply and then click OK to confirm your choice. Windows instantly deletes all existing restore points and wipes out the hidden spyware copies permanently.
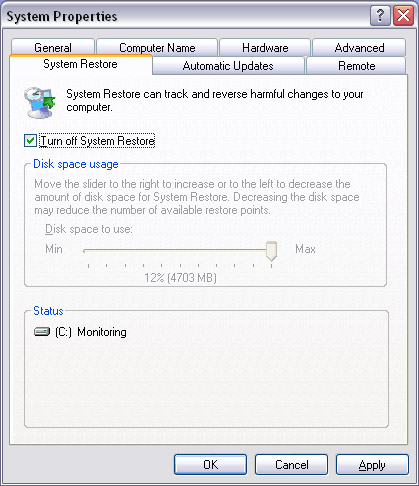
Disabling System Restore in Windows XP
1. Access the Computer Properties
Older legacy machines require a completely different navigation path. Right click on My Computer on your desktop and click on Properties. This action launches the core system properties window.
2. Turn Off the Restore Feature
Click the System Restore tab at the very top of the window. Check the box labeled Turn off System Restore. Click Apply and then click OK to execute the deletion command. The system purges the infected backup data from the local drive.
Creating a Clean Restore Point
1. Restart Your Computer
You must restart your computer immediately after flushing the old data. Rebooting clears the active memory and completes the registry fix application. Log back into your main Windows account to finish the cleanup process safely.
2. Create a Point in Modern Windows
Navigate back to the exact same System Protection tab you used earlier. Turn the protection feature back on using the configuration menu to protect your clean system. From the same System Protection tab click on the Create button to generate a brand new backup state.
3. Create a Point in Windows XP
Click on Start and navigate through All Programs to the Accessories folder. Open System Tools and then select System Restore. In the System Restore wizard, select Create a restore point and click the Next button. Type a descriptive name for your new restore point then click on Create to finish the job.