
Last Updated on April 7, 2026
If you have spent any time using virtualization software, then you know that there are several vendors to choose from. These include VMware, Oracle VirtualBox and Microsoft Hyper-V. You can actually run all three of these platforms on the same host computer if you want to experiment with each one to see which is the best for your needs. In this tutorial we will show you how to import a VirtualBox VM into Hyper-V.
You might have some virtual machines that you have configured with one of these platforms and want to move over to a different one. This process is not always as straightforward as you would think since these platforms use different technologies and virtual disk formats etc.

If you want to export a VirtualBox VM and then import it into a Microsoft Hyper-V environment, you can do so but will need to take an extra step to convert the virtual disk file so it can be imported into Hyper-V.
Exporting your VirtualBox VM for Hyper-V
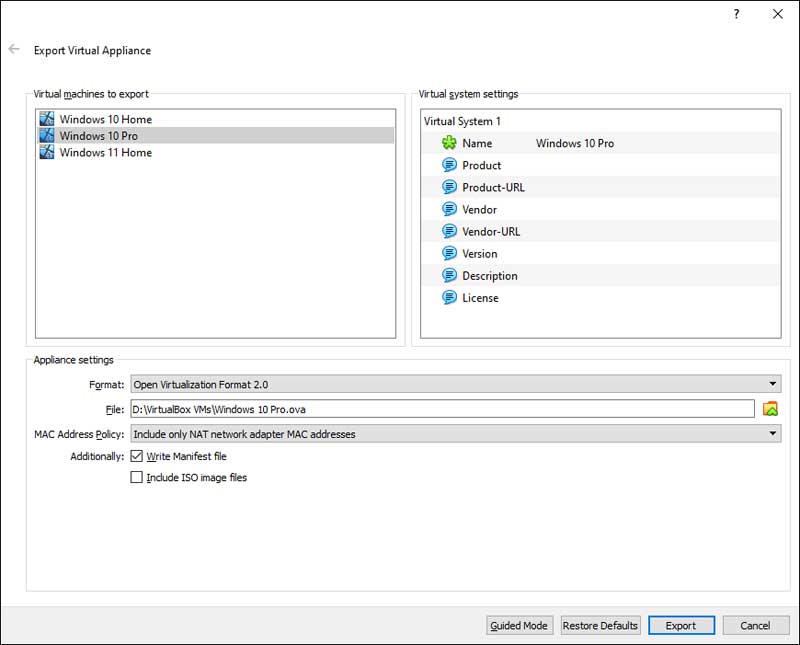
The first thing you need to do is export your VirtualBox VM as an OVA file and this is a fairly easy process do complete. To export your VM, you will need to go to the File menu and then select Export appliance. you will select the virtual machine you want to export from your listing of VMs. For the format you can choose Open Virtualization Format 2.0 and then you will need to choose a location to export the file to if you do not want to stick with the default location. You will also need to give the exported VM file a name that ends with .ova.
You can leave the default choice of Include only NAT network adapter MAC addresses or change it to Strip all network MAC addresses if you like. If you want to save some space with your OVA file, then you can uncheck the box that says Include ISO image files in case you have any ISO files mounted on your VM. Then you can click on the Export button.
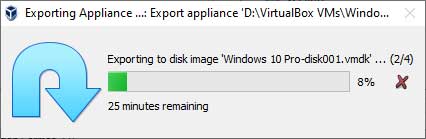
The export process will take a bit of time, and this will be determined by the size of your virtual machine.
Extracting Your VirtualBox OVA VM File
Once you have your exported OVA file you will need to extract the contents of it into individual files. You can use a program such as 7-Zip or WinRAR to do so.
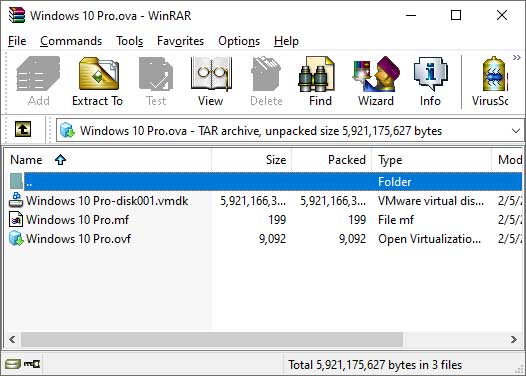
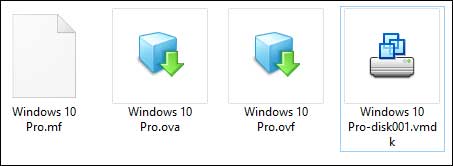
Now you will have your original OVA file along with a VMDK disk file and a couple of other files.
Converting the VMDK File and Importing it into Hyper-V
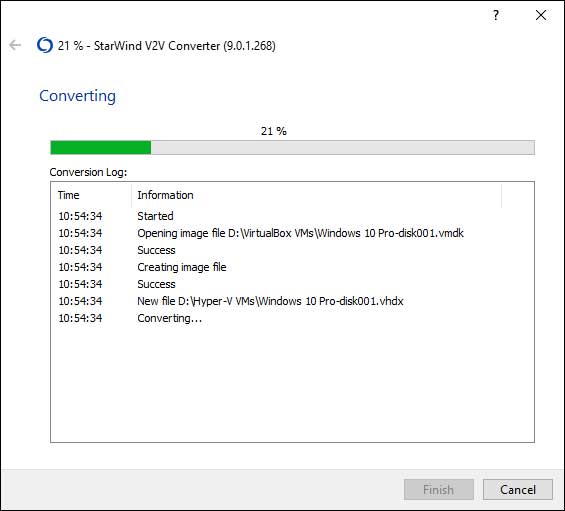
Now you will need to download and install the free StarWind V2V Converter and then run it. From the Select the location of the image to covert menu, you will choose Local file since you are going to be working with the VMDK file you just extracted.
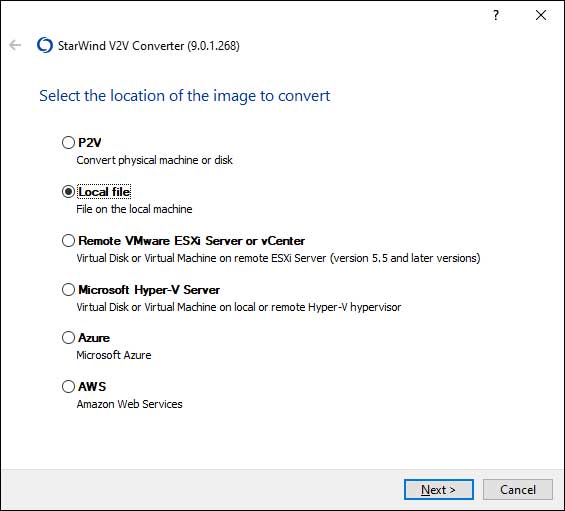
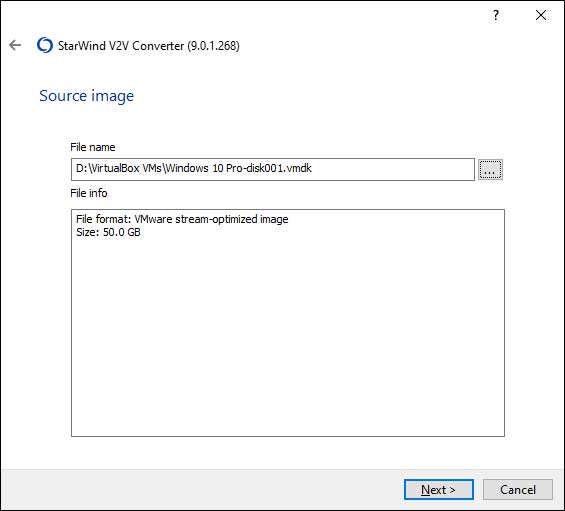
Next you will browse to the location of your extracted VMDK file.
After clicking the Next button, you will have a couple of options as to how you want to import your VMDK file into Hyper-V. The V2V Converter software has the ability to create a Hyper-V virtual machine and attach the converted VMDK to VHDX disk file right from the software if you choose the Microsoft Hyper-V Server option.
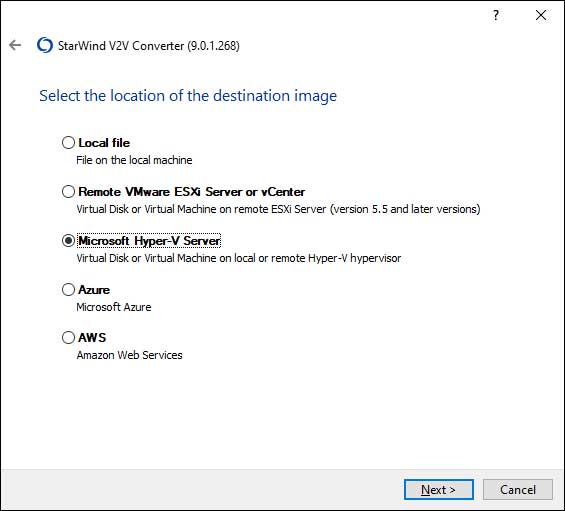
You will then need to choose your Hyper-V server location. If it is on the same computer you are working on then you can use the localhost option.

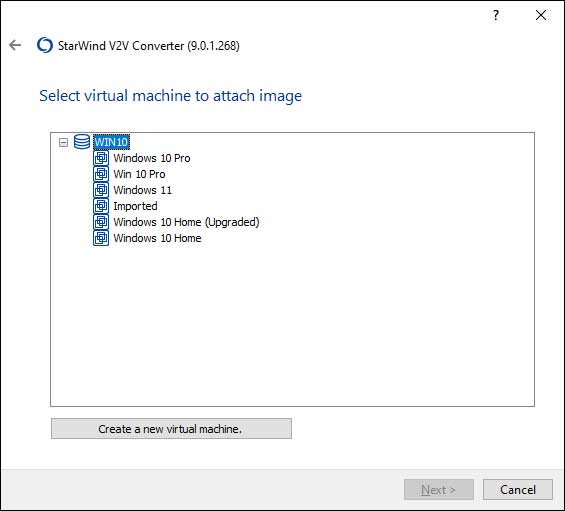
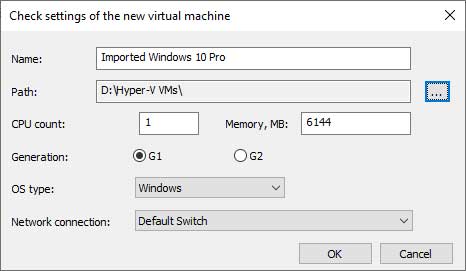
If you want to create a new virtual machine and then attach the disk, you can click on the Create a new virtual machine button. You can also create a new VM in the Hyper-V Manager but choose the option to attach a virtual hard disk later and then select it from the same list as seen below.
If you are creating a new virtual machine, you can give it a name, set the location path and adjust the CPU, memory and generation settings. You can also choose the OS type and what network you want to connect it to.
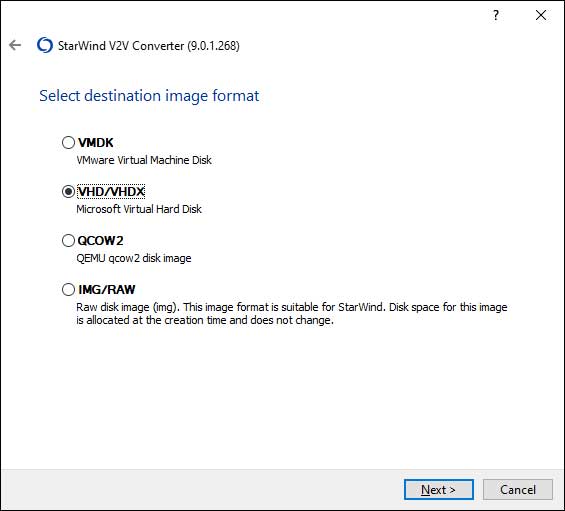
The other method you can use is to convert the VMDK file to a VXDH file by using the Local file option.

In the next step, you will choose the VHD/VHDX option an click the Next button.
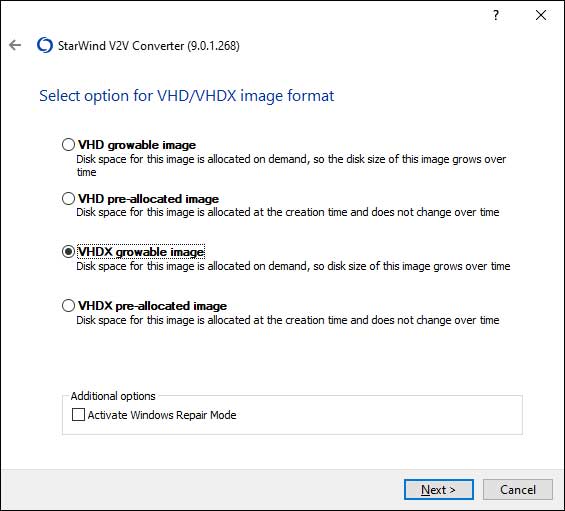
If you want to use the newer style Hyper-V virtual disk file format then you will choose the VHDX growable image option.
Next you will browse to the location where you want to save your converted file.
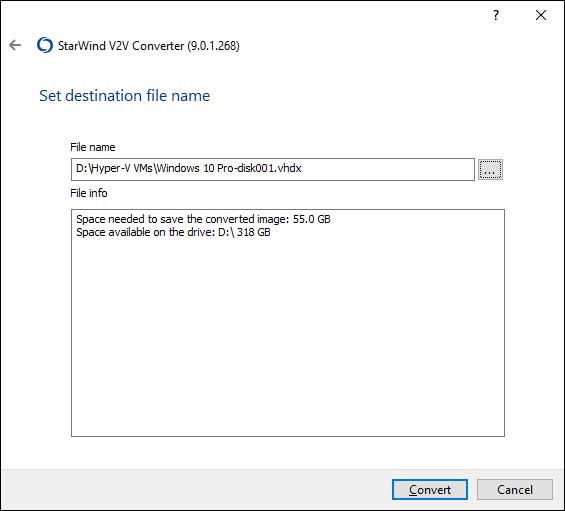
The conversion process will take several minutes depending on the size of your original file.
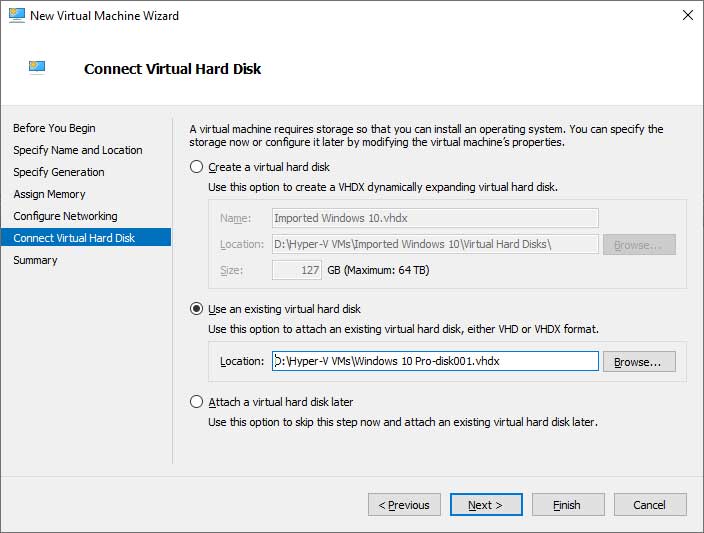
Now that you have your converted file, you can go into Hyper-V and create a new virtual machine and in the Connect Virtual Hard Disk step, you will select the Use an existing virtual hard disk option and browse to the location of your converted VHDX file.
Now you should be able to power up your virtual machine and make any adjustments as needed like uninstalling the VirtualBox Guest Additions since you won’t need them in Hyper-V. And that is pretty much all you need to do to import a VirtualBox VM into Hyper-V.
For additional training resources, check out our online IT training courses.
Check out our extensive IT book series.


