
Last Updated on August 16, 2026
Being able to properly manage your files and folders on your Windows PC is an essential skill to have to be a proficient computer user. One issue you may find yourself with over time is that you will start accumulating more files and folders than you might want or need. When this happens you may find that you end up with duplicates and you will then need to figure out which ones you want to keep and which you want to remove. In this article we will be showing you how to find duplicate files and folders on your computer so you can act on them to decide which ones to keep and which to remove.
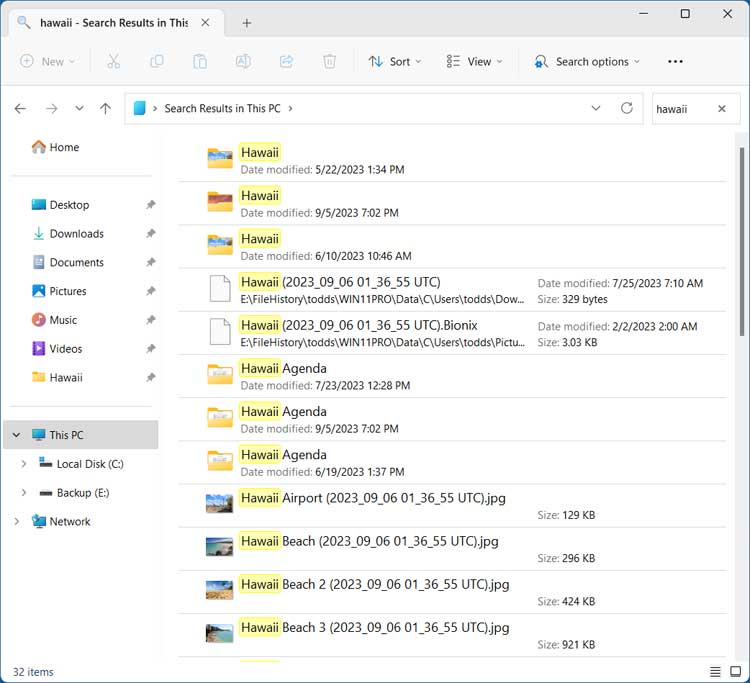
If you want to use the search method in Windows, then you can find files or folders with the same name, but you will only be able to find the duplicates for the file or folder name you are searching for. This might be ok if you are only concerned with files that you know the name of.

The Problem with Windows Search
1. Limited Search Capabilities
If you want to use the native search method in Windows, then you can find files or folders with the exact same name. You will only be able to find the duplicates for the specific file or folder name you are actively searching for. This might be ok if you are only concerned with files that you already know the exact name of.
2. Tedious Manual Filtering
Even if you do a thorough search in Windows, you will need to filter out the results manually. You do this by checking the file or folder properties to see if they have the same date or the same exact time. This can be a very tedious process and is not very practical for finding duplicate files or folders automatically.
Using dupeGuru to Find Duplicates
1. Download the Custom Software
A much better method you can use to find duplicate files and folders on your computer is to use an app such as dupeGuru. This program is made specifically for this exact type of task. The software is completely free and easy to use. You will be able to find your hidden duplicates with a minimal amount of effort.
2. Add Your Target Folders
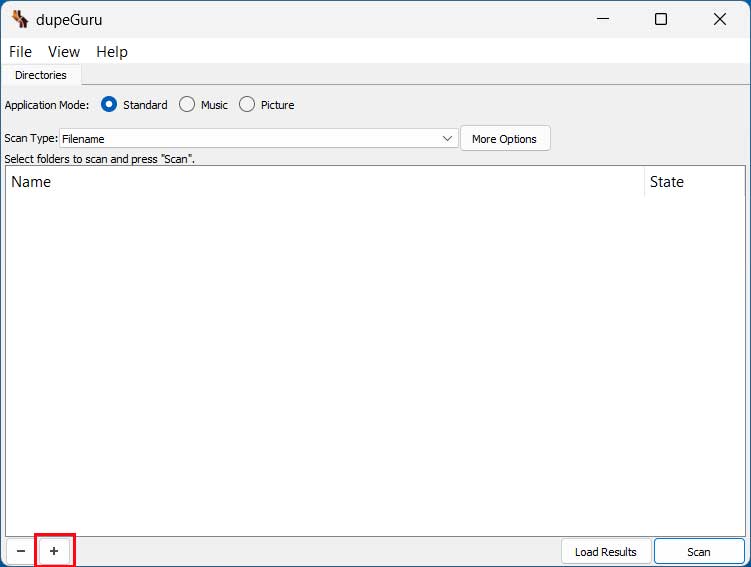
Once you download and install the software, you simply need to run it and then choose if you want to search for music files, pictures, or all file types using the Standard setting. You can then click the + button at the lower left to choose which drives or folders you want to search for duplicates in. I will add two specific folders from two different drives so I can easily find duplicates across both hard drives simultaneously.
3. Exclude Specific Folders
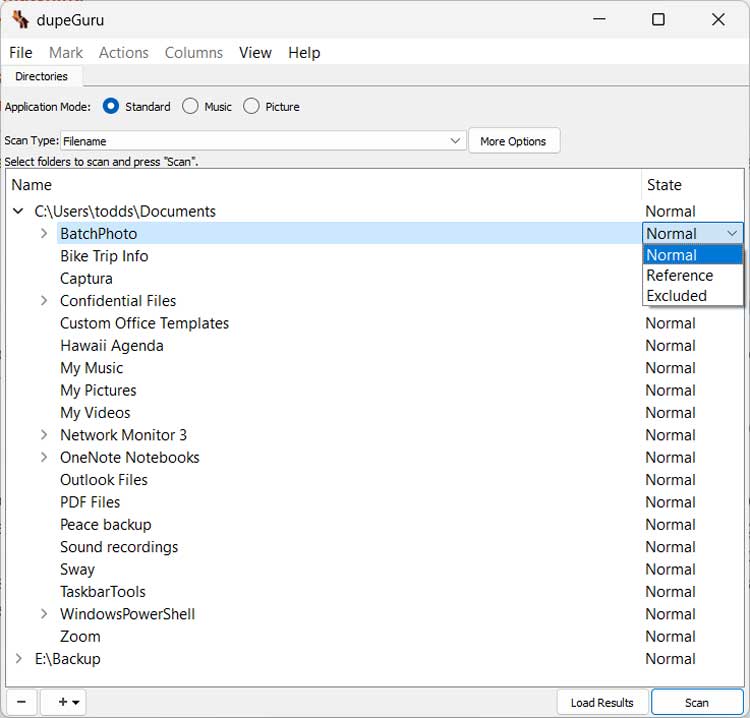
Once you add a drive or folder, you can then exclude certain subfolders from the active scan if needed. Clicking on the Scan Type dropdown allows you to choose between Filename, Contents, or Folders. Content scans will look directly at the internal contents of the file. The folder scan considers folders to be duplicates if all the files they contain have the exact same contents as the other folder.
4. Adjust the Advanced Settings
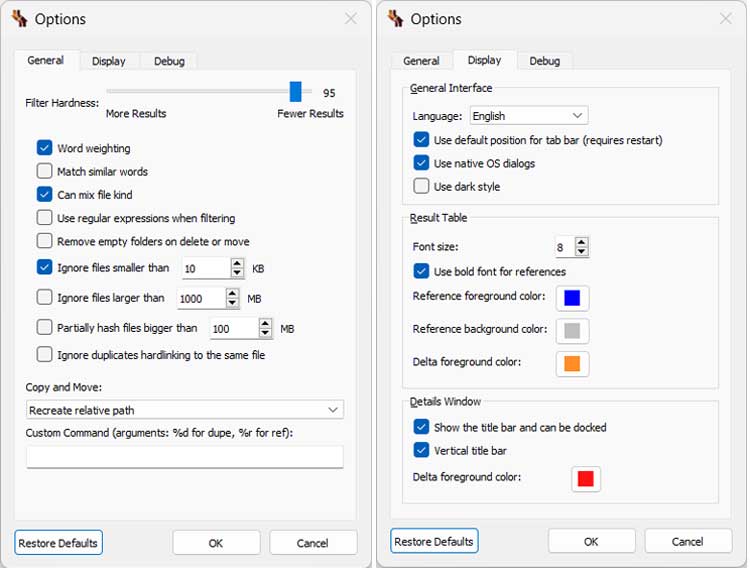
Clicking on the More Options button will allow you to change many of the advanced dupeGuru settings. You can adjust the filter hardness, ignore certain size files completely, and change the visual color scheme of your search results.
Reviewing and Deleting Duplicates
1. Understand Reference Files
Once the scan is complete, you will then be shown the results with each file name clearly highlighted. This makes it much easier to view the breakdown of the duplicated files. The highlighted files in blue are called reference files. dupeGuru uses the larger file size for the reference file because it assumes you want to keep the larger file.
2. Protect Your Original Files
You cannot mark the reference files to take action on them directly. dupeGuru does this intentionally to prevent you from accidentally deleting both files at the same time. You can right click a reference file and choose Open containing folder of selected to view the file and take manual action on it if needed.
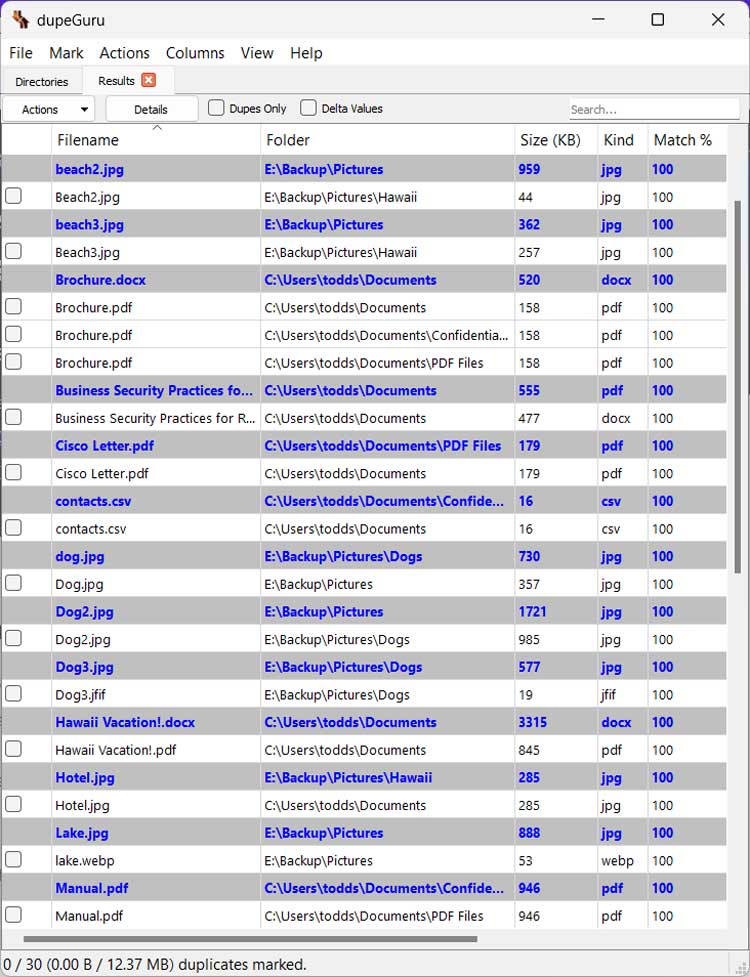
3. Filter for Duplicates Only
If you check the box at the top that says Dupes only, the software will hide the blue reference files. You would then be shown only the smaller duplicate files that are safe to delete.
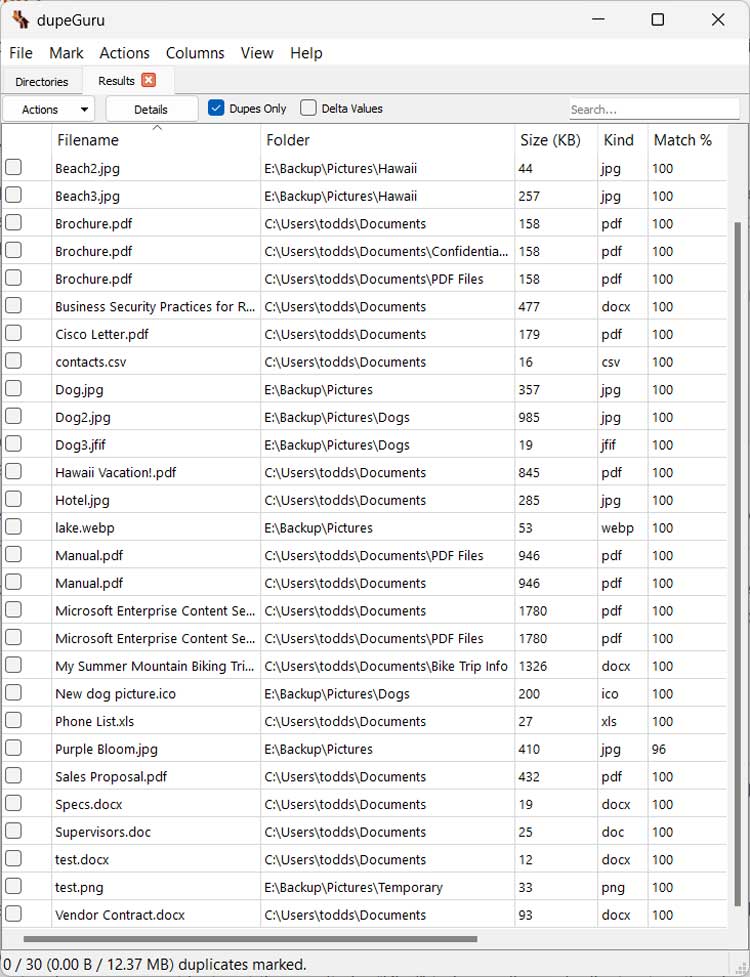
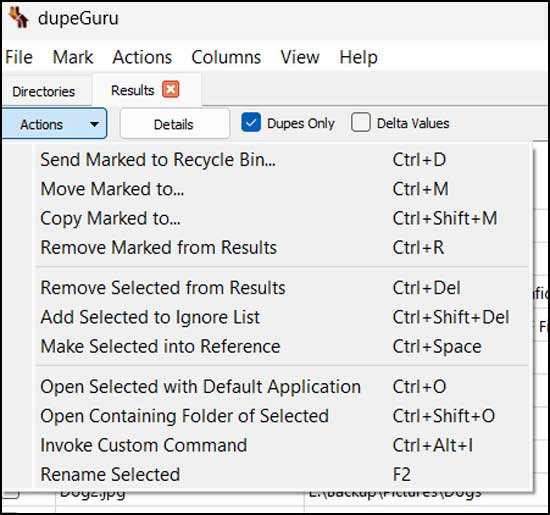
4. Take Action on the Files
When you check the box next to a file or files, you can then go to the Actions menu at the top. From here you can take a particular action on the selected file such as delete, copy, move, or rename it.
5. Export Your Scan Results
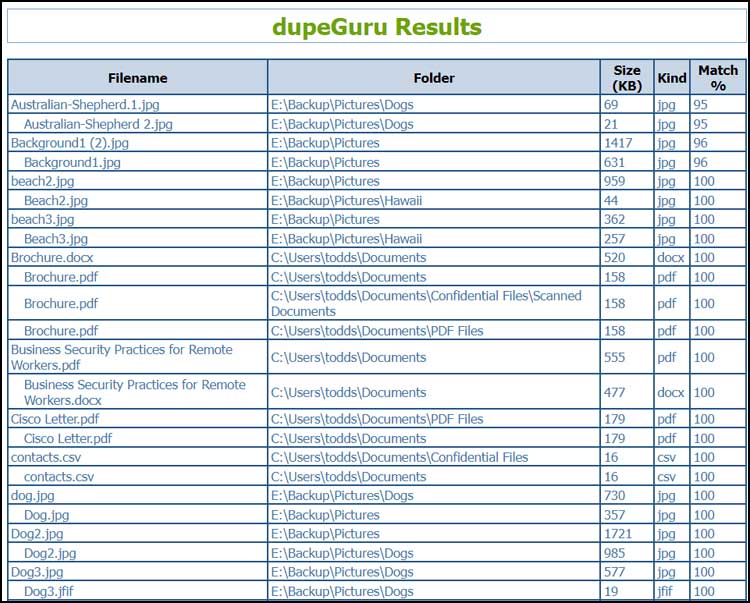
dupeGuru can also export your final scan results to a CSV or HTML file format. This allows you to review the results later offline. You can even send it to someone else so they can tell you exactly which versions of files or folders to act on.
Dupe Guru has many other features you can utilize to really help you find duplicate files and folders on your computer so we recommend checking out their help section to find out how to get the most out of the program. Dupe Guru can be downloaded here.
For additional training resources, check out our online IT training courses.
Check out our extensive IT book series.






