
Last Updated on July 9, 2026
Everyone who uses a computer knows that Google has a service or an app for just about anything you think of. And for those who want an easy way to create websites, they also have their free online website creation tool called Google Sites which doesn’t require any coding skills or HTML knowledge to use. But if you want to backup your website, you will notice that there is no option to do so. In this article, we will show you how to export your google sites website to your computer.
If you are using traditional website development tools or software, you would generally be working on your individual HTML files and also be backing them up as needed. But with Google Sites, you are working within the Sites interface online and your website it stored in your Google Drive account.
The Initial Google Drive Backup Process
1. Locate Your Website File
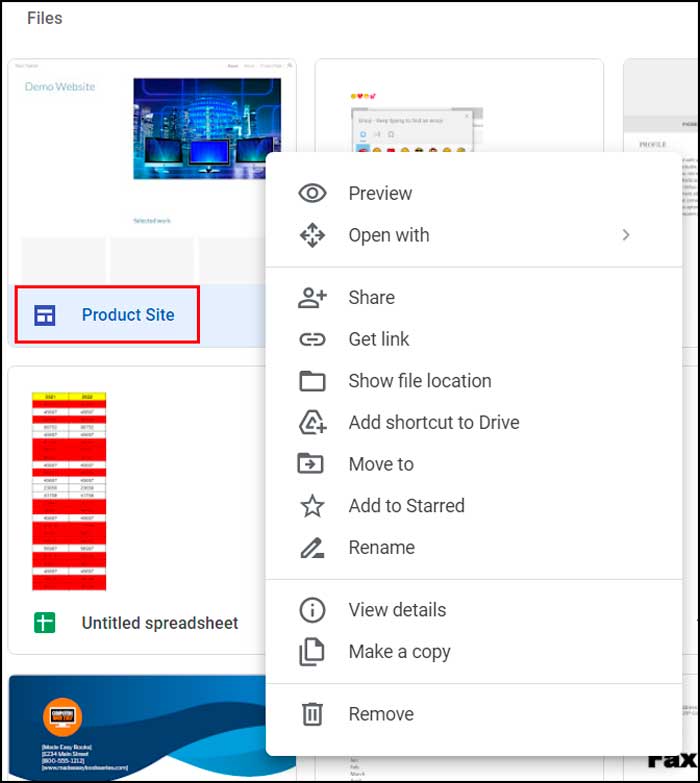
When you go to your Google Drive account and find your website, you will see that it appears as a single file just like a document or spreadsheet would appear. Then if you right click on it, there is absolutely no download option like you would see for other standard files.
2. Create a Dedicated Backup Folder
To backup your Sites website, you will first need to make a copy of it within your Google Drive account and move to a different folder. Within Drive, click on the New button and then choose New folder. Name this folder something like Website Backup or whatever you would like.
3. Duplicate the Website File
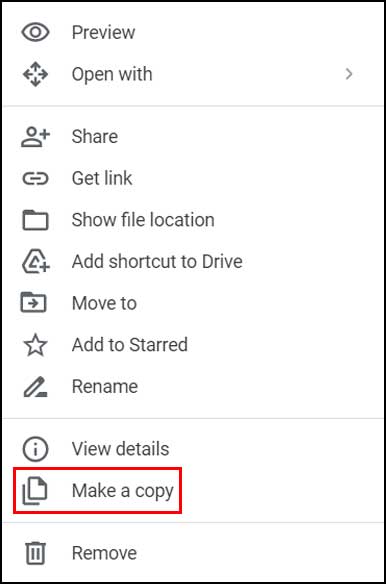
Next, go to your website file in Drive. Right click it and then choose the Make a copy option from the context menu. This will make a copy of your website in the exact same location and will add “copy of” in front of the existing name.
4. Move the Copy to the Backup Folder
You can then drag the copy directly to your new folder. You can also right click on the copy and choose the Move to option and then choose your new folder. You can also move your original website file to this new folder if you don’t want to make the copy for the backup.
Using Google Takeout to Export the Files
1. Access the Takeout Dashboard
After this copy is created, you can go to the Google Takeout website. Just make sure you are actively logged in with the same Google account that you use for your website.
2. Deselect Unwanted Data
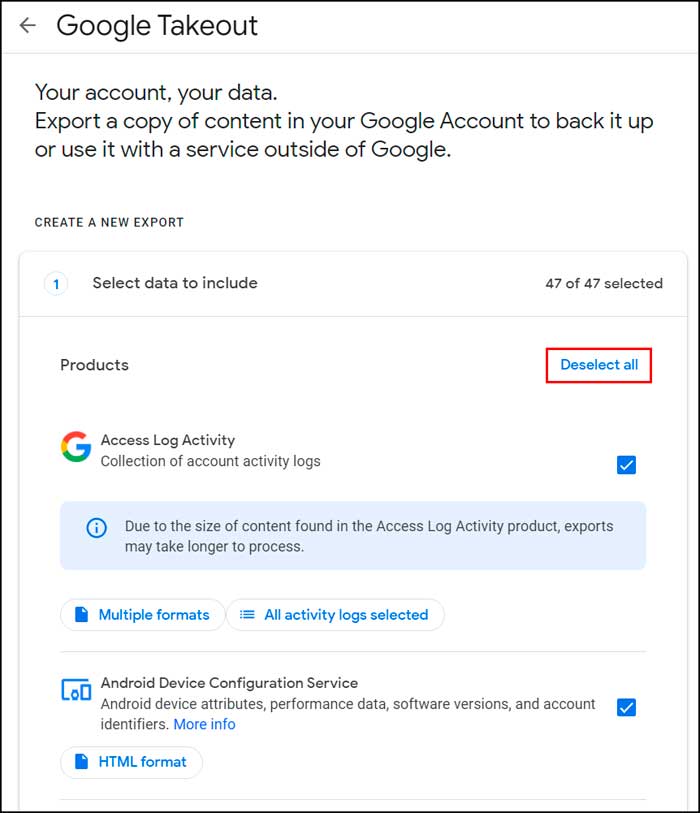
Then the first thing you want to do is click on Deselect all at the top of the list. All of the checkboxes for every single Google service will be selected by default. We only want to export our website data.
3. Select the Drive Application
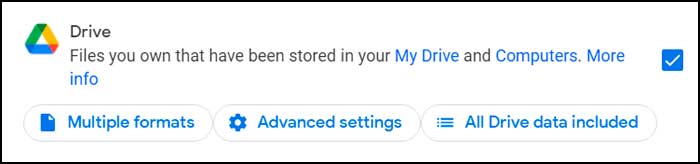
Then scroll down the massive list and look for Drive. Do not select the Classic Sites option. Check the box next to Drive and then click on the button that says All Drive data included.
4. Isolate the Backup Folder
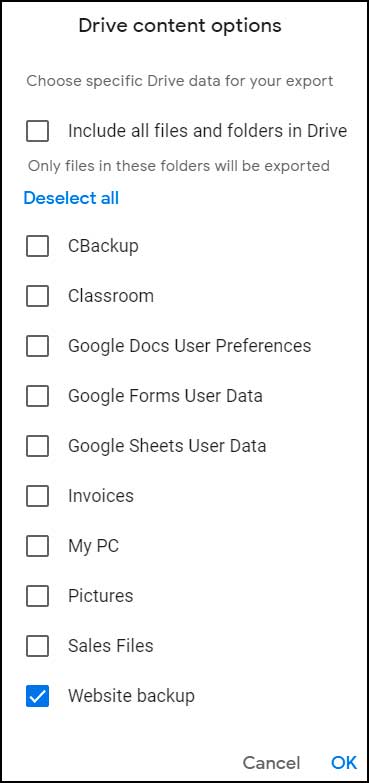
A small pop-up window will appear. Next you will uncheck the box that says Include all files and folders in Drive. Check only the specific box next to the folder name that contains your website file and click OK.
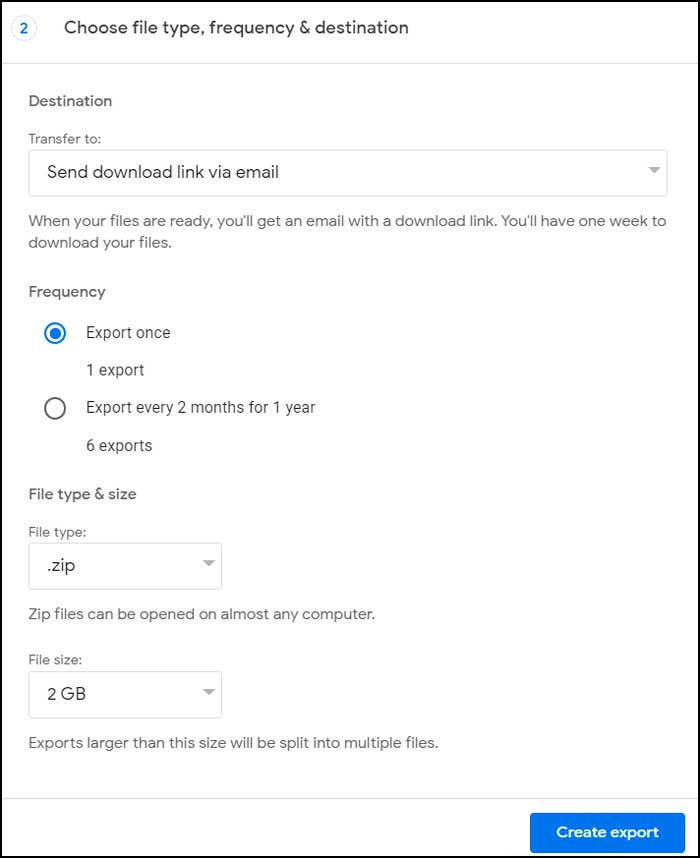
Then you will need to scroll to the bottom of the page and click on the button that says Next step. Now you will be able to configure the export to either send a download link to your email address or add your backup to your Drive, OneDrive, Dropbox or Box account. I prefer the email option.
You can also setup this backup as a one time export or have it be exported every 2 months for the next year. For the export file type you can choose between zip and tgz file formats. If you have a really large website then the export will be split into 2GB files but your website is most likely much smaller than 2GB.
Once you have everything set correctly, you can click on the Create export button.
5. Configure the Export Settings
Then you will need to scroll to the very bottom of the page and click on the button that says Next step. Now you will be able to configure the export to either send a download link to your email address or add your backup directly to your Drive, OneDrive, Dropbox or Box account. I prefer the email option for simplicity.
6. Choose Frequency and File Type
You can also setup this backup as a one time export or have it be exported every 2 months for the next year. For the export file type you can choose between zip and tgz file formats. If you have a really large website then the export will be automatically split into 2GB files but your website is most likely much smaller than 2GB.
7. Initiate the Export
Once you have everything set correctly, you can click on the Create export button. Google will begin compiling your data on their servers.
8. Monitor the Export Progress
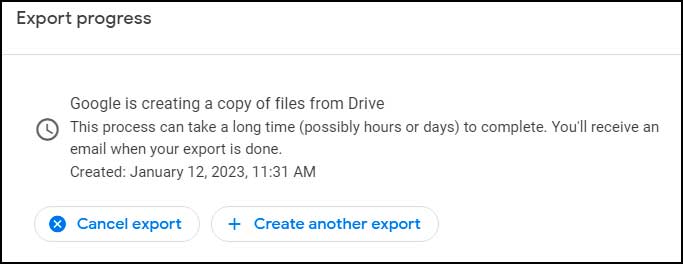
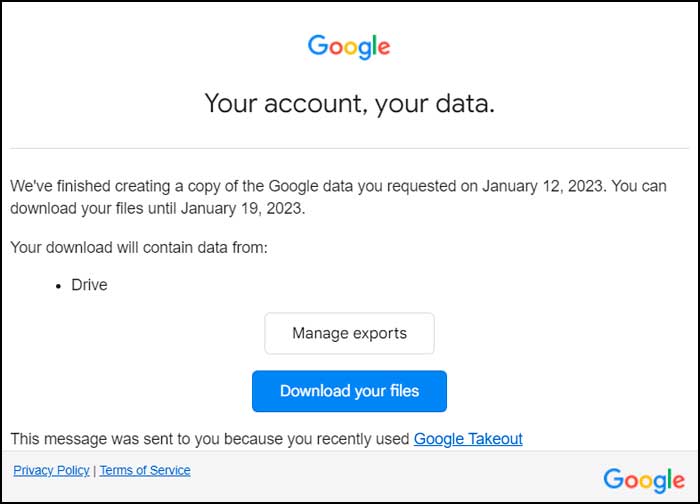
You will then be shown an export progress screen telling you that your will be sent an email when the export is complete. Even though it says it can possibly take days to complete, its usually fairly quick and might only take a few minutes.
9. Download Your Files
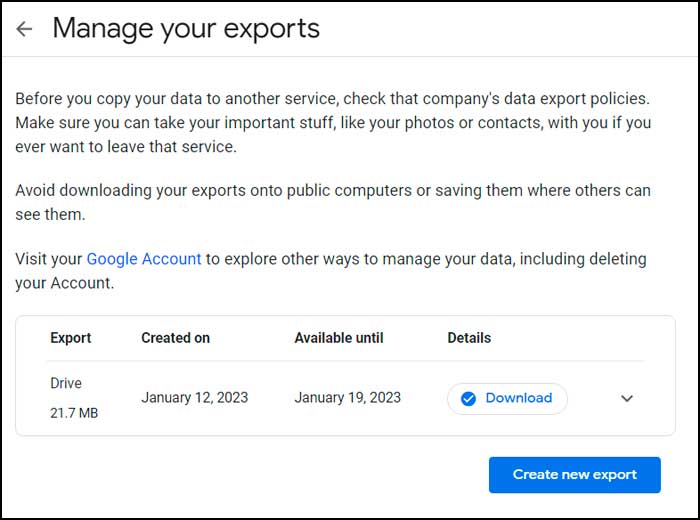
Once you receive the email, you can click on the Download your files button. You can also click the Mange exports button to be taken back to the Google Takeout website to download your files directly from the dashboard.
10. Extract the Local Files
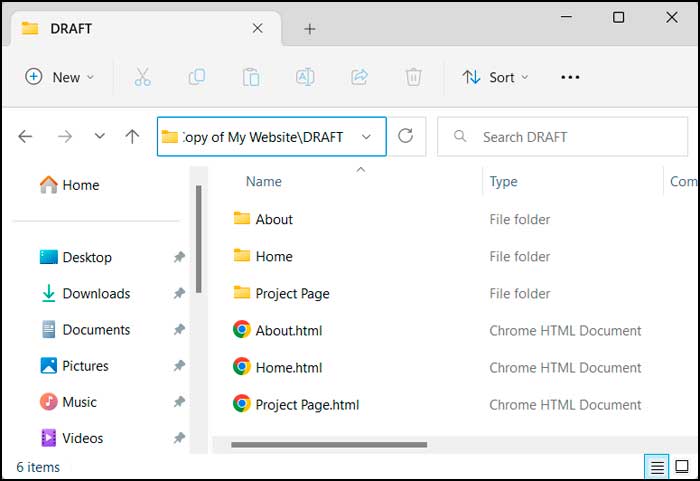
After you download the zip file, to your local hard drive, you can then extract it. Navigate to the location of your website files to verify the HTML code exported correctly.
For additional training resources, check out our online IT training courses.
Check out our extensive IT book series.






