
Last Updated on April 8, 2026
If you use any type of virtualization software such as VirtualBox, VMware or Hyper-V then you know how often you have to copy files between your host computer and your guest virtual machines. Without this capability you would be doing a lot of emailing files, using online storage or transferring files over the virtual network.
Thankfully, there is an option in VirtualBox that allows you to copy files between your VMs and your host. If you didn’t know, the host is the computer that is running VirtualBox and has the VMs running on it.

Configure VirtualBox Shared Folders
1. Open the Shared Folders Settings
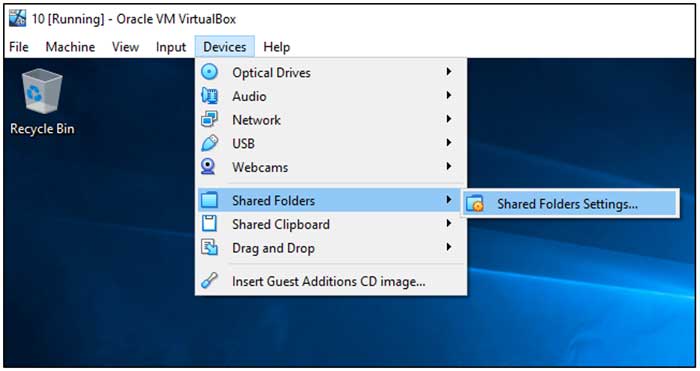
To enable the Shared Folders option you will need to completely open the VM that you wish to enable this on. Go to the Devices menu item at the top of the running window. Choose Shared Folders and then click on Shared Folder Settings.
2. Specify the Host Folder Path
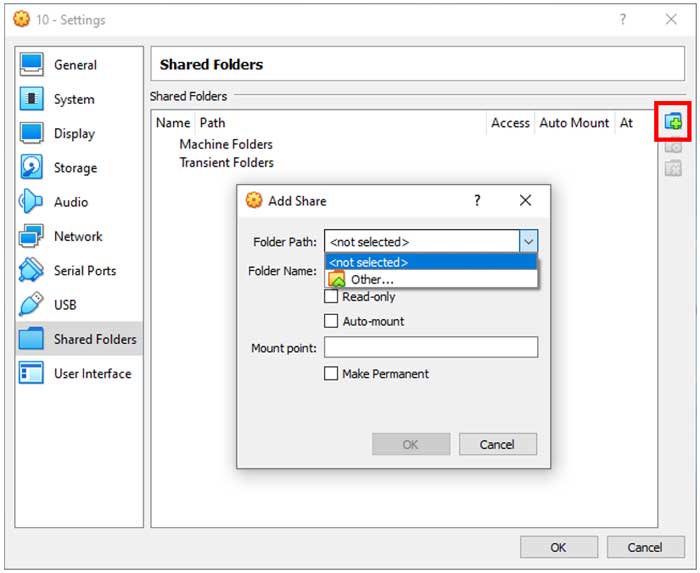
Next you will need to specify what folder on the host computer you want to explicitly share with the guest computer. You can click on Other from the dropdown menu under Folder Path to browse the host computer for the folder. You can also simply type in the direct path if you know it off hand.
3. Set the Folder Permissions
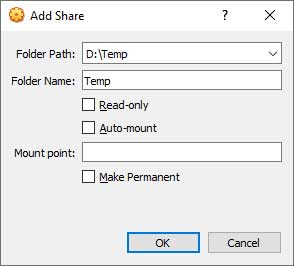
Once you have your folder location chosen you can then decide if you want to have its contents be read-only. This means you will only be able to read the files when accessed from the VM. You won’t be able to edit or delete them from the guest operating system.
4. Configure Auto-Mount Settings
The Auto-mount option is used to mount this shared folder as a mapped drive in Windows or as a mounted drive in Linux when the VM is booted up. If you want this shared folder to be available each time you start the VM then make sure to check the Make Permanent option to allow that.
5. Review the Active Shares
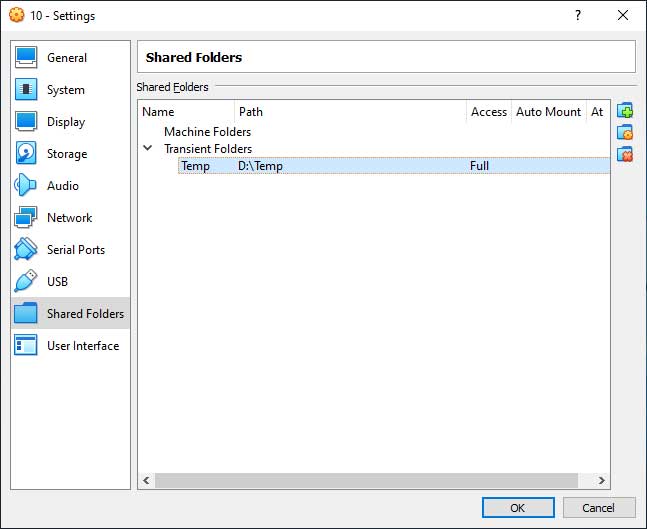
After you make all of your configuration choices you should click the OK button. You will be brought back to the Shared Folders section for that specific VM. It will then show you the share name, share path, and access level right in the window. You can add more shared folders if you wish and then they will be listed here as well. You can use the folder icon buttons on the right to edit or remove any shared folders that you have configured.
6. Access the Mapped Drive
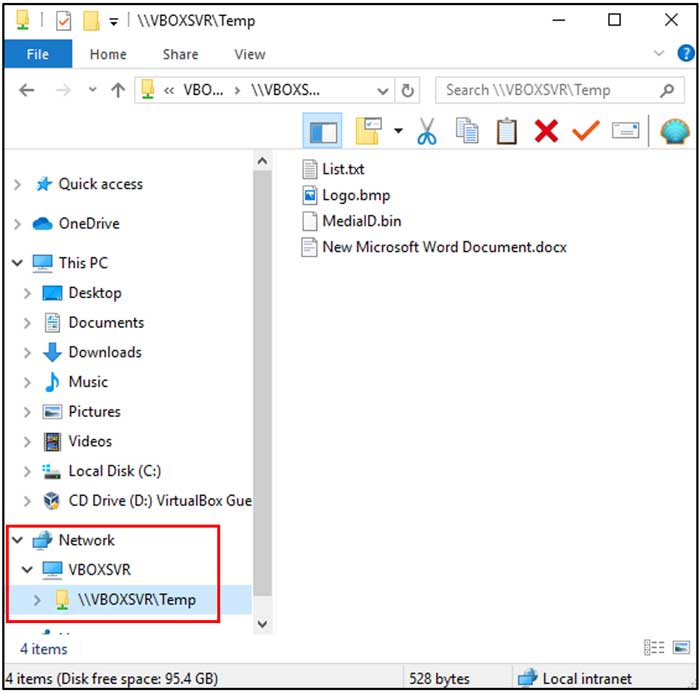
When you go back into the VM and open File Explorer to look at your files you will notice your new shared folder. It will be listed as a mapped drive under Network. Now you can work with files directly from your VM that are actually stored safely on your host computer.
Enable Drag and Drop Functionality
1. Turn on Drag and Drop
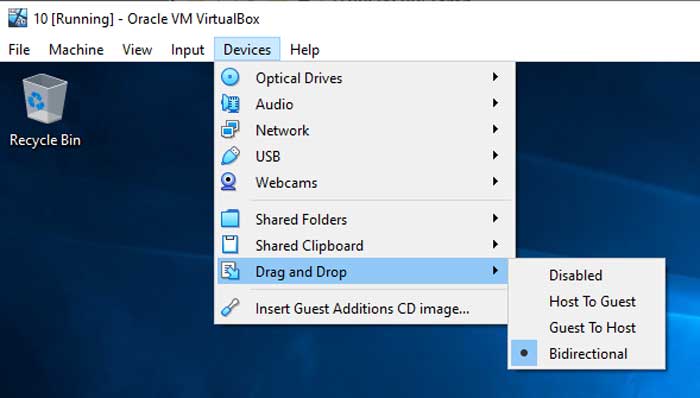
Another thing you might want to enable while you are here is the Drag and Drop feature. This will allow you to drag and drop files from your host computer right into the console window of the VM. This assumes you are dragging it somewhere that allows files to be copied such as an open File Explorer window.
2. Choose the Transfer Direction
You can have the Drag and Drop feature go only from host to guest, guest to host, or both ways using the Bidirectional setting. This is a very handy feature and might even work better for you than the Shared Folders option. It is perfect if you mostly work with your VMs in the console windows rather than remotely such as using Remote Desktop.






