
Last Updated on May 31, 2026
If you are the type who likes to keep their computer running in tip top shape, then you might occasionally check the optimization status of your hard drives. With newer versions of Windows, the operating system takes care of the hard drive defragmentation process so you don’t need to “defrag” it yourself.
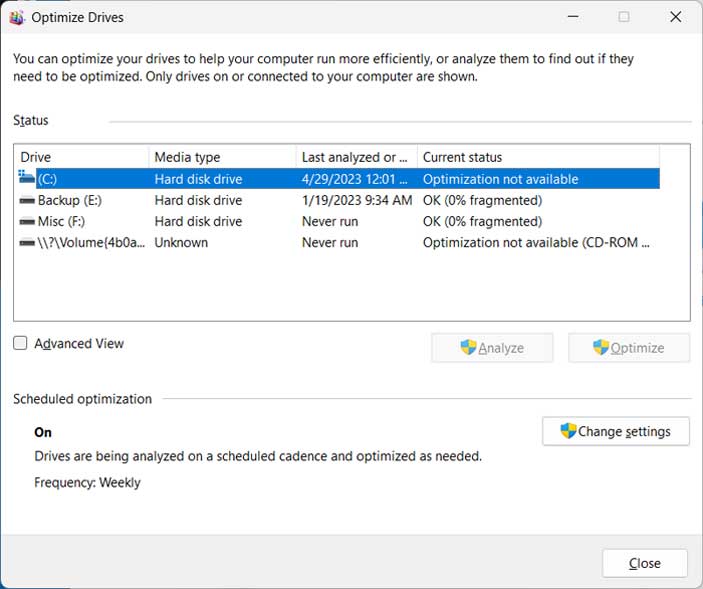
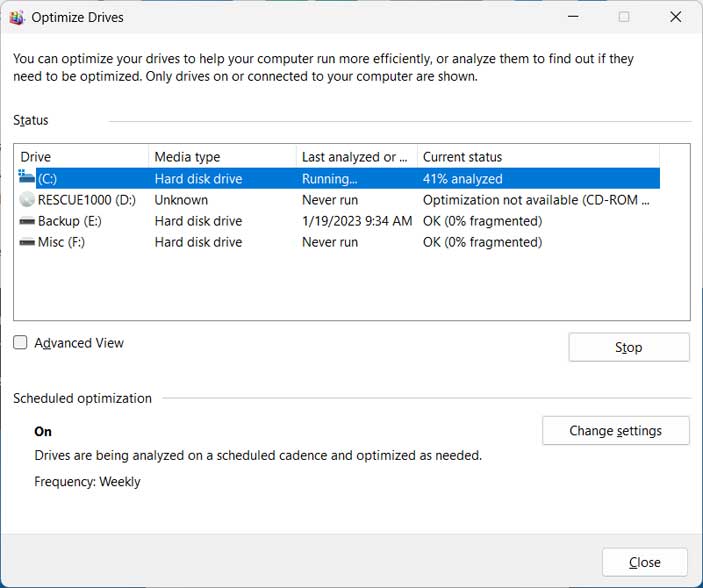
If you right click a drive, select Properties and then go to the Tools tab, will see a section labeled Optimize and defragment drive. Then if you click on the Optimize button, you will be able to see the optimization status for all of the drives on your computer. It also will show you when it was last analyzed or defragmented.

If you see a message under the Current status section that says Optimization not available, it might be because the dirty bit is set on that particular drive. The dirty bit can get set on a drive when the file system is in an inconsistent state from things such as the volume having outstanding changes or changes were made to the volume and not applied before the computer was shut down. In this article, we will be showing you how to reset the hard disk dirty bit in Windows.
Diagnosing the Dirty Bit Error
1. Run the Defrag Analysis Command
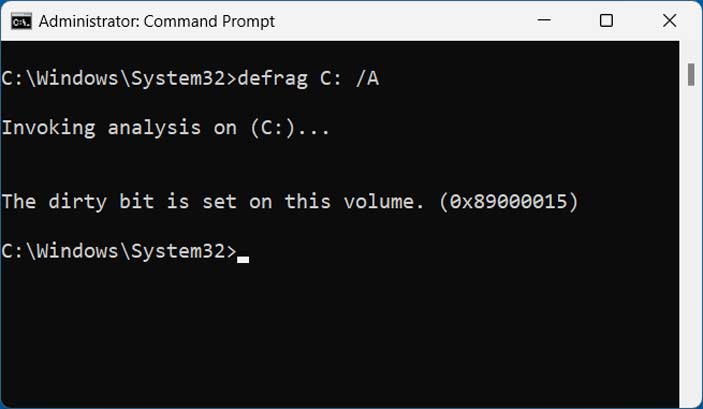
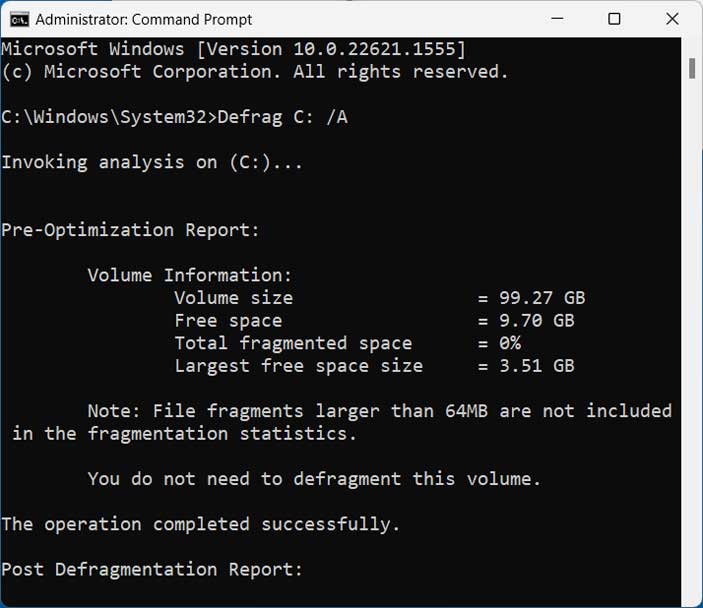
To find out for sure, you can open an administrative command prompt. You will run a defrag analysis using the Defrag C: /A command. You can change the C to whichever drive letter you are trying to physically check.
2. Identify the Error Code
If you get a message that says The dirty bit is set on this volume with an error code of 0x89000015, then that is most likely why you are unable to defrag the drive. You might get prompted to run a check disk (chkdsk) when the dirty bit is set. Often times this simple native utility will not actually fix the problem.
Using SystemRescue to Clear the Dirty Bit
1. Download the SystemRescue Toolkit
One relatively simple way to clear the dirty bit on your drive is to boot your computer using a specialized Linux environment. You need the SystemRescue Linux based system rescue toolkit. This package comes with a variety of powerful tools that can be used to troubleshoot and repair your computer. You can download the SystemRescue ISO file from their official website right here.
2. Create a Bootable Drive and Boot
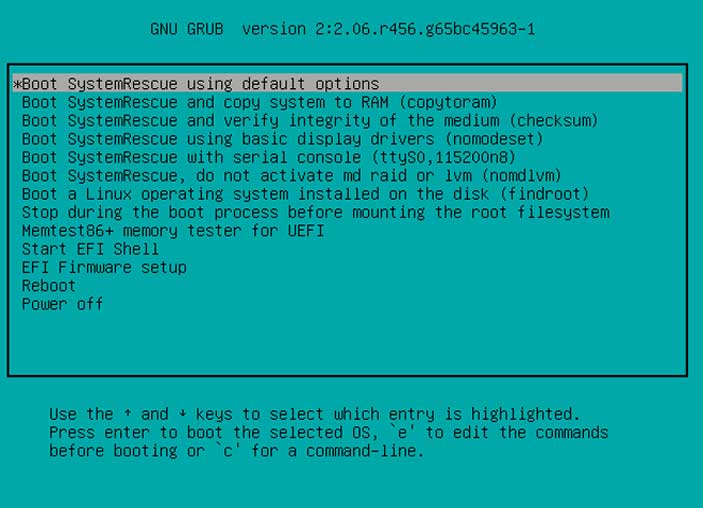
Once you download the ISO file, you must make a bootable CD or USB drive using software such as Rufus. You can then boot your computer with it to get to the main menu. From there you will want to select the first option that says Boot SystemRescue using default options.
3. List Your Active Partitions
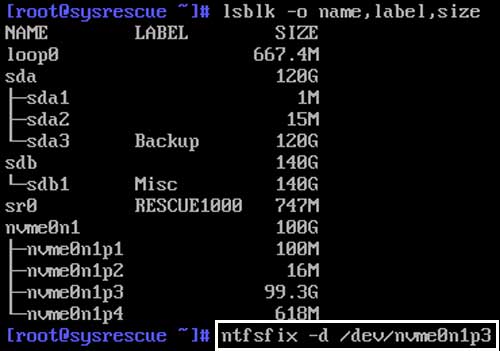
Next you will be presented with a command line interface. You will want to type a specific command to show all the drives and their partitions on your computer. Type lsblk -o name,label,size and press Enter to generate the hardware list.
4. Identify the Target Drive
In the example below, there are three hard drives (sda, sdb and nvme0n1). If you have more than one hard drive, be sure to make a note of its size. This Linux tool will not show standard Windows drive letters. You must match the drive by its physical storage capacity. Under each drive you will see its specific partitions such as sda1 or sda2. I will be working with the 99.3GB partition labeled nvme0n1p3.
5. Run the NTFSFix Command
The next command that needs to be run is the ntfsfix command with the d switch attached. After the switch you need to specify the exact partition path. The final command will look exactly like the following: ntfsfix -d /dev/nvme0n1p3.
6. Verify the Process Completion
Hit Enter to execute the repair script. If everything works correctly, you will see a message saying the partition was processed successfully. The Linux utility forcibly clears the dirty flag from the volume header instantly.

7. Reboot Your Computer
You can then type in reboot to have the computer restarted automatically. You might want to physically remove the SystemRescue CD or flash drive first. This makes absolutely sure the machine doesn’t boot straight into the Linux environment again.
Verifying the Hard Drive Optimization
1. Rerun the Defrag Analysis
Now when you are back in Windows, you can open an administrative command prompt. Type in Defrag C: /A once again and press Enter. It should run the analysis this time and not show you the annoying dirty bit message.
2. Check the Windows Optimize Tool
You can also go to the properties of the drive and then navigate to the Tools tab. Open the Optimize section and check the status screen from there. You can also run the manual defrag immediately to ensure the volume is functioning perfectly.
This is how you can reset the hard disk dirty bit in Windows to keep your computer running smoothly.
For additional training resources, check out our online IT training courses.
Check out our extensive IT book series.


