
Last Updated on May 13, 2026
Make your computer’s name display correctly everywhere!
Most Windows power users know how to change the name of their computer from the default name that Windows gives it during the installation. Normally you will see your computer named something like DESKTOP-N7SBJVN when you buy it from the store with Windows already installed or if you install Windows yourself and don’t change the name in the process. Many people don’t like this name and prefer to have something a little more personalized or accurate, especially if they have multiple computers or are on a network.

1. Verify the Name in Your System Settings
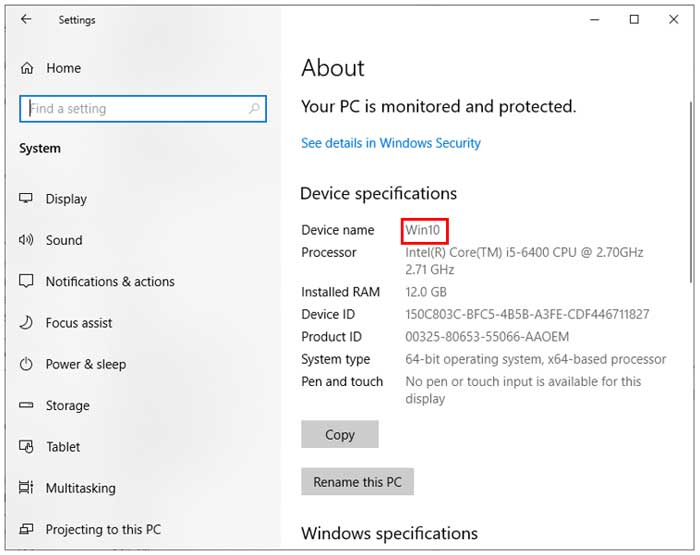
There are several ways to natively rename your computer, and once you do so, you might discover that the old name stubbornly sticks around and shows up in other obscure places within Windows. So you might go to your primary System settings and clearly see that the Device name matches exactly what you changed the computer name to, as seen in the image below, which is how it should naturally be. As you can see here, the computer name is Win10, and that is what it was successfully changed to by using one of the standard PC renaming processes that you can do within Windows.
2. Locate the Windows 11 PC Name
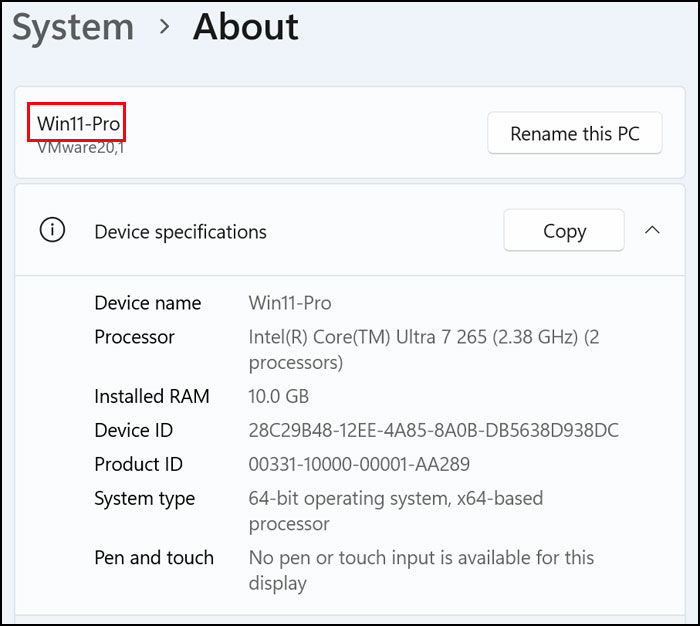
If you are currently on a newer operating system, the interface will look a little bit different than the classic Windows 10 layout. For Windows 11 computers, you can easily find the active PC name in the primary Windows settings app under the System menu, and then by clicking on About. This screen will verify that your modern operating system has officially registered the new desktop name perfectly.
3. Identify the Lingering Old Hostname
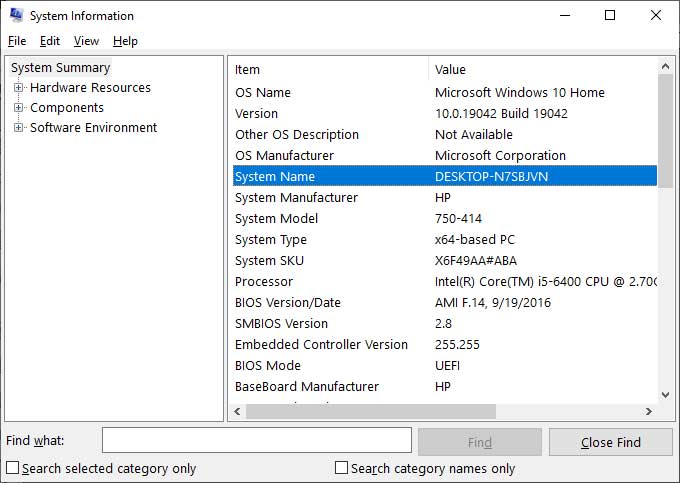
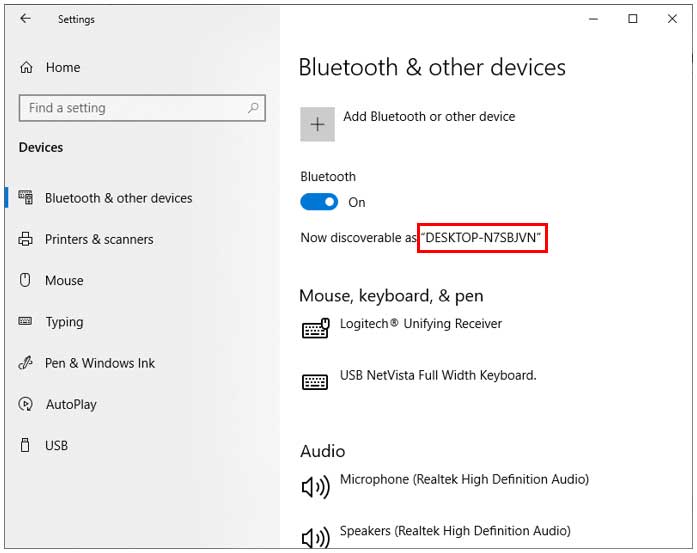
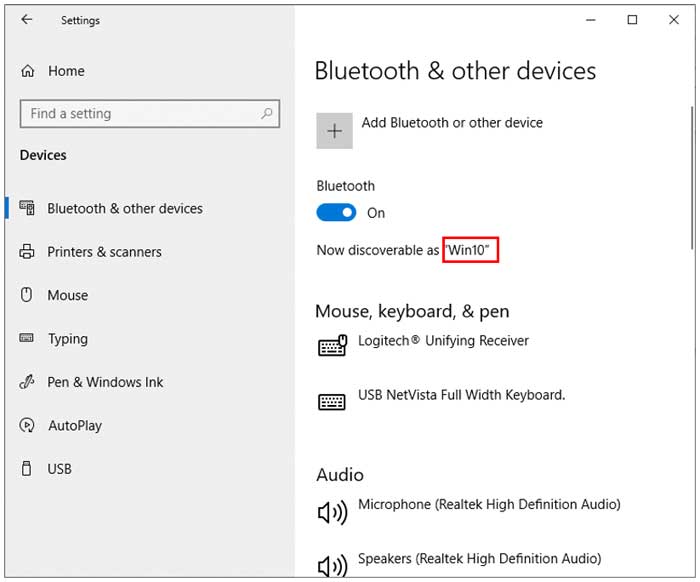
Even though the main settings look absolutely perfect, you might find that when you go to other technical areas of the operating system, the computer still shows its original factory name. This frustrating mismatch frequently happens in diagnostic utilities such as System Information (msinfo32), or when broadcasting your device through your Bluetooth settings. Having two different hostnames broadcasting simultaneously can cause major networking headaches when trying to pair devices.
4. Avoid Doing a Mass Registry Search
If you realize this hostname mismatch is happening, your first instinct might be to dive into the database and try to manually hunt down the bad entries. And if you do a blind search of the registry, you might actually find many entries that show the old computer name, making it really difficult to go through and try and change them all manually. Even if you took the time to do this, it might not even permanently solve the problem upon the next reboot.
5. Open the Windows Registry Editor
However, there is one highly specific registry key that you can carefully change that should completely fix this problem across the entire operating system. You can easily find it by opening the Windows Registry Editor by typing regedit directly in the taskbar search or Cortana box. Click on the Registry Editor app result and accept the administrative security prompt to successfully launch the tool with elevated privileges.
6. Navigate to the ComputerName Control Key
Once the registry editor is securely open on your desktop, you will need to navigate through the folder tree to a very specific system path. You can manually expand the folders, or easily paste HKEY_LOCAL_MACHINE\SYSTEM\CurrentControlSet\Control\ComputerName\ComputerName into the top address bar. Press Enter to instantly jump to the exact directory folder we need to modify.
7. Avoid the ActiveComputerName Key
While you are poking around in that specific registry location, you might notice that there is another similar key folder called ActiveComputerName sitting right next to it. Changing that one will actually not fix the problem, even though you would logically think that would be the exact one to change. When you look at the primary ComputerName value inside the correct folder, you will notice that it still has the old (incorrect) computer name listed, as seen in the image below.
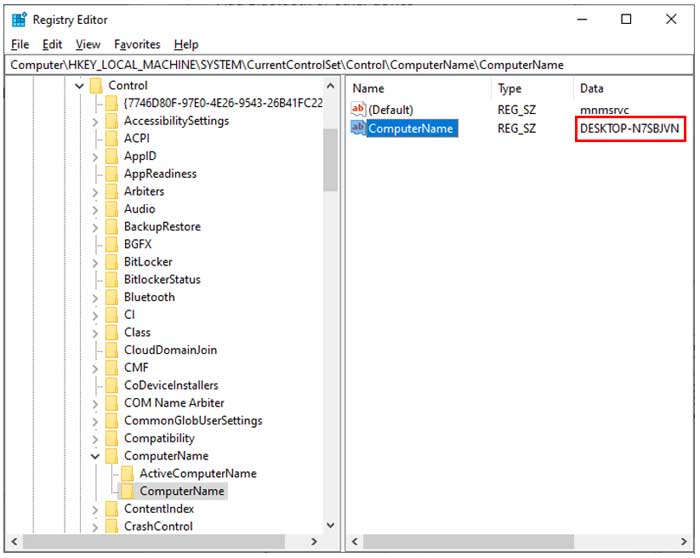
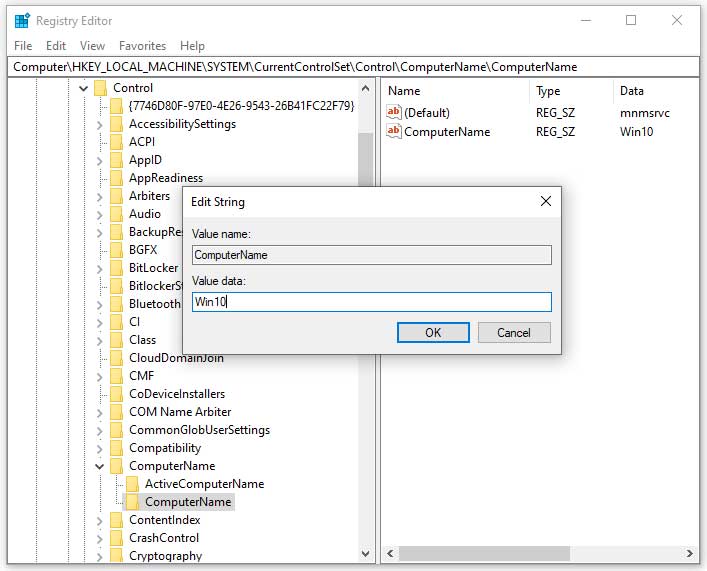
8. Edit the ComputerName String Value
To successfully change the value and fix the mismatch, simply double-click on the ComputerName entry to formally open the Edit String dialog box. Here is where you can permanently change the old computer name to the correct name that perfectly matches what you currently have in your Windows System settings. After you carefully type in the exact new name, click on the OK button to save it, and then completely close out of the registry editor.
9. Reboot Your Computer to Apply Changes
Because you just made a direct modification to a core operating system registry key, the visual changes will not take effect instantly on your active desktop. Next, you will need to perform a full system reboot of your computer to force Windows to read the new registry configuration into memory. When you finally log back in, you should beautifully see the correct computer name shown in all the networking and Bluetooth places where it was previously incorrect.
For additional training resources, check out our online IT training courses.
Check out our extensive IT book series.


